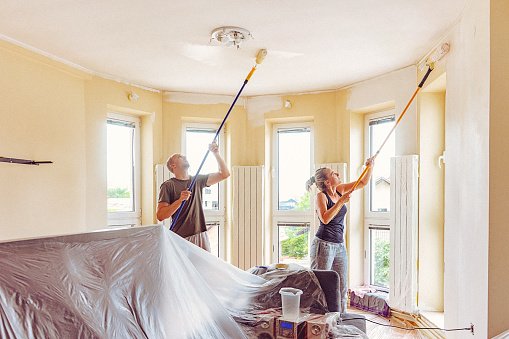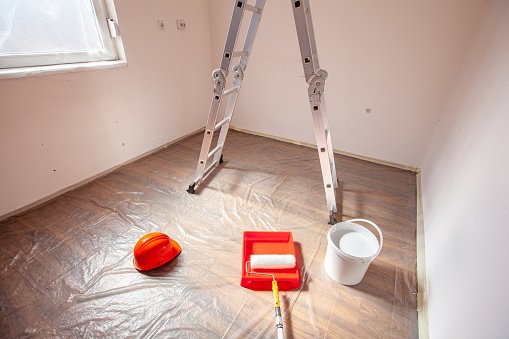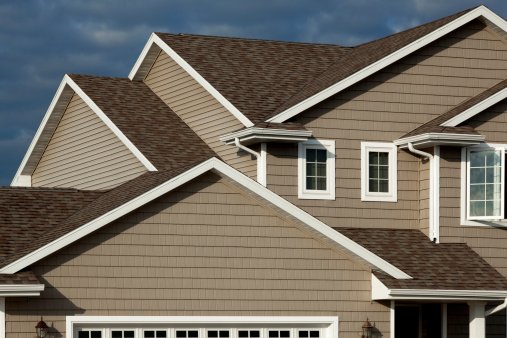
How Much Will Home Exterior Painting Cost in Calgary?

How Much Will Home Exterior Painting Cost in Calgary?

The value of your property will rise, and you’ll feel better about your investment if you repaint the outside of your house. Changing the appearance of your home’s exterior by painting it may have a dramatic effect. A comprehensive external restoration might take weeks or months, yet a simple coat of paint on the house’s siding can be done in a matter of days.

Your home’s exterior will be protected against harsh weather, bug damage, rust, mildew, and mold if you hire a professional painter. Having a new paint job done will make your house seem nicer, and it should endure for at least 10 to 15 years.

Is it time to repaint the outside of your house?

You may not be able to determine precisely when your house was last painted, but there are a few telltale indicators that it’s time for a fresh coat of paint.

To fix peeling, bubbling, or cracking paint on your walls.

Look for paint bubbling or peeling on the external walls of your property. If that’s the case, you need to take action immediately. It’s a sign that your siding is exposed to the weather if the paint on it has peeled away. The harm that may be done if you have a moisture issue is considerable. Mold remediation services are required if rot, mildew, or even deadly mold develop as a result. A professional painting business should be contacted for an outside paint job if the paint is peeling, bubbling, or damaged.

The color is deteriorating.

Exterior of your house takes a beating! Snow, rain, and the sun’s ultraviolet rays batter it. It will begin to disappear as time goes on. A fresh coat of paint on the outside of your house will keep it appearing fresh and well-cared for. In addition to making your house seem better, fading might be an indication that your paint is beginning to wear out and isn’t doing its job of preserving it.

Stucco and/or wood cladding have been damaged, as can be seen.

As a first line of protection against the elements, the paint on your house plays a crucial role. As a result, it won’t be around for long. Stucco or wood siding showing signs of rust or decay might be a sign that the paint has failed. It also necessitates that you fix the siding before painting. A new coat of paint will serve as an additional barrier against the elements after the repairs have been completed.

The siding has what seem to be stains.

It’s a bad indicator if anything seems damp or discolored from earlier wetness. Mold and mildew thrive in damp environments. A little detergent and simple scrubbing is all that is needed to remove any stains. A professional contractor should be called in if the stain does not go away on its own. While it’s possible to simply paint over a stain, more frequently than not, the stain will need the replacement of the underlying material.

How much does it really cost to paint the outside of a house?

According to HomeGuide, painting the outside of a property may cost anywhere from $1,811 to $3,201. For a 2,400-square-foot, two-story home, the average cost of painting the outside is roughly $2,500. That works out to around $0.60 to $1.60 for each square foot..

The cost of painting the outside of a home depends on a variety of things.

The size of the house is the most important aspect in determining the cost of painting the outside of your home. This affects both the quantity of paint and materials needed, as well as the amount of labor required. The painting contractor will begin their estimate by determining the total square footage of the surfaces to be painted and then provide a price based on that total square footage. How many crew members will be needed and how much cladding is being painted over may all have an impact on how much it will cost to paint anything.

The cost of painting the outside of a home will also be affected by the following factors:

Preparation


Preparation is the key to a successful paint job, whether it’s on the inside or the outside. The paint work will not endure if the surface is not adequately prepped. To ensure proper adhesion, the surface must be well cleaned. That might entail power washing, stripping old paint, sandpaper, patching cracks, holes, and priming the walls for the outside of the house

Additional gear

If your property is bigger than the norm, a painting contractor may need to bring in specialist equipment. Boom lifts or additional scaffolding may be necessary. It’ll be added to your final bill.

The total amount of time spent working.

According to HomeGuide, you should expect to spend between $30 and $40 per hour for each painter who works on your property. It will take roughly 36 hours for two painters to prep and paint the outside of a 1,800-square-foot house. That takes your total labor costs down to $1,8080-1,260.

Paints and other materials

For every 100 square feet of surface area, one gallon of paint is expected to be utilized. A gallon of low-quality paint costs around $21, whereas a gallon of high-quality paint costs roughly $70. If your home is 1,800 square feet, then you’ll need 18 gallons of paint to complete the job there. This increases your total paint expense to somewhere from $380 and $1,260.

Doors and trim

Painting the trim costs roughly one cent per linear foot. There are a variety of variables that influence the final cost of painting an external door, but generally, it ranges between $90 and $200 per door. Make sure you include these charges in your final estimate.

You don’t want to skimp out on paint. It will only last a few years if you use low-quality paint. When properly prepared, high-quality paint may endure up to 15 years.

The price of painting various surfaces varies.

It is possible to paint over most kinds of siding, with different outcomes and prices. Different varieties of siding need different amounts of prepping and priming, which affects the final cost. What you’ll need to paint each variety is summarized in the following table

Vinyl siding may be improved by painting it.

The color of your vinyl siding was designed to last for many years, but as time passes, it may begin to fade. Vinyl can be painted, which isn’t ideal but also not impossible. In general, if you paint your siding a lighter color than its original color, you may do so. That’s because deeper colors may distort vinyl since it can only absorb so much heat. It will be necessary to utilize vinyl paint that is specially formulated for this purpose. If your siding moves, the original color may show through the joints if it isn’t coated correctly, so take extra care while painting it. Brush and roller painting costs $43 per 100 square feet, whereas spray painting costs $34 per 100 square feet.

Metal siding may be painted.

Aluminum is the most often used metal for siding. Metal siding must be thoroughly cleaned with a TSP/water solution before painting. Afterwards, the surface was cleaned and dried before being sanded and primed with an oil-based primer. Paint may be applied once the priming has dry. Due to the lack of adhesion of spray painting to the surface, brush and roller procedures are required. This is the cost for painting using brushes and rollers: $29/100 ft2.

The process of repainting stucco

After a month or two of curing, new stucco may be painted. The paint won’t stick to the surface if it doesn’t. Painting contractors may use moisture meters to assess whether or not the surface is dry enough to paint. A dry day is required for painting once it has been sanded and any holes or cracks have been repaired. The absorbency of stucco makes it necessary to use more paint while painting it. Brush painting costs $112 per square foot, roller painting costs $55 per 100 square feet, and spray painting costs $25 per square foot.

Wood siding may be painted.

It might take a long time to prepare wood siding. A thorough cleaning and sanding process is required to remove any stray paint chips from the surface. A broken or decaying piece of siding should be replaced first. A wood filler may be used to patch up minor flaws in the wood. Brush and roller painting costs $43 per 100 square feet, whereas spray painting costs $34 per 100 square feet.

Repainting a brick

The surface must first be scraped with a dry brush and then cleaned with a TSP/water solution before painting. Painting may begin after the primer has dried. Brush painting will cost you $30 per 100 square feet, roller painting will cost you $52 per 100 square feet, and spray painting will cost you $18 per 100 square feet.

The price of painting larger surfaces might rise above average.

We briefly touched on the paint job’s intricacy above. Painting houses that are taller than usual is a major source of worry for painting professionals since it raises the danger to them and complicates their work.

Preparation and painting might take longer at heights of 8 feet or more. Due to the fact that the contractor must work from a ladder or scaffolding, they must utilize roller poles or wands on spray guns. To remain on the safe side and avoid accidents, the painters will take particular care due to the elevated working environment. You’ll need to adjust your budget if your house has any very high-priced features. If this is the case, the additional fee will be determined by your painting contractor.

Choosing a color for the outside of your house

Decide on the correct kind of paint for the job.

When choosing paint for your house, there are two things you need to consider: the kind of paint and the color options. To keep your house protected from the weather, the paint you select must be long-lasting. To avoid having to pay for a second coat of paint too soon, it’s critical that you get high-quality paint. Make sure it’s stain-resistant, has a fair amount of coverage, and has excellent external protection. If you have siding on your home, you’ll need to choose a paint that works well with it. It’s possible to use the services of a seasoned painting contractor for this.

Making paint color selections

Painting the outside of your house may be a difficult process. All that matters is that the color of your choice will be on display in your home for the next decade or more, which means you need to be happy with the decision.

Research exterior paint colors online if you don’t know where to begin. A better color profile may be found by looking through a few home improvement websites. To get an idea of how various colors would appear on your home, you may use certain online programs that let you upload a picture of it.

Online color matching tools may be provided by a paint retailer or a particular paint brand. You may choose a starting color and the computer will suggest colors that go well with it for you. You’ll be able to experiment with several paint colors for your home’s exterior, including the main walls, trim, and other elements.


Painting little sections of your home’s exterior might also help you get a sense of how the color will appear. To get the best results, paint a small section of the house’s south and north-facing walls. It’s a good idea to check over the paint samples in various light conditions throughout the day to ensure that you’re satisfied with how they seem.

What are the hottest paint colors right now?

For exteriors, neutrals and naturals continue to be popular. The colors you may choose to paint the outside of your house may be restricted in certain neighborhoods. If you’re not sure, ask your local community association.

Neutral beiges, greys, natural blues, and greens are the most popular colors. Keeping trim light and bright is a popular choice since it contrasts well with the primary color. Generally speaking, whites and creams are the finest colors for this, however some homeowners are opting for black trim. There’s a lot of room for experimentation when it comes to the front entrance. Colorful door options include red, teal, yellow, and black.

How to choose a painter

It takes a long time to paint the outside of your house. Equipment such as scaffolding, boom lifts, and ladders will also be needed. High-altitude prep and painting should be left to the experts since it may be dangerous. They’ll not only be able to do it securely, but they’ll also be able to do it more quickly, and you’ll get results that are professional and flawless.

If you’re going to hire a contractor to paint your house, you need to do your homework beforehand. Check for items like a company license, enough insurance, WCB coverage, and any pending concerns with the Better Business Bureau. Inquire about the contractor’s previous three projects and request to speak with some of their past clients. There are several ways to learn about the prior customers’ experiences, including looking at images and driving by. We at Lucky Painting Limited have made provision that eases your burden when seeking estimation. Call us now to book a free session.
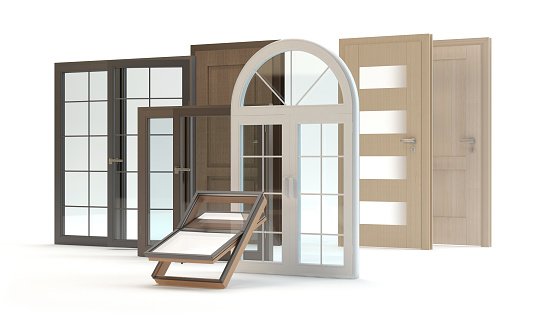

Priming and Painting Lintel

Steel lintels are an extremely common component of most brick masonry buildings. Since they support the facade above a window, priming and painting Lintel becomes of extreme importance in keeping your house in shape.

The simplest method to maintain steel lintels that are not severely deteriorated is to scrape, prime and paint them on a regular basis. Installing exterior primer and paint on the lintel will help protect it from corroding elements. Before the steel lintels are scraped and painted, the existing paint on the lintel must be tested for asbestos and lead containing material. Paint often contains lead, and while less common, asbestos is occasionally found in paint. If lead or asbestos exists, the paint must be abated by a licensed contractor.


Painting will only prevent additional damage to a lintel, and does not correct any existing damage to the steel. If the lintel is showing signs of more significant deterioration, it should be replaced. For example, if the lintel is bowing or bending, a gap can form between the lintel and the brick masonry above. Another sign of a deteriorated lintel is rust jacking or oxide jacking, which occurs when the rust on the lintel expands and causes the mortar in front of the lintel to crack or break loose. These conditions can threaten the structural stability of a masonry wall.


Steel lintel repair is critical to extending its usable life and preventing structural damage. A primer and paint should be applied to steel lintels prior to installation, and any broken brick masonry components should be repaired or replaced. From the edge of the lintel to the brick masonry that backs it up, waterproofing should be applied. Adding a layer of corrosion prevention is made possible by this waterproofing. To keep the brickwork above the steel lintel in place, use brick ties. Brick ties, on the other hand, pierce the waterproofing of the lintel. Water should not be able to enter the inside if there are any gaps or flaws in the waterproofing.


The degradation of steel lintels may also be caused by improper drainage, which should be addressed while replacing lintels. Some new lintels are poorly sealed to avoid water penetration at the connection between the facade and the new lintels that have been placed. Sadly, this information may really be harmful rather than helpful. Despite the fact that sealant will keep water out of the wall, it will also retain any moisture at the lintel level of the wall. The corrosion of the steel lintel will be accelerated by the presence of water on it. At the bottom of the mortar joints, weep vents or weep holes should be built to guarantee that any water that may be trapped in the brick is expelled.


WHAT ARE THEY RESPONSIBLE FOR?

Lintels are a fundamental feature of any brick building’s structural framework, making them an essential aspect of any architectural design. Windows and doors in brick buildings have L-shaped steel components installed in the upper portion of the apertures. Rather of placing the weight directly on the door or window, these devices are designed to disperse it. Their long-term viability is greatly influenced by the changing climate. A skilled painter, on the other hand, is much less costly than replacing the lintels or the doors and windows that no longer open.


Maintenance of lintel systems is essential for the structural safety of your building.


Failure to keep your lintels in good condition might have severe results. It’s possible that a weak spot in one of them might cause a window to break or possibly the whole wall to fall if the building’s façade is supported by them. Our building painters can assist if you don’t know when the previous lintel maintenance project was done. A ten-year maintenance cycle with a yearly check is what we propose.


Deterioration of Lintels


Lintels are composed of steel, thus even though they aren’t in the open, they may corrode with time. Steel lintels may rust even in a brick construction because of oxidation. Moisture may seep into your stonework and corrode the lintels if there are cracks. All of these things may weaken your building to the point that it warps or collapses completely. Keep an eye on your brick buildings for signs of bulging or cracking. Doorways and window frames are particularly vulnerable to degradation of the lintel.


In what ways may a LINTEL be problematic?

Rust is a natural occurrence when metal is exposed to moisture. The purpose of windows is to keep out the elements, however this is not a foolproof method of security. In the Midwestern summer, humidity is a regular friend, and even a little amount of condensation on your window might be enough to create problems.

Steel expands greatly as it corrodes. When metal inserted within masonry rusts, it may grow seven times its original thickness, according to research. Even with so much extension, the window frame’s other components will be compelled to move. Your foundation’s exterior is damaged as a result of these moving components. When the window frame is attached to the lintel, you’ll notice a rusty red discolouration and metal flakes or scales in the same place.

WHAT IS THE BEST WAY TO FIX?

Cutting out, removing, and replacing the lintel is required. The best way to seal and preserve it from the weather is to paint it. Replacement of the rusty metal with galvanized metal is another alternative, which will survive longer than the standard steel lintel does. This is a great do-it-yourself project if you like working with your hands. Another option is to hire a mason, general contractor, or handyman.


An experienced local bricklayer or mason should be consulted if the mortar around the afflicted window or door has broken. To begin with, you’ll need to be sure that the lintel is responsible for the fractures. Cracks on the outside of your foundation may indicate that your foundation is sinking and need expert repair.

Restoring the Lintel’s Decline


Maintaining your brick constructions on a regular basis is the finest strategy for ensuring their stability. Be on the lookout for any signs of structural weakness. If you want to avoid crumbling, water retention, and structural damage, have a professional inspect and repair your masonry regularly. If your lintels have started to decay, you should contact in a professional for repairs. In addition to buckling, bulging and cracking brickwork, degradation of your home’s structural integrity may result in costly and complicated repairs. Make sure to keep up with lintel degradation maintenance and repairs to keep your brick looking its best for a long time.

The Way We Work

Lintels may be restored by scrubbing away rust and debris and sanding the surface to a clean finish by our team of experts. Only the finest rust removal products are used by qualified professionals, protecting your lintel metal from further rust.

To ensure that the rust-preventative paint adheres properly to a metal surface, we first apply a primer. Rust-Oleum and other high-quality rust-prevention exterior paints extend the life of your lintels

If you’re looking for lintel repair or replacement, we’ve worked on hundreds of houses and businesses.

Totally Free Quotes

To get a free estimate on whether or not your lintels need to be re-painted , repaired or replaced in Calgary and its environ, call us now for a free  quote or inspection of your facility.

Painting Brick Exterior

The practice of painting brick exteriors has grown in popularity in Calgary in the last several years. There are a plethora of advantages and hazards to consider, so the most important thing to determine is whether or not it is really necessary and what effect it will have.

When you’re walking around Calgary, you’ll see a lot of brick buildings. Brick, stucco, and siding are all typical options for exteriors of homes. It’s not merely for the sake of making your house seem nice on the outside. The most frequent construction material in the past century was brick and many homeowners opted to retain the original appearance of a brick house. In recent years, painting outside brick has become a popular trend due of advances in paint technology.

The exteriors of the houses are ancient and unclean due to the harsh weather and pollution in the air. Additionally, the brick external surfaces show signs of deterioration and weathering. Whenever you think it’s time for a fast cover-up and concealment of the flaws Painting over old external brick is the finest method. By sealing the wall’s surface, painting the external bricks will help improve the wall’s insulation.

In the Greater Calgary Area, the most popular exterior brick hues are dark charcoal, gray tones, chocolate brown, and off-white tints. Red exterior paint is a popular choice for homeowners who wish to maintain the brick’s natural hue.

In Calgary, property prices are rising at an alarming rate. The housing market is booming. Bidding wars are used to sell resale properties. To receive the greatest potential price for their houses, homeowners pay close attention to all aspects of the transaction. A painted brick house will attract more attention from potential buyers if it is properly painted in a color that complements the architecture and character of the property. It’s an excellent technique to cover defects and make their property more appealing, which leads to greater offers and a faster sale.

The easiest approach to determine whether or not to get your home’s outside brick painted is to listen to the advice of an experienced real estate agent. Simply because it is not possible to get back to a house’s original appearance after painting over an outside brick. There’s no going back once it’s completed.

A professional opinion is especially important if you want to paint over the original outside brick of your property. A long-lasting coat of best paint for external brick should be used to ensure that the paint doesn’t wear out too soon after application. There are just too many dangers associated with using amateur painters and using subpar exterior paint. It will cost you a fortune to repair the paint if it begins bubbling and peeling.

A two-year guarantee is offered on all exterior projects by C&S Painting, and we can provide references from all across the city. For more than two decades, these external renovations have been in the works. Our costs are incomparable and we always use the finest paint for a brick home.

Painting Exterior Brick Has Advantages

If your home’s brick façade is red, orange, or yellowed, a paint refresh may have a number of positive effects.

Enhances the appearance of your home’s exterior. The value of your property will go up if you paint your bricks. When painted appropriately, a dark hue like slate grey or even a classic white may have a significant aesthetic effect.

Protects the wearer from the weather. The fresh paint on your brick house will work as a sealer to protect it from precipitation and other seasonal weather changes when it is properly updated. Your home’s exterior may be protected against fading and decay by painting it.

It’s easy to clean. Leaving brick untreated allows dirt and debris to get lodged and difficult to remove. The smooth surface of painted brick makes it much simpler to clean with a power washer on a more frequent basis.

Things to Consider When Painting Exterior Brick

With that said, painting external brick is a work that should be approached with caution

It’s a permanent finish. You can’t go back to your brick house’s original brick façade once you paint it. It is common knowledge among professional painters that once brick has been painted, it must be left that way. It may be quite expensive to even attempt to remove paint off brick. Fortunately, you don’t have to stick with a single paint color for the rest of your life since you can change it whenever you choose.

In the event of a leak, paint might chip. In general, this is true, however excess moisture near the ground might be a genuine worry with painted brick. This may be avoided, though, with simple repaints every 7-10 years or so. It’s also a good idea to get your external brick repainted on a regular basis to maintain it looking its best.

The outside of your home may need more frequent cleaning. However, grime and mildew are considerably more noticeable on painted exteriors than on natural brick. An occasional professional power washing may help maintain your brick exterior looking its best. This is a low-cost option, often running in the hundreds of dollars.

Advice on Painting Brick on the Exterior

The inherent color and durability of brick make it an ideal construction material. Typically, brick homes are built such that a homeowner does not have to paint the brickwork. There is no need to avoid painting brick, but this does not imply that you should. Make sure you follow these guidelines to guarantee that the painting of your house goes according to plan.

Always avoid painting deteriorated, chipped, or deformed brick. Molding and crumbling brick may be hidden with a fresh coat of paint, but this is not always the case. This is a complete and utter fabrication! Paint should never be applied to water-damaged brickwork. Painting wet bricks will just exacerbate the issues you’re currently facing.


Take care to use the right paint for your project. A good masonry paint (and probably a primer) is a must for painting brick exteriors due to the porousness of the material. Choosing the correct primers and paints requires an in-home color consultation by a skilled painter.

Paint your home’s exterior with a professional. Failure to adequately prepare the brick for painting or the application of the improper paint may result in a major smear. Painters with experience know precisely what tools, paints, and supplies to use to repair, clean, dry, prep, and paint your brick to the finest standards possible.

The façade of your home may be improved with modest, less permanent alterations. To avoid making a hasty decision, consider the pros and cons of painting your outside brick before deciding. Once again, painting brick is a long-term commitment, so be sure this is something you really want to accomplish before you get started. The façade of your property may always be refreshed in different ways. Consider painting your outside wood trim, your garage door, or your shutters and windows before making a final decision. All of these items might have a positive impact on the overall appearance of your property.

Paint Your Brick House with the Help of a Professional!

Painting brick is a reasonably easy approach to have a big effect on your home’s appearance and boost its value. Professional exterior painters can guarantee that your brick house is painted correctly and looks wonderful for years to come, despite some small downsides. The finest paints and finishes are used by professional house painters to provide a stress-free home remodeling project. Get a free estimate on your outside painting now!

7 Reasons Why You Should Choose Wooden Frames Over PVCu


Wooden frames are highly attractive and look great on any home.  Here are 7 reasons why you should choolse wooden frames over pvcu.

You may customize your wooden window frames by choosing from a wide range of woods such as maple, mahogany, or oak, each of which has a distinct appearance. Wooden window frames may be carved, stained, or painted to fit your preferences and to match the style of your home.

3d illustration, white background

When compared to PVCu, windows with timber frames are substantially more environmentally friendly.

They actually have a negative GWP (global warming potential), which means that during the course of their employment, they may reduce the quantity of CO2 in the atmosphere. PVCu manufacture, on the other hand, requires the discharge of very toxic compounds, six of which have been prioritized for eradication by European governments.

This window frame choice is the most ecologically friendly of all since it uses wood from sustainable sources.

Timber window frames have the potential to survive for many years, but PVCu windows are likely to last fewer than 30 years. Your hardwood windows can withstand wear and tear and last a lifetime if properly maintained.

Timber, as one of nature’s masterstrokes, functions as a natural insulator, keeping your home at a reasonable temperature. Because wood is inherently insulating, it aids in the retention of heat inside your home. As a result, carbon emissions are reduced, and your power cost is reduced while your home remains warm and pleasant.

Although wooden window frames need regular care and weatherproofing to stay in good shape, painting and varnishing them not only makes them appear nice but also makes them more resistant to the elements.

PVCu window frames, contrary to common assumption, are not maintenance-free, and a PVCu window cannot be fixed as simply.

A PVC window frame uses around eight times the amount of energy as a wood window frame. PVC trash is expected to increase to 6.4 million tonnes by 2020, according to environmental organizations. PVC windows create 43 percent more garbage than wood windows. Around 82 percent of material is disposed of in landfills, while the remaining 15 percent is burnt. Only 3% of the garbage produced is recycled.

Timber windows with high performance are not always more costly than their PVCu equivalents. You have a lot of options since they come in so many distinct varieties. While maple is the most affordable window wood, mahogany is the most expensive. Furthermore, you can be confident that if you pick a traditional window frame for your house, it will endure considerably longer than PVCu.


What are the Benefits of Timber Windows?

Although many people in the United Kingdom like wood windows and doors, many have shifted to PVC. Why? PVC, according to several salespeople, does not decay like wood, is less expensive, and does not need painting. That sounds terrific, but before you rush off to make your purchase, let us question your assumptions.

Wooden Interior with Funiture and Fireplace

Norway has a lot of forests and has exceptionally harsh winters. As a result, they’ve become fairly good at harnessing their abundant natural resources to keep us warm, as well as an effective construction material.

PVC windows are seen in extremely few residences in Norway. This is due to the fact that wood is a natural barrier to the cold.

It outperforms PVC windows and doors when carefully designed and constructed into a window or door and paired with double or triple glazing.

Why is PVC so popular in the United Kingdom? The tale is complicated, but for many people, decaying wood windows conjure up images of those placed in homes following WWII. Retain you ever noticed how many homes constructed more than a century ago still have their original windows?


This is due to the fact that they were fashioned from well-seasoned, high-quality wood. Many structures erected after WWII, on the other hand, were constructed with inferior materials. As a result, wood has developed a poor image.


So, what is the current truth?

In the United Kingdom, over 12 million windows of all varieties are sold each year, with wood windows accounting for 30% of that market. The public sector uses 57 percent of wood windows supplied in the UK, while the private sector uses 42 percent; 86 percent of these are used in renovation projects, while 14 percent are used in new construction. (Figures courtesy of the Forest Stewardship Council.)

While Norwegian windows and doors have always been made of high-quality materials, the progress of wood windows in terms of quality,

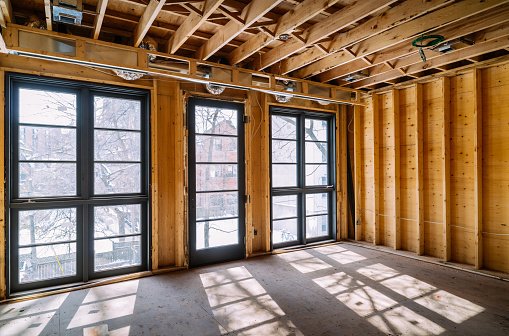
Interior of Home during complete renovation. This old house was complete gutted inside and now new wooden framing is installed for next phase of modern walls, floor and ceiling.

durability, and design has been significant in the past ten years. Modern high-performance wood windows may have finish guarantees of up to 10 years and rot free guarantees of up to 30 years, with frames that are completely protected from water and UV rays at the factory. The use of dual sealing and factory glazing extends the life of a unit, while smart design features extend the life of the wood even further.

When compared to PVC units, the National Building Federation’s Standards in Quality and Development estimates that PVC windows will last 20 to 25 years, whereas vacuum-treated softwood windows would last 25 to 35 years. ‘Properly built and well kept wood windows can and do endure the lifespan of the structure in which they are put,’ according to the Green Builders Digest.


Many individuals find upkeep difficult, yet no material is maintenance-free, despite promises made by PVC sellers. Innovations in timber window design and finish have resulted in products that reduce water retention, damp penetration, and enable wood to breathe, all of which contribute to a low-maintenance product. Paint that peels and blisters is no longer an issue.

Factory-finished windows may last up to 8 years without needing to be repainted. Painting cycles of 5 to 8 years were the standard after then. Modern finishes also help to cut down on prep time. Unlike PVC, factory-finished wood windows and doors may be customized to a specific color to match your project and home. While it is true that wood windows need some upkeep, new high-performance windows make this upkeep quite simple.

While the initial cost of wood windows may be greater than that of other materials, the ‘whole-life’ cost of maintenance, durability, and environmental effect that timber provides gives it an outstanding value for money.

To back up the assertion of good value for money Softwood is cheaper, according to the National Housing Federation, both in terms of original capital expenditures and life cycle expenses over a 30-year period.

Another financial benefit of wood windows is their capacity to be repaired and restored. Wood may be easily mended, refreshed, and maintained without the need of specific components, expertise, or equipment, according to TRADA, the Timber Research and Development Association.

Finally, lumber is a natural insulator that, when paired with the glazing system (air, argon, or krypton filled), insulating glass, and draught sealing, has no trouble meeting current criteria of a U-value of as low as 0.6W/m2K.

To sum it up

Timber is an ecologically beneficial, thermally efficient, good-looking, and low-maintenance material that comes from managed forests, largely in my birthplace of Scandinavia. All of this is, thankfully, a far cry from the bad image earned in recent years by low-cost, low-quality softwood windows and doors.

All of the above makes sense to me, and when it comes to windows and doors, nothing compares to the beauty and feel of wood.

Which is Better: Wooden Windows or PVC-u Windows?

Replacement windows are a long-term investment that pays off handsomely. They may increase the value of your house, save you money on energy costs, minimize condensation, enhance peace and quiet, and cut down on maintenance time.

Empty room with glass window frame house interior on concrete wall

Before you take the leap, consider if you would be better off with wooden or plastic windows. Here’s a side-by-side comparison to aid you in your selection.

Cost

PVC-u windows are nearly usually the most cost-effective choice. They seldom, however, provide the greatest value. Wooden windows will last at least twice as long as vinyl windows and will increase the value of your house – especially if it’s a historic residence.

Warranties

PVC-u windows usually come with a 10-year guarantee, but wood windows usually come with a 30-year warranty.

Appearance

Many historic houses around the nation have been ruined by PVC-u replacement windows. Although some PVC-u manufacturers are now producing better-looking period windows, nothing compares to the appearance and feel of wood. You may have original classic elements like joints, thin glazing bars, and incorporated horns without losing performance with today’s wood windows.

Window, Installing, Service, Repairing, Home Improvement

Even when covered in aluminum, modern wood windows have a firmness and quality that is as vital within the space as it is outside.

Energy-efficiency

Replacement windows made of wood or PVC-u may both provide excellent levels of energy efficiency.

Due to the robustness of hardwood frames, massive triple-glazed units may be installed without the need of ultra-thick parts.


Household Upkeep

Whether made of PVC-u or factory-finished wood, today’s windows are low-maintenance. They merely need yearly maintenance to have the frames cleaned and the hardware oiled. Factory finished wood windows will need a new coat of paint after around 10 years, and thereafter at seven-year intervals, depending on exposure circumstances. This restores them to their previous state and enables you to adjust the color if desired. PVC-u windows, on the other hand, do not need re-coating but will lose their finish with time. PVC-u windows are also significantly more difficult to repair than wood windows.

The natural world

Wood is the most environmentally friendly window material. Studies have shown its superiority in a variety of environmental aspects. Most importantly, replacing a PVC-U window with a Wood Window Alliance window saves roughly 160kg of carbon dioxide.

As the best painting company in Calgary and environ, we interpret the art of painting to mean customer satisfaction, and that is why our work is centered around client fulfilment. Our focus circles every detail of your painting needs to deliver the results of your dreams. We can satisfy your window needs be it wooden frames or PVCs. Call us now and speak to one of our experts at no cost. 

Paint Varnished Window Frames to Perfection

To obtain a beautiful finish when you want to  paint varnished window frames to perfection, you need to make a solid start. Preparation and priming are essential for every form of painting.

The most common reason we are called to paint varnished window frames is because they have been neglected and the varnish or stain has worn away over time. The varnish or stain has entirely peeled away in some parts, leaving the wood exposed to the weather, as you can see in this photo.

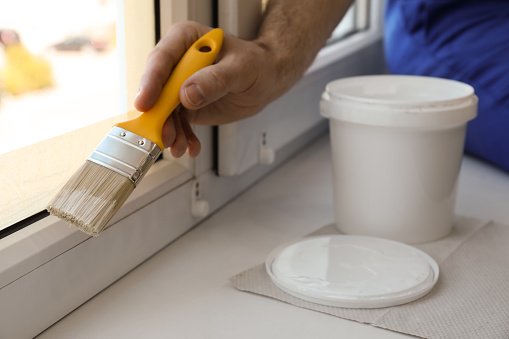
Man painting window frame at home, closeup

The wood will become black with mould and mildew in certain parts over time, and it will begin to decompose.

It will be quite impossible to restore your windows and doors to anything close to their former state if they have deteriorated this much. Most of the external windows we are requested to repair and paint look like this.

Sanding and scraping away all of the loose coating will be one of the first things to accomplish. You must ensure that the original coating is properly attached to the hardwood surface before painting varnished window frames and doors.

The previous coating must be removed if it is not solid, that is, if it scratches or scrapes away readily. This may seem to be a lot of work, but it must be completed!

If you skip this stage and go right to priming, you’re pretty much guaranteed that the whole work will have to be redone from scratch. You don’t have to remove all of the previous coating; only the easy-to-remove parts.

After scraping and sanding away the old loose coating, give whatever varnish covering is left a quick clean and a thorough rubbing down with sandpaper. Cleaning with soapy water and sanding with 150 grit paper sandpaper should suffice.

You may now go to priming. Here you may learn about the many sorts of primers. Personally, I would suggest using an oil-based primer like as Zinsser Coverstain.

Interior of Home during complete renovation. This old house was complete gutted inside and now new wooden framing is installed for next phase of modern walls, floor and ceiling.

Coverstain is a great all-around primer for painting varnished window frames and doors. After the primer has dry, you may need to fill in any gaps with a mix of caulk and external wood filler. The less you file, the better, since the filler will most likely be the first item to fail as the years pass, so take it easy!

After you’ve filled everything, you’ll need to sand down the woodwork and the wood filler a bit (try not to sand over caulk or leave caulking until after the woodwork has been sanded). Because the timber hairs have risen to the surface, the initial application of primer has made the woodwork feel somewhat scratchy.

Poster frame mock-up in home interior background with sofa, table and decor in living room, 3d render

This is natural, and all you have to do now is sand these hairs smooth once again. After sanding and dusting, a second layer of primer should be applied to ensure that everything is fully primed.

If you’ve gotten this far using Coverstain, you now have the choice of utilizing either a water-based or an oil-based top coat. Both will work nicely with Coverstain. In my experience, an oil-based top coat will stay longer than a water-based paint.

In general, the greater the shine, the longer it will persist.

The most popular finishes these days are satin and eggshell, however they don’t last as long as a gloss finish. Sikkens Satura plus is, in my view, the greatest paint to use.

This is a long-lasting oil-based semi-gloss paint. This is the look I’d go for on my own windows.

He looks excellent and will last much longer than the varnished or stained finish. It now truly lights up the place! You’ll need the following tools and supplies to perform this on your own.

The following are the tools you’ll need for this job:
  • Scraper for paint.
  • Sandpaper grades 60, 80, 120, 150, and 180 are available.
  • Brushes of excellent quality.
  • Kettle with paint.
  • For paint overs, use a drop sheet or some other sort of protection.
  • Knives for filling and a caulk gun
  • Extension ladders and step ladder

The following ae the items you’ll need for this project: Primer. Caulk. Filler for wood. Undercoat. Gloss, satin, or eggshell finish for the top coat.

When purchasing all of your materials, I suggest going to a specialty paint store which will have everything you need and can also provide advise if needed. As the best painting company in Calgary and environ, we interpret the art of painting to mean customer satisfaction, and that is why our work is centered around client fulfilment. Our focus circles every detail of your painting needs to deliver the results of your dreams.

Paint Varnished Window Frames to Perfection

To obtain a beautiful finish when you need  to paint varnished window frames to perfection, you need to make a solid start. Preparation and priming are essential for every form of painting.

The most common reason we are called to paint varnished window frames is because they have been neglected and the varnish or stain has worn away over time.

Interior of Home during complete renovation. This old house was complete gutted inside and now new wooden framing is installed for next phase of modern walls, floor and ceiling.

The varnish or stain has entirely peeled away in some parts, leaving the wood exposed to the weather, as you can see in this photo. The wood will become black with mould and mildew in certain parts over time, and it will begin to decompose.

It will be quite impossible to restore your windows and doors to anything close to their former state if they have deteriorated this much. Most of the external windows we are requested to repair and paint look like this.

Sanding and scraping away all of the loose coating will be one of the first things to accomplish. You must ensure that the original coating is properly attached to the hardwood surface before painting varnished window frames and doors.

The previous coating must be removed if it is not solid, that is, if it scratches or scrapes away readily. This may seem to be a lot of work, but it must be completed!

If you skip this stage and go right to priming, you’re pretty much guaranteed that the whole work will have to be redone from scratch. You don’t have to remove all of the previous coating; only the easy-to-remove parts.

After scraping and sanding away the old loose coating, give whatever varnish covering is left a quick clean and a thorough rubbing down with sandpaper. Cleaning with soapy water and sanding with 150 grit paper sandpaper should suffice.

You may now go to priming. Here you may learn about the many sorts of primers. Personally, I would suggest using an oil-based primer like as Zinsser Coverstain. Coverstain is a great all-around primer for painting varnished window frames and doors.


After the primer has dry, you may need to fill in any gaps with a mix of caulk and external wood filler. The less you file, the better, since the filler will most likely be the first item to fail as the years pass, so take it easy!

After you’ve filled everything, you’ll need to sand down the woodwork and the wood filler a bit (try not to sand over caulk or leave caulking until after the woodwork has been sanded). Because the timber hairs have risen to the surface, the initial application of primer has made the woodwork feel somewhat scratchy. This is natural, and all you have to do now is sand these hairs smooth once again. After sanding and dusting, a second layer of primer should be applied to ensure that everything is fully primed.

If you’ve gotten this far using Coverstain, you now have the choice of utilizing either a water-based or an oil-based top coat. Both will work nicely with Coverstain. In my experience, an oil-based top coat will stay longer than a water-based paint.

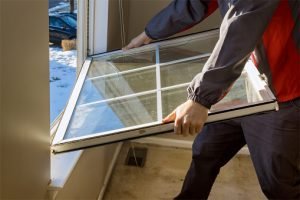
Worker in the removing break down windows in the home

In general, the greater the shine, the longer it will persist. The most popular finishes these days are satin and eggshell, however they don’t last as long as a gloss finish. Sikkens Satura plus is, in my view, the greatest paint to use. This is a long-lasting oil-based semi-gloss paint. This is the look I’d go for on my own windows.

He looks excellent and will last much longer than the varnished or stained finish. It now truly lights up the place! You’ll need the following tools and supplies to perform this on your own.


The following are the tools you’ll need for this job:

Scraper for paint.

Sandpaper grades 60, 80, 120, 150, and 180 are available.

Brushes of excellent quality.  Kettle with paint. For paint overs, use drop sheet or some other sort of protection. Knives for filling and a caulk gun. Extension ladders and step ladders are also available.

The following are the items you’ll need for this project:

Primer.
Caulk.
Filler for wood.
Undercoat.


Gloss, satin, or eggshell finish for the top coat.

When purchasing all of your materials, I suggest going to a specialty paint store which will have everything you need and can also provide advise if needed. As the best painting company in Calgary and environ, we interpret the art of painting to mean customer satisfaction, and that is why our work is centered around client fulfilment. Our focus circles every detail of your painting needs to deliver the results of your dreams. Call us now to fix a free consultation and get professional input on how to make the best of your window frames. Our output will stun your imagination. 

10 Places in your home that needs a paint makeover

Your house’s paint is one of the first things that people notice when they walk through the door. No matter how meticulously you keep the rest of the space, if the walls aren’t painted, the room will never appear its finest. If you’re looking for the best painters in Calgary, go no further 10 Places in your home that needs a paint makeover, according to the city’s most trusted professionals at lucky painting Limited .

The Living Room

This is the busiest room in the house for a lot of families. You can see all the activities taking on in the living area through the paint. As they move up and down, recliners frequently scratch the wall they’re placed against. Every year, the Christmas tree has to be put up and taken down, which nearly always results in paint scrapes and scratches. There’s no escaping the fact that youngsters who are constantly playing with games and toys are certain to knock against walls. The wall may also be a canvas for children’s imaginations. After a while, enough dirt and damage accumulates to warrant a visit from Painters in Calgary.

Second, there are the bedrooms.

The living room isn’t always the best setting for this kind of activity. Every now and again, kids will re-arrange the furniture in the family room, leaving behind a few scuffs for Calgary painters to fix. The baseboards, door trim, and walls in bedrooms are also a common target for toy trucks and dolls, which often collide with one other. Every few years, after years of use by children and adults, a bedroom has to be repainted to bring it back to its original, fresh appearance. In the long term, appropriate maintenance may save you money even if it takes up a little amount of time each year.

Third-party restrooms

Think about it: The bathroom is a prime target for paint damage. Painters in Calgary are well aware of the dangers of the city’s continuous dampness. Sheetrock may collect moisture that ruins paint if it’s too humid, which feeds mold. Scuffs from hair brushes, curling irons, and hair dryers are also a problem. In addition, toothbrush smears, soap smears, and hairspray sheens all deteriorate the paint and need a retouch.

4th floor

In most homes, the basement serves as a secondary living space, additional storage, or a combination of both. It doesn’t matter how you utilize your basement, the paint will take some wear and tear. We commonly harm the paint when we use a broom to clear spider webs from dark, silent basements. Mildew and mold are common because of the high levels of humidity in the area. It’s also common for furniture and other goods to bounce against walls when they’re being kept in Calgary, damaging the paint. It is critical to maintain the paint in basements since they are huge, flexible rooms that may be swiftly converted into different sorts of living quarters.

In contrast to other rooms, a formal dining room is less likely to be damaged. There are fewer everyday collisions in this space since it is less often utilized. It’s also a mildew-free environment. If you’re a fan of scuffing baseboards with scuffed chairs, this isn’t the ideal place for you. The living room, in particular, requires a new coat of paint since it is held to a higher level of appearance than other areas of the house.

Painters in Calgary for Bed Room Painting

If the living room is the busiest room in the house, this is arguably the most grueling one to keep clean. Keeping your storage room painted on a regular basis will allow you to subsequently transform it into a different area. The more you neglect it, the more difficult it will be in the future to fix it. Painters in Calgary will have a full schedule when they come in to create a fresh coat since the rough edges of boxes and crates may do a lot of harm.

This is the room for which hazardous duty compensation is due. Even if we don’t want them to, children will play in every part of the house. Choosing a space and declaring it “dedicated to playing” means we’re willing to let anything from crayon paintings to flying toys harm our walls. The youngsters will be less cautious if you allow the room to get untidy. Calgary painters can transform the room’s appearance, making it clear that there are limitations to how much fun one may have.

Home offices are a need for many people, whether they’re working from home or simply trying to get the bills off the kitchen table. Many home offices are in need of a fresh coat of paint. It’s possible that this is because the space was formerly used as a dumping ground or as a work place. There are times when it’s simply the cost of running a company from home, when the walls are scratched by filing cabinets, computer wires, and stacks of paper. A fresh coat of paint will give it a more polished and inviting appearance, which in turn will boost productivity.

The guest room, like the dining room, should be kept clean and tidy at all times. When a visitor is on the way, the customary pre-guest cleaning routine might quickly uncover paint issues. Painting the room periodically will keep it looking new, clean, and ready for a few days of occupancy instead of a nasty surprise when guests arrive.

The kitchen, the busiest of all the rooms in your house, is last but certainly not least. It is subjected to a great deal of wear and tear from the constant movement of kitchen utensils and dishes. As chairs are slid in and out and baseboards are mopped and swept, the walls and floors are damaged. Finally, no matter how hard you try to clean up a food accident, there will always be a little residue left behind. Having the walls painted on a regular basis by Calgary painters can cover up any defects and leave them appearing bright, clean, and lovely.

It doesn’t matter whether you have a large or a small family; they leave their imprint on your walls. Painters in Calgary should come in every now and then to remove the accumulated dirt and grime of a busy household and restore each space to its former pristine condition. 267-333-2939 is the phone number for Painters In Calgary, your local house painting company.

Deck and Fence Staining

Your deck and fence staining is a necessary if you want your home’s exteriors to look their best. Investing in time outside  the house is a wise decision that you won’t regret at any point. In Calgary, our deck and fence staining experts at Lucky Painting Limited Calgary are here to help you. We can help you restore your deck and fence to their former glory!

When it comes to staining decks and fences, customers often question whether or not they should even be doing it in the first place. Unless the wood is completely damaged and beyond repair, staining is an option. Professional house painters with stain can undoubtedly restore the beauty of your deck, even if some sanding, repairs, and new panels are required during the preparation phase.

I’m at a loss as to how frequently I should be staining my deck or fencing. In other words, how long can we expect it to go on?

In most cases, a good deck staining job may last anywhere from one to three years, depending on the weather and temperature where you reside. In case your deck staining is peeling, Lucky Painting Limited Calgary’s extended warranty maintenance plan may be of assistance to you.

Our experienced Lucky Painting Limited will return to complete the restaining or repainting job for a third of the price if you choose to go with us for your first deck staining requirements. At Lucky Painting Limited Calgary, customer happiness and high-quality work are our main priorities.

Since I recently had a brand new deck built, I’m stumped as to what color to paint it or even when to start staining it. Is there anything you can tell me?

When it comes to deck staining and fence staining, consider about how to maintain and preserve your investment. If you’re not sure what color to choose for your new deck, a transparent or translucent stain is a good place to start. The sooner you start protecting your deck, the better it will be for its health and longevity.

Are you uncertain about the color and appearance of the deck staining or fence staining?

When you hire Lucky Painting Limited Calgary, you get a team of specialists that know their colors. Your deck or fence staining contractor would be pleased to include a color consultation as part of your evaluation to ensure that you are happy with your choice of color.

In a place like Calgary, I’m not sure how much deck staining will cost. What kind of costs might I expect?

Deck or fence staining is a cost-effective way to boost the value of your Calgary or GTA home’s curb appeal and increase its marketability. Preparation and repair work, as well as the scale of the job, all go into the cost of staining a deck or a fence.

First, how much does it cost to re-stain your deck?

For how much can I expect to pay to have my deck painted? What’s the answer? The size, quality, and condition of your deck all go into this decision. Staining your deck might really save you money in the long run, since there are several reasons to do so. Staining a deck is less expensive than painting one. The cost of staining a deck might vary widely depending on its size and quality. Maintaining your deck instead of replacing it may save you up to 90% of the cost of a new deck.

Small changes to your home’s exterior will have a big impact on its curb appeal. To avoid peeling or cracks, this process must be done correctly and requires a lot of time. Before embarking on a large-scale DIY project, it’s usually a good idea to consult a professional.

The average time it takes to stain a deck

Many folks wonder how long it takes to stain a deck. For both small and large decks, the entire process can be completed within two to three days. grey brick home, painting over stained wood and can you paint over stained wood are just few of the questions we are asked when it comes to refinishing a wood deck.

Deck Staining prices may be affected by a number of factors.

Deck Staining prices are determined by a variety of variables. The following elements should be included in your budget:

The scope of the project.

More stain is needed for a larger deck, but the price per square foot goes down as the deck gets bigger and bigger.

It’s not only the size of an item that determines the cost of restoration, but the complexity of staining an object as well. In the case of railings, this is especially important since, despite their tiny surface area, they may absorb a lot of stain. They take a long time and are more expensive. Lattice is another thing that might raise the expense of deck staining unexpectedly on a patio or deck.

The cost of re-staining a deck depends on how long it has been since the last time it was stained. It’s not the same as painting over old paint since you have to perform more prep work. Stain and sealer removers may also be needed before the new stain can penetrate successfully. As a result, deck staining will be more expensive.

If you need your task done quickly, you’ll have to hire additional painters, which can raise the overall cost.

It’s that time of year. The cost of your deck staining job will be affected by the time of year you choose to do it. The ideal time to visit is generally in the spring or autumn.

Many customers prefer to use their credit cards to make their payments, but doing so comes with additional fees that only serve to raise the overall cost of the transaction.

You’ve just discovered that the inexpensive painters you hired performed shoddy job, and you need to start again.

In order for the painters to come, is it essential for them to relocate and clean the areas where they will be staining?

Yes, painters can typically accomplish it for you, but it will add to the total cost and the number of hours required for your job. In order for them to finish painting, you may ask for their aid with any heavy things that you are unable to handle on your own.

In terms of translucent stain, which is also known as a sealer, there are several things to keep in mind. You may occasionally get away with reapplying a fresh layer of UV protection every year or two, but the UV protection is typically reduced.

The color and bonding of wood fibers may be altered by extended exposure to the sun’s direct rays. Using a clear stain will ensure that the natural beauty of your wood is preserved. The fiber will be protected from moisture damage, allowing the texture and color to be clearly seen through the material.

The next consideration is whether to use an oil-based stain or a water-based one. As long as the wood fibers are dry, an oil-based stain may penetrate deep into the wood and protect it from water damage for longer in certain exterior house projects.

Moisture may be trapped within if the surface isn’t dry enough before staining. You don’t have to remove the old oil before applying the new one. A water-based stain, on the other hand, may better conceal flaws in old and new wood panels, as well as worn surfaces.

Because water-based stains tend to sit on top of wood, it’s critical that the wood be completely dry before applying the stain. This will prevent the stain from trapping moisture. Sanding and stripping prior to recoating will provide the greatest results since it rests on the surface and may ultimately flake.

Finally, there may be over a dozen different stains to pick from, depending on the maker. If you choose a darker color, you will have to re-stain less frequently. Color your wood a little darker using a translucent or semitransparent sealant. Despite this, less of the original grain is visible. In any case, you’ll be providing a layer of protection to your surface that will help it stay longer and seem more bright.

How to Paint a Garage Door and Metal Doors 


What about that adorable little home down the block has such a bright garage door? The fact is, your neighbors wanted it to stand out, therefore they used that precise color! In addition to being eye-catching, the garage door’s bright paint also serves as a weather barrier in Calgary’s ever-changing climate. Whether you have an aluminum, vinyl, or metal garage door, these painting ideas will come in handy. Choosing the correct paint color will  be discussed in this article on how to paint a garage door and metal doors . In other words, keep reading if you want your garage door  and other metal doors to be the envy of your neighborhood!

Choosing the right garage door the color of the wall paint

When painting the front door an accent color, some people advise against painting the garage door the same color as the front door. Some people may argue that this is the only viable option! Make sure that the color of your garage door doesn’t conflict with the rest of your house if you’re selecting a striking color. As long as your home is painted in a traditional style, merging in your garage door with the rest of the house would work well.

You might, however, opt to color coordinate with some of your property’s more striking accents. Color-coordinated garage doors and mailboxes or shutters are popular choices among homeowners. This is an effective way to convey a unified message and to seamlessly integrate disparate elements while yet retaining a sense of individuality.

Can I store paint in my garage?, can I paint my garage with red brick?

Preparation and Cleaning

Make sure the garage door is free of dirt and sand any areas that aren’t perfectly smooth. If you have a metal garage door, an abrasive scouring sponge can be an excellent choice. Use a powerful cleaning solution to remove any remaining filth, and then rinse thoroughly.

Use painters tape to mark the area you’ll be painting on the garage door once it’s been cleaned. To protect the sections you don’t want painted, use painters tape as a barrier. Protect your driveway from messes by laying down a drop cloth or tarp.

The most important of the three.

Pour some primer into your paint tray before you begin painting with a roller and a tray. Before you begin priming the garage door, dip your roller in the paint and roll it around until it is uniformly coated. If you like, you may skip this step and use a paint and primer in one. For areas that the roller can’t get to, use a paintbrush. Just let it dry, and you’ll be done!

Painters in Calgary that specialize in exteriors and interiors, as well as garage door painting on brick

A stone home with oak doors stained and a stained brick house; exterior painting and staining of the bricks.


Repaint the door of your garage

After the priming has dried, it’s time to get creative! You may prepare your paint in a tray and begin painting the garage door with a roller as soon as you have it. If the roller’s reach is limited, switch to a paintbrush to finish the job. You may need to apply a second layer of garage door paint if you want a lighter hue.

It’s best to paint vertically or horizontally if applying a second coat of paint after having painted the first one horizontally. This gives a professional appearance. After that, all that’s left is to wait for it to dry.

After that, you’re done!

Remove the painters tape when the paint is almost dry. Removing the painters tape right before the paint has dried will make it easier to remove the tape without leaving any residue behind. Avoids scuffing or smearing the paint.

Your garage door has been painted after you remove the tarp or drop cloth you laid down. Take a deep breath and bask in the glory of your newly painted garage door and the labor of love that went into it.

Removing and Repainting Metal Trim

When it comes to your home’s exterior, it’s the tiny details that may make all the difference. Neighbors will be impressed if your house’s paint job looks decent. Even the trim makes a difference! Check out this article if you have metal outside trim and are searching for some fantastic painting advice!

Make Sure the Metal Exterior Trim is Clean Before You Begin.

Before you arrive at the party, give your hair and nails a thorough brushing! Preparation is essential before you even begin painting. Getting rid of the years’ worth of filth and grime is a top priority.

Consider hiring our exterior house painters if you want to paint the outside of your home but don’t have the time or energy to do it yourself. A competent home painter can answer any questions or concerns you may have, no matter how big or little. Call +1 403-891-4138 or email info@luckypaintingltd.ca for a FREE quotation if the labor required in home painting seems like it would take too much time and effort for you to do it yourself. Also, don’t forget to connect with us on the social platforms!


Painting Metal Objects

  • Using a power washer or a towel and some soap and water, scrape the windowsills and/or remove the metal trim, if necessary.
  • Use painter’s tape to protect adjacent surfaces from getting paint on them.
  • Install the outside metal trim.
  • Removing the outside metal trim
  • Remove the Metal Trim from the Exterior.
  • Using a wood wedge and placing it on the wall behind the trim, you may use the pry bar to remove external trim without damaging the wall. Pry the window or door trim away from the surface it is fastened to using a tiny pry bar. When reattaching the trim, be aware that removing the old nails can enlarge the new holes. To avoid damaging metal trim, carefully raise and shift the pry bar.
  • When necessary, use pliers. Also, use wood putty or caulking to smooth out any remaining surface irregularities where the metal window trim originally stood.
  • Refinish Metal Window Trim Using Primer/Paint
  • Exterior Trim Painting: What Are Our Views?
  • You may paint on top of the metal outside trim after you’ve removed it from the outer door or window by laying it down on a sheet or cardboard.
  • Exterior metal railings and trim should be coated with galvanized primer before painting. Allow the first layer to dry completely before adding a second coat to ensure that no brush strokes are apparent. It’s best to let this dry as well.
  • Using a wooden dip stick to mix the acrylic latex paint with water in a can can give you a superior finish on your external metal trim painting! Allow it to dry.
  • Once you’ve reattached the window metal trim using a hammer and bigger nails (to ensure a tighter seal), you’re all set! Your external metal trim is beautifully painted and has a long-lasting shine.
  • Additional advice from a Calgary painting contractor, as per the following statement:
  • Unless you use an etching primer when painting outside metal trim, the paint applied on top will rapidly peel away and become ineffective.
  • When making a diluted paint solution, you should use around 1 gallon of acrylic paint and 1 oz of water to measure/volume.
  • Apply primer or paint to the metal window trim.
  • Paint for outside windows, window trim, and the exterior
  • Choosing the perfect color for your home’s exterior paint job
  • If you want your home’s exterior to convey a unified and subtle message, you should choose trim that is a few shades lighter or darker than your primary color. If your primary exterior painting color is going to be a light cream, like Calming Cream, then choose a tan for your trim and accents.
  • To make a statement, consider using a stark contrast between the colors in your design. You can’t go wrong with a white or cream home with black trim, for example. It’s timeless and classic!
Painting on Exterior Vinyl Windows and Siding

Painting on Exterior Vinyl Windows and Siding

If you have vinyl siding and windows on your house and you need painting on exterior vinyl windows and siding this spring, you should be thinking of a new coat of paint.

A new coat of paint may transform your home’s curb appeal, particularly if you’re planning to sell it. Without some preparation, painting vinyl might be difficult. You can paint vinyl, but unless you’re an expert, it’s not a good idea. If you wish to perform this endeavor yourself, though, you must be aware of the hazards.

Painting on Exterior Vinyl Windows and Siding

When it comes to updating your vinyl siding or windows, it’s not as easy as washing and painting. Paint won’t attach to vinyl without some form of priming, but depending on what’s in it, primer might potentially harm the vinyl.

When you paint vinyl, it usually crumbles, splits, and flakes, which is really ugly.

You should also double-check that you aren’t voiding any warranties you may have.

Priming and painting your vinyl might compromise its structural integrity and result in a major (and costly) hassle. Before you begin the difficult task of painting your vinyl, double-check that your manufacturer’s guarantee is still in effect.

Dark vinyl absorbs more light, thus it’s not suggested if it’ll be exposed to direct sunlight for the most of the day. Your window will ultimately bend or get damaged as a result of the absorbed heat.

If you’re still not sure that you should hire a professional to paint your vinyl siding or windows, here are some helpful hints.

  • Use a high-quality alkyd or bonding primer.


  • Invest in high-end paint. Sherwin Williams and Benjamin Moore both provide vinyl-safe paint solutions that would work well for these tasks. Even though some products claim that you don’t need a primer, it’s always a good idea to use one.


  • Avoid using a deeper color since it may warp.


  • Because vinyl has a tendency to expand over time, you should use latex or acrylic paint instead. These paints are less likely to fracture and peel than other paints.
  • Because vinyl is so fragile, you’ll want to prepare the surface as much as possible.

How to Paint Vinyl Windows or Siding on the Outside

The four basic stages for painting vinyl windows or siding are as follows:

The surface should be thoroughly cleaned in step number one. To get the finest effects, you must thoroughly clean the region.

Staff painting Windows

After cleaning the surface, you’ll want to gently sand it to ensure that the primer does its finest work. Keep an eye on your windows while you apply the medium-grit paper or sponge sandpaper to the vinyl.

The next step is to prime your vinyl. With a brush, roller, or spray, you may apply a layer of high-quality primer to your surface. Tape off any places that you don’t want to be primed. Before painting, let the primer to dry fully.

Once the primer has dry, you may begin painting. For windows, you’ll need a little brush to get the job done well. When painting with spray paint, keep an eye out for drips.

Tips for Painting Vinyl: Things to Keep in Mind

When painting vinyl, it is important to take into account all of the possible dangers. Keep the structural integrity of your house intact since it is your first line of defense against the weather. If you decide to paint your vinyl yourself, here are some things to keep in mind.

Otherwise, you risk causing damage to the outside of your house, necessitating an exorbitant repair bill.

There is a scenario in which, even though you know that your vinyl siding or windows are covered by a warranty, you decide to paint them. An insurance claim might be voided in this situation.

We can assist if you want to paint the outside of your house but don’t want to undertake the task yourself. Whether you’ve made up your mind or not, a professional home painter can assist you with any issues or concerns you may have.

Call us now to obtain a FREE estimate if you think the task will take too much time and effort for you to do it yourself. Painting the vinyl will usually invalidate the warranty, according to the terms of the manufacturer’s guarantee.


Painting tools roller tray ladder and white paint in prepared for painting empty small room

Choosing Between Painting Wood Siding and Vinyl Siding

As a result of its widespread usage, vinyl siding may account for anything from 40 percent to 70 percent of the market, on average. Nonetheless, if you’re curious about vinyl siding’s benefits and drawbacks, we’ve got you covered!

Plastic polymer vinyl was invented more than a century ago. Because of its durability and resistance to fire, it has become one of the most widely used materials in the world.

PVC, or polyvinyl chloride, is a popular material for making pipes and floors. Because of its low-maintenance and high value, it is an excellent choice for siding.


Merits and Demerits of  Painting Vinyl Siding

The natural color of vinyl siding may last up to 30 years before fading. A homeowner may begin looking at their alternatives sooner if there are a lot of damaged sections and panels. ‘Can you paint vinyl siding?’ may be on your mind if the panels are in good shape. As a replacement might cost upwards of $5000 for a typical-sized home, painting is a far more cost-effective option.

Painting, on the other hand, often costs between $600-$3600 per square foot. Acrylic paint adheres best to vinyl siding because of this. For the next decade or more, repainting may be unnecessary.

Before embarking on this process, consider how you want your house to seem, how to install vinyl siding, how long you’ve owned it, how good of a condition it is in, how much you want to spend, and whether or not you want to sell it.

It is also vital to think about the season and how weather conditions may impact the actual operation..

Merits to Painting Your Vinyl Siding


It’s cost-effective.

In certain cases, painting vinyl siding may save you thousands of dollars compared to the expense of replacing the material. Depending on your financial situation, this might mean the world.

For one thing, it saves a lot of time

It may take anything from 2-10 days to paint a home, depending on the size. Installing new siding might take 2-3 weeks. Because of this, it’s possible that it will affect the time of year or the schedule of the homeowner.

It’s Time for a Change

Refreshing the appearance of vinyl siding with a fresh coat of paint is one option. Repainting your walls is an easy method to update the appearance of your house if the colors are beginning to fade or if you just want a fresh start. Your panels will look as they did when they were first installed.

A Second Layer of Protection

Painting vinyl siding is a simple and effective method to protect your siding from the elements and extend the life of your panels.

It Increases The Value Of Your Home

Consider painting your vinyl siding if you plan to put your house on the market or if you’ve noticed that it’s lost some of its luster over time.

Painting Vinyl Siding Has Its Downsides, overall, the drawbacks of painting vinyl siding are minor. But here are four things to keep in mind.

Reasons why painting vinyl siding is not the best option

New Siding Has a Longer Life Expectancy than Old Siding

With proper maintenance, new siding can look great for decades. While on average, painting your house every five years keeps everything looking new – however you may not need to paint again for up to 10 years, depending on the characteristics of your property

If the vinyl siding is already damaged, it will only become worse with time. Occasionally, the damage is so extensive that replacing or installing new siding is the only alternative.

Color Mismatches

In certain cases, vinyl siding colors that are excessively dark might have a detrimental impact on a home. More heat may be absorbed by a darker color, which can lead to distortions in the smoothness and alignment of vinyl siding panels.

The warranty may be affected.

It is possible that painting the siding while it is still under warranty might void the warranty. Before making any selections or painting your vinyl siding, be sure you read the terms and conditions first

There you have it…the advantages and disadvantages of painting vinyl siding vs installing vinyl siding. At first, deciding on a course of action gives you an immediate lift, but looking at the home from the outside might be overwhelming! Many hands and other tools are often required to complete a huge undertaking like this. Call Lucky Painting Limited Calgary instead if that option isn’t feasible or accessible to you. Whether you have a query or need a service, we’ll get it done on time and within your budget!