
What about that adorable little home down the block has such a bright garage door? The fact is, your neighbors wanted it to stand out, therefore they used that precise color! In addition to being eye-catching, the garage door’s bright paint also serves as a weather barrier in Calgary’s ever-changing climate. Whether you have an aluminum, vinyl, or metal garage door, these painting ideas will come in handy. Choosing the correct paint color will be discussed in this article on how to paint a garage door and metal doors . In other words, keep reading if you want your garage door and other metal doors to be the envy of your neighborhood! 
Choosing the right garage door the color of the wall paint
When painting the front door an accent color, some people advise against painting the garage door the same color as the front door. Some people may argue that this is the only viable option! Make sure that the color of your garage door doesn’t conflict with the rest of your house if you’re selecting a striking color. As long as your home is painted in a traditional style, merging in your garage door with the rest of the house would work well.
You might, however, opt to color coordinate with some of your property’s more striking accents. Color-coordinated garage doors and mailboxes or shutters are popular choices among homeowners. This is an effective way to convey a unified message and to seamlessly integrate disparate elements while yet retaining a sense of individuality.
Can I store paint in my garage?, can I paint my garage with red brick?
Preparation and Cleaning
Make sure the garage door is free of dirt and sand any areas that aren’t perfectly smooth. If you have a metal garage door, an abrasive scouring sponge can be an excellent choice. Use a powerful cleaning solution to remove any remaining filth, and then rinse thoroughly.
Use painters tape to mark the area you’ll be painting on the garage door once it’s been cleaned. To protect the sections you don’t want painted, use painters tape as a barrier. Protect your driveway from messes by laying down a drop cloth or tarp.
The most important of the three.
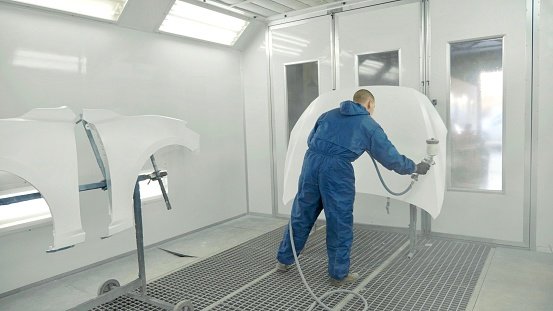
Pour some primer into your paint tray before you begin painting with a roller and a tray. Before you begin priming the garage door, dip your roller in the paint and roll it around until it is uniformly coated. If you like, you may skip this step and use a paint and primer in one. For areas that the roller can’t get to, use a paintbrush. Just let it dry, and you’ll be done!
Painters in Calgary that specialize in exteriors and interiors, as well as garage door painting on brick
A stone home with oak doors stained and a stained brick house; exterior painting and staining of the bricks.
Repaint the door of your garage
After the priming has dried, it’s time to get creative! You may prepare your paint in a tray and begin painting the garage door with a roller as soon as you have it. If the roller’s reach is limited, switch to a paintbrush to finish the job. You may need to apply a second layer of garage door paint if you want a lighter hue.
It’s best to paint vertically or horizontally if applying a second coat of paint after having painted the first one horizontally. This gives a professional appearance. After that, all that’s left is to wait for it to dry.
After that, you’re done!
Remove the painters tape when the paint is almost dry. Removing the painters tape right before the paint has dried will make it easier to remove the tape without leaving any residue behind. Avoids scuffing or smearing the paint.
Your garage door has been painted after you remove the tarp or drop cloth you laid down. Take a deep breath and bask in the glory of your newly painted garage door and the labor of love that went into it.
Removing and Repainting Metal Trim
When it comes to your home’s exterior, it’s the tiny details that may make all the difference. Neighbors will be impressed if your house’s paint job looks decent. Even the trim makes a difference! Check out this article if you have metal outside trim and are searching for some fantastic painting advice!
Make Sure the Metal Exterior Trim is Clean Before You Begin.
Before you arrive at the party, give your hair and nails a thorough brushing! Preparation is essential before you even begin painting. Getting rid of the years’ worth of filth and grime is a top priority.
Consider hiring our exterior house painters if you want to paint the outside of your home but don’t have the time or energy to do it yourself. A competent home painter can answer any questions or concerns you may have, no matter how big or little. Call +1 403-891-4138 or email info@luckypaintingltd.ca for a FREE quotation if the labor required in home painting seems like it would take too much time and effort for you to do it yourself. Also, don’t forget to connect with us on the social platforms!
Painting Metal Objects
- Using a power washer or a towel and some soap and water, scrape the windowsills and/or remove the metal trim, if necessary.
- Use painter’s tape to protect adjacent surfaces from getting paint on them.
- Install the outside metal trim.
- Removing the outside metal trim
- Remove the Metal Trim from the Exterior.
- Using a wood wedge and placing it on the wall behind the trim, you may use the pry bar to remove external trim without damaging the wall. Pry the window or door trim away from the surface it is fastened to using a tiny pry bar. When reattaching the trim, be aware that removing the old nails can enlarge the new holes. To avoid damaging metal trim, carefully raise and shift the pry bar.
- When necessary, use pliers. Also, use wood putty or caulking to smooth out any remaining surface irregularities where the metal window trim originally stood.
- Refinish Metal Window Trim Using Primer/Paint
- Exterior Trim Painting: What Are Our Views?
- You may paint on top of the metal outside trim after you’ve removed it from the outer door or window by laying it down on a sheet or cardboard.
- Exterior metal railings and trim should be coated with galvanized primer before painting. Allow the first layer to dry completely before adding a second coat to ensure that no brush strokes are apparent. It’s best to let this dry as well.
- Using a wooden dip stick to mix the acrylic latex paint with water in a can can give you a superior finish on your external metal trim painting! Allow it to dry.
- Once you’ve reattached the window metal trim using a hammer and bigger nails (to ensure a tighter seal), you’re all set! Your external metal trim is beautifully painted and has a long-lasting shine.
- Additional advice from a Calgary painting contractor, as per the following statement:
- Unless you use an etching primer when painting outside metal trim, the paint applied on top will rapidly peel away and become ineffective.
- When making a diluted paint solution, you should use around 1 gallon of acrylic paint and 1 oz of water to measure/volume.
- Apply primer or paint to the metal window trim.
- Paint for outside windows, window trim, and the exterior
- Choosing the perfect color for your home’s exterior paint job
- If you want your home’s exterior to convey a unified and subtle message, you should choose trim that is a few shades lighter or darker than your primary color. If your primary exterior painting color is going to be a light cream, like Calming Cream, then choose a tan for your trim and accents.
- To make a statement, consider using a stark contrast between the colors in your design. You can’t go wrong with a white or cream home with black trim, for example. It’s timeless and classic!