The Value of Triple-Pane Windows

You’re not the only one who’s ever been curious about the differences between double- and triple-pane windows. Many homeowners are perplexed by these possibilities. However, all is not lost. Your search has ended.

What distinguishes a triple-paned window from a double-paned window will be explained in this article. There are several ways to tell whether your windows need replacing, and what to look for in a high-quality replacement.


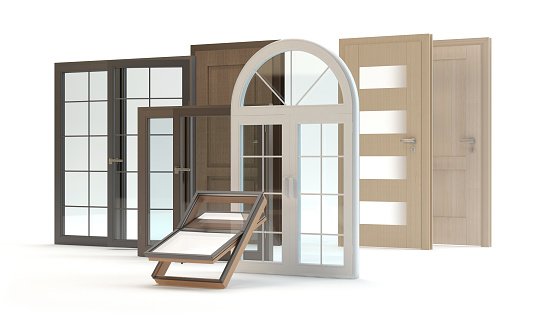
Double-Pane vs. Triple-Pane Windows: Which is better?


Isn’t triple-pane glass better than double-pane glass? The complicated answer is, as the name implies, complicated.


You may want to consider triple-pane windows if you live in a region with high summer and winter temperatures. In certain cases, though, they may be a waste of money.


Let’s take a closer look at each option’s details.


A window with two panes

The building of double-pane windows is quite straightforward. The frame has two panes of glass instead of one. Filling the gap between the two panes of glass is commonly argon or krypton, an inert gas that acts as an insulator (or a combination of the two).

If you can, use low-E glass for your windows. This form of glass has a coating on it that reflects solar heat radiation while yet allowing light to pass through. Glass made from Low-E material is more energy efficient, which means less strain on your HVAC system and a less impact on your budget.


Pros


According to energy savings, it’s a good investment.


Easy to obtain from most manufacturers, no matter what the size or type of your windows are. •


  • A choice of frame materials are available.


Cons


  • Low-quality windows’ seals may break.


There is a high expense and difficulty in replacing broken glass panes


Windows with triple panes


In comparison to double-pane windows, triple-pane windows are less popular in the United States. Double pane windows have two panes of glass, whereas triple pane windows have three panes of glass.


Many people are presumably aware of this. The window’s performance will be affected as a result of this.


If your window has three panes, your house will be more protected against heat loss. If you reside in a location where the winters are very severe, triple-pane windows may assist reduce the amount of heat that is lost through your windows.


If you reside in a region where noise pollution is a problem, triple-pane windows may be a suitable choice. The sound attenuation provided by the additional pane of glass is substantial. Consider the whole cost of windows before making a final choice.


One of the biggest drawbacks of triple-pane windows is that they are both expensive and heavy.


Krypton gas is often used to fill the two gaps between the three panes of glass. In addition to the higher weight, Krypton gas is more costly than argon and has a greater density.


Pros


More efficient than two pane windows in terms of energy efficiency


The reduction of outside noise has been noticed.


Cons


  • Energy savings may not be substantial enough to warrant the additional costs


  • Additional weight may need alterations to the construction of your house.


Window Replacement: Is It Necessary?


New windows are a wise investment, as are the majority of exterior house improvements. The return on your original investment might range from 70% to 85%, depending on the style of window and the material used. Vinyl replacement windows are the most popular option, according to a wide range of experts.


However, if your windows need to be replaced, the investment makes sense.


It’s not always a negative thing to be old. Make other house upgrades first if your windows are in excellent condition.


Replace Your Windows If You Notice Any of These 5 Symptoms


Take a look at these five typical warning flags. If you see any of these signs, it may be time to contact a local window company for an estimate on window replacement.


  1. Windows with just one pane


You can’t beat the insulating capacity of two (or three) panes of glass even if your home’s single-pane windows are in excellent condition.


After installing double or triple pane windows, you’ll notice a considerable reduction in your heating and cooling bills.


The inability to maintain a constant temperature in the house


Your HVAC system will have to work extra hard to keep your home comfortable if your windows are old and drafty.


The windows should be checked both inside and outdoors if they’re at ground level if you’ve observed hot or cold spots in the home. Get in touch with an experienced window replacement company as soon as possible.


A foggy window


It is inevitable that the seals on older, lower-quality double-pane windows will break. As a result, condensation forms on the space between the glass panes, resulting in discolored areas.


In the event of a failing seal, your only option is to have the window replaced entirely. Only the foggy portion of the glass may be replaced by certain firms.


However, you should be aware of this. Replacing an old window with a new one is often the most cost-effective option.


Windows that aren’t working properly


Broken windows are not only inefficient, but they also represent a major risk to the health and safety of the occupants.


A glass firm may be able to replace the broken pane, depending on the amount of the damage and the design of the window. The only way to fix it is to buy a new window.


Damaged windows are fifth on our list.


Windows are subjected to the same wear and tear as the rest of your home’s exterior.


In terms of weather resistance, vinyl and aluminum windows are superior than wood. Wood-frame windows, if not properly cared for, may begin to rot.


Look for replacement choices if you find soft or discolored spots on the frame.


Choosing Windows of the Highest Quality


Replacement windows may be a bit of a challenge to choose from. How do you tell whether the window you choose is any good, given all the possibilities?


Look for the following:


  1. A well-known manufacturer


It’s possible that you’ll need warranty work or new windows down the road. It will be simpler for you to acquire aid from a reputable window business than a fly-by-night organization if you find yourself in this situation.


a person’s sense of beauty


Depending on the architecture of your house, the design of your windows may be influenced. You may not get the return on investment you were looking for if you pick windows that don’t match the architectural style of the property.


In any case, make certain you’re satisfied with the appearance of the windows. Once they’ve been installed, you won’t be able to prevent them.


The ease of usage is the third factor.


Don’t be afraid to use the store’s display windows; they’re there for a purpose. Every window that attracts your attention should be examined.


Does it take a lot of effort to open and shut them?


If you don’t have a ladder, can you clean them from top to bottom?


What do you think about the latches?


  • Is it possible to remove the screens without damaging them?


  • Is the weatherstripping properly attached?


If you can’t respond yes to any of them, it’s time to move on.


  1. Efficient use of energy


Your utility expenses will go down as a result of having new windows installed.


Argon, krypton, or a combination of the two should be used in multi-pane windows. In comparison to air, these gases are more effective in insulating.


Choosing low-E glass will help you save the most money.


The End of the Story


Replaced windows may save you money every month if your current windows are single-pane, drafty, or broken. Having replacement windows installed will give you a sense of relief.


All you really need is a pair of double-paned windows in most circumstances Triple-pane windows are an option to consider if you anticipate a particularly harsh winter each year.


Window technology is constantly improving. For the best value, deal with a window business that is up to date on the latest energy-saving technology.

Everything You Need Know About LVT

Details about Luxury Vinyl Tile

Choosing new flooring may be overwhelming, as anybody who has done so will attest. When it comes to selecting a style, there is no shortage of options. Luxury vinyl tile, often known as LVT, is a fantastic alternative to consider. With LVT, you get the beauty of most flooring materials with the durability and long-term performance of vinyl tile. Unlike vinyl of your youth, this vinyl may be cut and placed to look like ceramic tile, stone, or wood, with the additional advantage of water and damage resistance..

For the time being, my family is looking for a new place to call home. Floors are important to us since this is our first home, and we learnt this early on in our house tours. We decided whether or not we desired a home based on its composition, color, and pattern.


Carpeting and wood flooring are both lovely, and each person has their own set of advantages and drawbacks to weigh when making a flooring decision. Things in my own family led us to look for something new. 🙂


Things are spilled on us since we don’t get along with carpet very well. Often.


Water, scratches, and ordinary wear may rapidly ruin our present wood floors. •


Keeping up with the upkeep that natural flooring requires is not something we want to include into our budget.


Later, we went to a home with luxury vinyl tile and luxury vinyl plank (LVP) all over it a few weeks ago. As soon as we walked in, we were immediately enamored with its varying shades of blue, along with its kitchen, which featured similar flooring in a different colour. Finally, our lightbulb moment had arrived:


  • Today’s LVT resembles real wood and stone in appearance.


  • The many colors and patterns available in LVT make it simple to tie a full home design together.


At this point in our life, we can’t afford LVT’s polished style and high-end aesthetic.


It was just what we were looking for, plus it has the wear resistance we need with two kids and a dog running around.


A flooring specialist can help you choose the right design and material for your home’s needs if you’re in the market for a new floor like I am. A professional can tell you which of your favorites will work best for you and your lifestyle by taking measurements of your rooms and inspecting the slope and composition of your floor. Learn more about why LVT is such a popular choice for flooring in the following paragraphs.


What Is Luxury Vinyl Flooring?


Because of its long lifetime and low-maintenance needs, LVT is an excellent choice for my family. An aluminum oxide layer covers the wear layer, which is formed of transparent PVC, and protects the surface and texture of the tile. LVT is a hard flooring that is constructed of many layers.


Consider the thickness of the wear layer of LVT while selecting a material. Depending on the application, the thickness of LVT may range from 6 to 30 millimeters. LVT’s wear layer protects the vinyl image layer and prevents deep gouges or rips, keeping the LVT in good condition for many years.


The vinyl image layer is where the visual appeal is found. There are various options for pictures or colors, and the clear finish on top adds depth, making the tiles remarkably realistic copies of both natural and artificial materials, including the following:


  • Wood


  • Tiles made of ceramic


  • Limestone, granite, and sandstone are


  • Bamboo


  • Fabric


  • Cement


  • Art


  • Patterned fabric


There are a wide variety of color choices to choose from when it comes to LVT, which is similar to most other flooring materials. Tiles or long planks (LVP) of LVT are available, and you may even have it highly embossed or textured to further avoid slippage or to enhance the floor’s look.


Options for Vinyl Flooring


Vinyl isn’t all created equal. The term brings back memories of my childhood house and the bright red vinyl floor in the kitchen. A bright yellow linoleum floor was installed exactly on top of the previous one. Vinyl’s biggest downside is its inability to withstand gouging, denting, warping, and scuffing, despite the fact that design choices have increased dramatically over time.


With LVT, the vinyl may be created in practically any pattern, and the additional layers of protection will handle the wear and tear of daily usage over time. You can’t harm the vinyl print layer, which is resistant to fading. LVT is also more affordable than wood or stone because of its lower cost. Natural materials need constant polishing and refinishing because of the high expense of maintaining them. Unlike wood or stone, LVT is impervious to stains and dampness.


Adding LVT is a low-cost solution to give your house a fresh, polished appearance while also updating your interior quickly and affordably.


Maintenance and Repair of LVT


Grouting further improves the “real-looking” appearance of LVT since LVT may be placed much like tile or wood planks. Over time, it needs extremely little upkeep, making it a long-lasting and durable material.


The procedure for putting up new LVT flooring


You may begin the installation procedure as soon as you have picked a flooring specialist and your LVT. So, be prepared to leave the rooms alone until your flooring specialist advises you it’s okay to walk on the floors again throughout the remodeling. The flooring firm is likely to provide the following services:


  • Remove the old flooring.


  • Fill up any holes, seams, or low points in the subfloor.


Allow the LVT to be put just below the base trim by removing doors and base trim if required.


The quality of your subfloor will determine whether you need to install vinyl or plywood underlayment.


  • Make a mark on the floor to indicate where the first tile should go.


A “click lock” mechanism or tile adhesive may be used to secure the tiles in place.


  • A roller is used to set the LVT.


  • Grout


How to take care of your new LVT floor coverings


Cleaning and maintaining LVT is far easier than cleaning and keeping natural flooring. Your LVT will look great for many years to come if you maintain it according to the same rules that apply to any other hard floor surface.


  • Vacuum or sweep the floor every day.


LVT-specific cleaners should be used.


  • Use just a little amount of water at a time


  • As soon as possible, clean up any spills that occur.


With a vinyl floor finish or sealer, you can disguise any deep scratches or scuffs on the floor.


The broken or scratched tiles may be replaced one by one if required.


Does LVT Hard Surface Flooring Fit Your Lifestyle?


The richness, color, tone, and pattern of the material have a significant role in flooring. If you’ve chosen to go with a hard surface floor, you should obviously consult a flooring expert. A 3-D representation of renovation options may also be available to help you better picture the finished outcome. Your alternatives will be clarified at the very least if you consult with an expert.


More and more designs and colors are becoming available for LVT, making it a serious rival in the flooring industry. There are even LVT designs that appear like cloth, and that’s something I’ve never seen before in a home’s flooring. I saw a light blue burlap version, and it was stunning. There is nothing wrong with preferring the look and feel of real wood, stone, or tile. No matter what kind of flooring you pick, it will be an expensive undertaking if it is not properly installed by a professional. Make sure you acquire all the warranty information after the installation is complete.


If you’re looking for new flooring because of wetness, excessive foot traffic, or a lot of tiny messes, LVT may be the best option for you. I’m eager to see what LVT and LVP have to offer, and I’m sure you’ll be too. It’s gorgeous, sturdy, long-lasting, and multifunctional, so you can bet it’ll be in my next house. I can’t wait.

What to do when moving into a new home

The process of moving into a new house may be overwhelming. To be honest, we frequently overlook the importance of the things you do once you move into a new house because we think that the simple task of packing and unpacking is all that stands in the way of a smooth transition. When you become a homeowner, you’ll need to get to know your house, find out how it works, and prioritize the improvements you want to take on.

There is no denying that you have a lot going on in your life at the moment. Here are the top 10 things you must do before moving into a new house, in case it helps you organize your to-do list. The majority of these processes aren’t time-consuming, but they do demand some work on your part to complete them. After you’ve learned everything you need to, make a game plan. When the dust settles, you’ll be able to sit back, relax, and toast your new home.

Taking a tour of the property is the first step.


There is no better time than when your new home is absolutely vacant to do a thorough tour. Now is a good time to have a look around before you start unpacking and setting up your furniture (and even better, before you start emptying the moving truck if you can). You should make sure, among other things:


  • The prior owner completed all required and agreed-upon repairs.


  • All of the items that were supposed to be included in the sale are in the home.


  • All of the outlets, switches, and fixtures are fully functional.


Call your realtor immediately if you discover a problem with the sale contract (for example, the previous owner took the washer and dryer with them while they were meant to leave them behind). You’re now responsible for any concerns that weren’t addressed in your contract, but it’s helpful to know what they are.


  1. Pet- and child-proof (if Necessary)


In order to ensure the safety of your small ones (or even your furry four-legged kids) while you’re still setting up your new house, you’ll need to undertake some preliminary child proofing. Creating a kid-free zone for abandoned packing items and inspecting all windows to ensure they are securely closed and clear of long dangling cables from the blinds are just a few of the childproofing ideas we provide in our moving day guide. Keep any potentially harmful items (such as box cutters, cleaning tools, and glassware) out of the reach of children.


What’s Happening and Where?


Moving into a new house can be a time-consuming and stressful experience, so it’s best to have a plan of action in place before you get started. This is especially true for heavy and bulky things, such as furniture. Assuming that you already know which items belong where, take a few moments to envision how you want your space organized. It is possible to make modifications later on, but having a broad framework in place will make this effort much simpler.


  1. Verify That All of Your Utilities Are Working Correctly.


If you had your utilities set up before moving into your new home, now is the time to check sure they are operating correctly. Moving day is a great time to make sure that all of your utilities are working properly. Make a call to your neighborhood waste management facility to confirm that your new residence is also set up for rubbish pickup..


Fuse Box and Water Valve may be found in this step.


It’s a good idea not to search for the fuse box or water valve when you actually need them. Because of this, it’s best to know where they are in advance so that you can get there quickly if you lose power or need to turn off the water for any reason. In general, your fuse box can be found in your basement, garage, or storage room, whereas your home’s water valve can usually be found around the perimeter of your house.


  1. Perform a thorough cleaning


When you’ve just moved into a new house, the last thing on your mind is cleaning it from top to bottom. However, now is the greatest moment to do it. The good news is that we’ve put together a guide on how to thoroughly clean a new home. Calling in professional cleaners if you don’t have the time or interest to do it yourself (and we don’t blame you) is an option. Starting your new life in a clean house is well worth the effort, regardless of how much it costs in terms of time or money.


Repairs Should Be Put First


Unless you’re moving into a brand-new house with no past occupants, you’ll almost certainly have some repair jobs ahead of you. Although the house inspection should have given you a good notion of what these are, it never hurts to go around on your own to get a sense of what needs to be done and what’s most important. It’s not necessary to start working on these repairs right away (after all, you’ll have plenty of time to do so once you’ve settled in), but a list of what needs to be done and in what order you intend to do it will help you put your repair needs into perspective and give you a better footing for when it’s time to get the ball rolling.”


Your locks should be changed at least once every year.


Changing the locks on your new house is always a smart idea. Anyone might have a key, even if you don’t care about the prior owner. It’s best to be safe than sorry in this case, so call a locksmith or, if you’re confident, replace the locks on the door yourself. Do a complete rekey of your home’s locks, including the ones on the interior and exterior doors and windows. For a few dollars, you may have a lot more security than you bargained for.


Changing your address is the ninth step.


The post office may already be aware of your new address, but if you haven’t done so, now is the time to do so. Be careful to advise your friends and relatives, subscription services, your bank, any loan providers you have, and anybody else who sends you regular mail or invoices of your new location as well. The entire list of people who need to be notified may be seen here. For a new driver’s license and updated car registration, contact your state’s department of motor vehicles once you relocate to a new state.


Ten. Get to Know Your Neighbors a Little Better.


Right after you move in, it’s a lot less uncomfortable to meet your neighbors. You may also use the opportunity to meet your neighbors to learn more about your new area and receive suggestions for local businesses (like this locksmith) in case you ever need them. Don’t go door-to-door, but do introduce yourself to a new neighbor the first time you see them. A smile and a pat on the back can go a long way.


It’s normal to feel overwhelmed when moving into a new place, but following the 10 steps outlined above may help make the process a little less daunting. As a result, don’t be hesitant to seek assistance from a friend or member of your family as well as a professional service provider. There are a lot of things that need to be taken care of before your new house can really become your home.

How to Prepare a Deck for Restaining


Steps must be taken before using a cleaning, stripper, or re-staining a deck. Some are necessary for the job at hand, while others are more crucial for maintaining peace and security in the home. Spring cleaning and preparing a deck for staining are not the same thing, but there are some parallels as well.

It’s important to remove all of the things off the surface that will be restained before beginning the process.


Reduce damage from run-off by soaking the ground and covering it with plastic to prevent contamination. When you’re done, instantly uncover what you’ve been working on.


  • Use plastic wrap to prevent liquids from splattering on glass and metal surfaces.


Remove or cover any goods that are stored beneath the deck.


  • Make sure the deck is free of leaves and debris by raking it.


Any loose screws or nails should be fixed.


Planks that are decaying or broken should be replaced.


For the best results, use a stiff-bristle floor brush with soap or detergent and water, if necessary; rinse and repeat as necessary.


As long as you’re using the same kind of stain and the same color,


  • There are a variety of commercial deck cleaners on the market, as well as several home-made formulas.


Most filth, grease, and grime may be removed using all-purpose deck cleaners that include mild detergent.


  • Use a mildewcide cleaner on moldy or mildewed decks.


Use a restorative cleaning or brightener on aged and grayed decks.


  • Use and clean up should be done according to the instructions on the container.


  • When necessary, put on safety gear and equipment.


  • To apply the cleaner, use a hose and applicator attachment, a power washer, or a bucket and brush.


The best way to apply and scrub is to work from one end of the deck to the other. It’s important to remember that you aren’t attempting to remove all of the stain.


  • Use a squeegee or a cloth to remove any pools or puddles.


The stain won’t soak as effectively into wet wood as it would into dried wood, so let it cure for 24 to 48 hours for optimal effects.


If the color or brand of stain is being replaced:


Use care and cautionary measures, such as following safety instructions and using the proper protective gear.


  • Use a plastic bucket or watering can to apply the deck stripper (NOT metal).


From one end to another, work backwards in a counter-clockwise direction.


  • Apply the remover with a stiff-bristled synthetic brush.


In general, manufacturers recommend that you leave it on the skin for 10 to 15 minutes, but don’t allow it to dry.


A hard synthetic brush may be used to remove tough bindings from the deck, but be cautious not to slide.


  • Thoroughly rinse the surface to get rid of all the stripper. To dilute the wash-off, soak the polluted ground and surrounding plant life with water.


Follow the manufacturer’s instructions for using a Brightener to restore the wood color and pH balance. You should thoroughly clean the deck before applying a stain to avoid streaking.


  • Rinse plants well after removing the protective plastic.


  • Wait 48 to 72 hours before staining the deck.


A Step-by-Step Guide to Re-staining a Deck That Has Already Been Stained


As soon as the wood has cured, it’s time to apply the stain; the key is patience.


Read up on various types of stains and invest in a high-quality product to achieve the best results. Check the temperature range and drying timeframes in the directions. See if you have enough time before a heavy dew or rain to dry up a few applications. How long do you have before something or someone needs your attention? Spend as much time as you need on the project; rushing it leads to more mess and a greater chance of spillage.


How to apply stain to your deck:.


Protect surfaces you don’t want to be discolored by covering them with plastic or paper.


Stain brushes with natural bristles should be used. A decent brush is better than a roller or sprayer when it comes to applying stain on wood. Alternatively, the brush may be attached to a pole so that it is more comfortable for the user’s back and knees.


Test the stain on a hidden area of your deck first. There is nothing worse than halfway through a project and realizing you dislike it.


Avoid dripping or splatters by staining many boards at a time. Stain overlaps are darker and more prone to peel if all boards are stained from end to end.


  • Apply the stain to the exposed end grains and the seams between the boards.


  • Remove any remaining liquid with a brush or wipe.


When you’ve finished painting, take a moment to admire your work before it’s coated in dust and dirt again.


If the stain is still wet, don’t put anything back until it’s completely dried.


Conclusion


In addition to making the deck seem better, refinishing it may extend its useful life by years. The previous stain does not have to be stripped or sanded off the boards if you use the same kind of stain from the same manufacturer. You should now have a better idea of how to prepare and stain your deck so that it looks as good as the day you bought it.

9 home improvements tips

In only ten minutes or less, you may make a number of home improvements.
Have you compiled a to-do list of quick fixes around your house? Whether it’s noisy cabinets or creaky floorboards, every home might benefit from a little tender loving care. If even the prospect of making little alterations to your house scares you, keep reading. There are a number of things you can do to maintain your house in top condition, and we’ve put up a list of nine.
1. Overloading of Outlets

Check your electrical outlets for frayed wires or the dreaded “outlet overload” every three months. Plugging in a new bulb or small gadget isn’t a big deal for most people, but overloading an outlet may lead to problems.

Check each room for overloaded outlets and install a power strip if necessary. Prevent storm-related losses by purchasing one that has surge protection for your devices, such as TVs and laptops.

The second option is to run on empty.

The incessant gurgling of a toilet is one of the most irritating aspects of owning a house. Replacing the flapper is a common do-it-yourself solution.

Add a few drops of food coloring to the tank water to see whether a worn-out flapper is the issue. The flapper is to fault if there is any bleeding into the bowl. Get in touch with a local plumber if it doesn’t leak down the drain.


3. Create a Feeling

Changing to LED or CFL bulbs may have given your house a more modern look and feel, but the white light doesn’t seem to have the same cozy glow. Switch to yellow-toned CFL bulbs that mirror the brilliance of incandescent lights, but with greater energy efficiency, in only a matter of minutes.

Keep the white or blue lights for the kitchen and other areas where you’ll be working, such the living room or bedroom.

Make a Difference

When you move a piece of furniture, a divot appears in your carpet, ruining the aesthetic appeal. With a few easy steps, you can make your carpet seem like new again.

The damage in the carpet may be fixed by placing a couple of ice cubes in the area. After a few hours, use a spoon or a gift card to fluff up the strands and smooth them out.

Dispose of Cement Spots

If your car’s undercarriage is leaking oil or any other fluid, cement garage flooring and driveways may absorb the liquid. It’s a breeze to erase the oil stains.

Allow 15 minutes for the unused clay-based cat litter to rest on the oil stains. Before washing away the litter, crush it into the stain and let it soak in. If necessary, repeat the procedure with a little dish detergent or scrape until the oil stain is faded or gone.

Put an end to the squeaks!

As soon as you step on them, either hardwood or carpeting will squeak loudly. Try one or more of the following:

• To prevent the floors from grinding against one another, sprinkle talcum powder on them and massage it in. The friction between the flooring is lessened by the use of talcum powder.

Use a stud finder to locate the floor joists on a carpeted area. Using trim-head screws, fasten the subfloor to the squeaky floor by driving them into the pile.

7. Disguise the Areas of Interest

Repainting the whole room is not necessary to fix little water spots on the ceiling. Before you do anything else, check for and fix the leak in the bathroom or the roof that caused the discoloration.

You may use a diluted bleach solution in a water bottle to get rid of any mold or mildew that may be growing on the ceiling after you’ve finished the main repairs. It can be applied to both rough and smooth surfaces, however it may need more than one coat.

8. Correct the Streaming of Thought

A filthy aerator screen might be at blame if your faucet is dripping at a trickle. Hard water minerals and sediment particles might clog the screen, resulting in decreased water flow. You may simply remove it with pliers or by hand, flush it clean, and then reinstall it in its original location. If your water flow is restored to normal, you’ll be able to go back to work.

Refresh Your Look

When your dishwasher is emitting a bad stench, it’s difficult to know whether the dishes are clean. White vinegar is all you need to get the job done. Your dishwasher will smell fresh and clean without you needing to scrape it.

It’s best to run your dishwasher’s hottest cycle with a cup of vinegar in a cup or bowl on top of it. If the stench is especially strong, you may need to repeat the process many times. Wipe off the seals of the dishwasher when it has cooled down. For your microwave, give this method a go as well!

A Beginner’s Guide to Pressure Washing

Despite the fact that you can’t see filth and grime on the outside of your house, it’s still there. The filth you’ve gathered around your house isn’t an indication of how well you keep it clean. It’s simply a part of life. With or without your permission, your home is constantly exposed to the weather.

The good news is that you don’t have to watch helplessly as dirt and filth ruin your lovely house. When it comes to cleaning the outside of your property, you may use a pressure washer instead.


It seems simple, doesn’t it? Hold on. Some conditions apply.


Inexperienced usage of pressure washers may result in serious injury or even death. Before you get started, do your research. For those new to pressure washing, here is the place to start.


We’ll cover… in this tutorial.


  • Pressure washers of various types


A power washer suitable for the task at hand


  • What kind of nozzle should you utilize?


  • Power washing safety advice


When and how to clean certain surfaces.


Do you have an idea for a new project? Learn the basics of power washing in the following paragraphs.


What’s the Difference Between a Gas and an Electric Pressure Washer?


Pressure washers use a pump to boost the flow of water via the linked hose, resulting in a higher pressure. Gasoline or electricity may be used to power this pump.


In both cases, there are advantages and disadvantages.


Pressure washers powered by gas.


The PSI (pounds of pressure per square inch) and GPM (gallons of water per minute) of gas-powered washers are generally greater than those of electric washers. Because of the increased cleaning power, they can get the job done considerably faster.


There are several advantages to using gas pressure washers.


The PSI and GPM outputs of gas-powered pressure washers may vary widely. To top it all off, you’ll have many more possibilities to choose from than you would with electric ones.


Cordless: • Gas pressure washers Working without a power outlet isn’t an issue.


The drawbacks of gas pressure washers


  • Gasoline engines, no matter how little, require regular maintenance. The oil will need to be changed often and the correct fuel additives must be used if you want to keep the machine in storage for a long length of time.


When it comes to noise pollution, gas engines outshine electric ones. Additionally, they are a source of pollution. The use of a gas-powered pressure washer inside or in enclosed areas is also a bad idea.


Pressure washers powered by electric motors


In certain cases, electric washers are more handy than gas-powered counterparts. Aside from that, there are no gas smells to worry about.


Advantages of Using an Electric Power Washer


Pressure washers that run on electricity do not emit any dangerous pollutants. However, you would need to wear hearing protection and have a solid method of draining the water before using one inside.


There are no oil changes or other maintenance jobs to worry about with an electric engine.


Electric Pressure Washers: The Downsides


  • A gas-powered pressure washer is just too powerful for an electric type. An electric pressure washer will take significantly longer to clean a big or particularly unclean area. (Also, don’t expect to get the outcomes you were hoping for.)


  • Electric pressure washers are less portable than gasoline models because they require a power outlet.


RELATED: Grout and Tile Deep Clean


What’s the Best Pressure Washer Size for Me?


It doesn’t matter whether you go with a gas or electric pressure washer; you’ll still have to decide on the engine size.


The overall power of the machine is determined by the size of the engine, as with any other machine driven by an internal combustion engine. Compared to a bigger engine, a smaller engine can’t provide as much water pressure or gallon-per-minute production.


Pressure washer engines may be divided into four general categories.


Pressure washers designed for light duty


Water pressure in light-duty pressure washers is less than 2,000 PSI. A light-duty electric pressure washer is all you need if you simply want to clean a few outdoor items, such a deck or a patio, on a regular basis.


Washers that can handle medium-duty cleaning tasks.


Is your home’s exterior in need of some TLC? Medium-duty pressure washers are necessary. Between 2,000 and 2,800 PSI, this pressure washer can squirt out water.


Pressure Washers Designed for Heavy-Duty Cleaning


Heavy-duty pressure washers are a good option if you plan on cleaning huge sections of concrete or want to access a second floor. Between 2,900 and 3,300 PSI may be reached with heavy-duty pressure washers.


High-Pressure Cleaning Equipment for the Professional Market


Are you going to be pressure washing a lot? You’re getting ready to paint the outside of your house, aren’t you? If so, you may want to consider purchasing a high-quality pressure washer. Big chores that require a lot of time may be handled by the extra-heavy-duty engine. A water pressure of 3,300 PSI or more is possible with these power washers.


If you’re going to use a pressure washer, don’t forget to factor in the GPM measurement.


Your Job Requires a Different Type of Nozzle.


The angle of the water stream is determined by the nozzle you pick, not the pressure washer’s engine size.


The angle of the water stream has a significant impact on its capabilities. A large-angle spray is less effective than a spray with a restricted angle.


The Use of Different Colors for the Nozzles


A good thing about pressure washer nozzles is that they come in a variety of colors.


Nozzles that are red in color


There is a zero-degree angle on a red tip. Using this trick will result in a powerful jet of water that may do significant damage, so proceed with caution. Any surface should be avoided while using the red-tipped nozzle up close.


Nozzles in the color yellow


Sprays with a 15-degree angle are produced by yellow tips. When you need to pressure wash the concrete surrounding your home, use this nozzle.


the green nozzles


A 25-degree spray is produced by a green tip. This is a good all-purpose pressure washer for the home. If you need to wash your vehicle or remove mildew from your patio furniture or deck, this is the nozzle you utilize.


Nozzles in white


A 40-degree spray is produced by a white tip nozzle, which is probably the easiest to operate. If you’re going to be cleaning the outside of your house, be sure to use the white tip. Using a white-tipped nozzle is ideal for cleaning windows and siding.


With black nozzles


The softest spray comes from a black nozzle, which has a 65-degree spray angle. In reality, because of its lightness, this spray is unable to effectively remove dirt or stains from clothes. Use this nozzle instead when you just need to moisten a surface.


Adapters & Nozzles for Different Applications


Consider utilizing a cleaning attachment made particularly for the task at hand for even better cleaning results. Attachments for pressure washers include some of the most common ones listed below.


Cleaner for the surface


High-pressure water may be spread out over a broader area with this attachment’s rotating bar. Using this on big areas of concrete, like a driveway, may be beneficial.


The Nozzle of a Rotary Pump


A rotary tip, which is also known as a turbo nozzle, creates a water stream that spins at 0 degrees. When it comes to getting rid of tough stains and dirty buildup, this nozzle comes in handy.


Stain Remover for Brooms


Pressure washing brooms convert a single water jet into two or three jets for additional strength and a broader cleaning area, like a surface cleaner attachment.


An Expansion Wand


If you want to clean high places without a ladder, an extendable wand is a great option.


Laundry Detergent Repository


Soap/detergent reservoirs are attached to the pressure washer and used to provide cleaning solution to the water jet. Use the appropriate nozzle for the task. Soap may be pushed into the surface if the water flow is too vigorous.


Mold and mildew on siding may be caused by a variety of factors.


Pressure Washing


If you don’t know what you’re doing, pressure washing may be a real pain. It’s essential to devote the necessary time to preparing thoroughly.


Tips for Safe Pressure Washing


Beginners and experts alike might benefit from the following list of safety precautions.


Protective Gear for Your Eyes and Ears


The noise produced by pressure washers is deafening. Debris and water will also be sprayed back at you due to the tremendous pressure of the water. Wear eye and hearing protection at all times.


Take a Hold of Something with Both Hands


Hold the wand firmly in both hands until you feel more comfortable using the pressure washer.


Try to keep your distance.


Spraying too close to the surface you’re trying to clean might result in a lot of harm.


What Pressure Washing Should Not Do


Siding that was painted before to 1978 should not be cleaned with a power washer. Instead, call a power washing service.


When pressure cleaned, old paint might peel off. Lead may be present in paint that was applied before to 1978. Toxic lead paint chips and dust may be breathed or consumed unintentionally.


First and foremost, make sure that you, your family, and your pets are safe.


Pressure washing wood with a garden hose


When it comes to reviving the look of your wood deck or fence, pressure washing is a great option. As an added benefit, this is a job that can be completed in a few days.


What you’ll need is here.


  • A gas-powered pressure washer; an electric power washer may also be used, but it will take longer to complete the task.


Nozzle with a 25 degree spray angle: • A green-tipped one


  • The wood sealer of your choice


In the event that you have never used a pressure washer before, we strongly suggest that you do a spot test first. Pine and cedar are the most common woods used to build fences and decks. Overscraping is a simple mistake to make when using a scraper.


Here are a few pointers to help you achieve the results you’re looking for.


  • Use an equal, up-and-down motion with the wand of the pressure washer.


Make sure you don’t let the spray linger in any one location for the best results. Until you get the hang of it, you may have to go over the same area a few times. Rather of being too harsh and harming the wood, this is a far better solution.


Stopping the spray mid-board is a bad idea. Wait until you’ve reached the highest or lowest point.


  • Similarly, don’t begin spraying in the midst of a board.


Make use of overlapping strokes to keep visible lines to a minimum


After pressure washing the wood, it’s time to seal it against the weather. The wood must first be dried before it can be used.


Before you start building a fence, here are seven things to keep in mind.


Using a Pressure Washer to Clean Concrete


Everyday dirt accumulation on concrete is often disregarded in favor of more noticeable stains and mildew.. For example, you may be completely unaware of just how filthy your driveway is.


Pressure washing your driveway, pathway or patio is a simple process that only a few simple tools.


  • A pressure washer with a high GPM


  • A 15-degree spray nozzle with a yellow-tipped nozzle


  • Concrete cleaning solution designed specifically for usage


Scrubbing brush with a hard bristle


  • Goggles and gloves, at a minimum, are required.


  • Sealant for concrete


Make sure that you’ve got a high-pressure stream of water on hand while cleaning concrete, so that you don’t come into contact with any flying debris (including chunks of concrete).


It is possible to pressure wash concrete in a secure manner.


Before you begin, thoroughly sweep and brush the surface.


Stains from oil or other fluids may be pretreated with a stiff brush and a concrete cleaning solution using this method.


  • Use the correct nozzle while pressure washing the surface. The most powerful cleaning may be achieved by using a narrow spray.


Add soap to the pressure washer’s detergent reservoir and switch to the nozzle labeled “soap” if stubborn stains require further treatment.


Pressure washing may be necessary for stubborn stains. Before applying a sealant, wait for the concrete to cure fully.


This last step isn’t required, but it will help preserve the concrete’s appearance for the foreseeable future.


Pressure washer for cleaning soffit and fascia


There is a high risk of mildew and dulling on vinyl siding. Fortunately, pressure washing is the finest technique to brighten the outside of your property.


Here are the materials you’ll need to get the task done.


  • A pressure washer with a gasoline engine


A nozzle with a green or white tip


  • A soap dispensing nozzle


  • A brush with a long handle and firm bristles


cleaning solution for the outside of a residence


Take a walk around the exterior of your home to get started. Keep an eye out for water leaks, such as loose siding, cracks, and other breaches, when cleaning.


Before you pressure wash, be sure to repair any holes or cracks.


The following actions should be followed when you are ready to begin cleaning.


Add detergent to the pressure washer’s detergent tank by affixing the soaping nozzle to the wand.


Apply soap to the siding with the use of a pressure washer. Use a scrub brush to dislodge stubborn dirt or mildew if your residence has any of these problem spots.


Rinse the siding using the green- or white-tipped nozzles. Soap and grime may be rinsed away more easily and stubborn stains can be removed more quickly with the help of these two nozzles.


This task might take a long time depending on the size of your house. Do not haste, particularly when it comes to climbing up and down a ladder. Regardless of how long it takes, I’ll take it. The most critical aspect is your own safety.


Cleaning your siding may be necessary every few years depending on the weather and other environmental conditions.


The End of the Story


It’s possible that if you’re looking for immediate satisfaction when it comes to cleaning and maintaining your property, pressure washing might be just the ticket.


Pressure washing, on the other hand, may prove to be too much of a nuisance for you. That’s OK, too! If you’re going to do this, expect to be drenched. If you prefer to have a professional do the pressure washing for you, call a service provider.


It’s easy to keep the exterior of your house just as spotless as the inside with a little water and effort.

How Much Will Home Exterior Painting Cost in Calgary?

How Much Will Home Exterior Painting Cost in Calgary?

The value of your property will rise, and you’ll feel better about your investment if you repaint the outside of your house. Changing the appearance of your home’s exterior by painting it may have a dramatic effect. A comprehensive external restoration might take weeks or months, yet a simple coat of paint on the house’s siding can be done in a matter of days.

Your home’s exterior will be protected against harsh weather, bug damage, rust, mildew, and mold if you hire a professional painter. Having a new paint job done will make your house seem nicer, and it should endure for at least 10 to 15 years.

Is it time to repaint the outside of your house?

You may not be able to determine precisely when your house was last painted, but there are a few telltale indicators that it’s time for a fresh coat of paint.

To fix peeling, bubbling, or cracking paint on your walls.

Look for paint bubbling or peeling on the external walls of your property. If that’s the case, you need to take action immediately. It’s a sign that your siding is exposed to the weather if the paint on it has peeled away. The harm that may be done if you have a moisture issue is considerable. Mold remediation services are required if rot, mildew, or even deadly mold develop as a result. A professional painting business should be contacted for an outside paint job if the paint is peeling, bubbling, or damaged.

The color is deteriorating.

Exterior of your house takes a beating! Snow, rain, and the sun’s ultraviolet rays batter it. It will begin to disappear as time goes on. A fresh coat of paint on the outside of your house will keep it appearing fresh and well-cared for. In addition to making your house seem better, fading might be an indication that your paint is beginning to wear out and isn’t doing its job of preserving it.

Stucco and/or wood cladding have been damaged, as can be seen.

As a first line of protection against the elements, the paint on your house plays a crucial role. As a result, it won’t be around for long. Stucco or wood siding showing signs of rust or decay might be a sign that the paint has failed. It also necessitates that you fix the siding before painting. A new coat of paint will serve as an additional barrier against the elements after the repairs have been completed.

The siding has what seem to be stains.

It’s a bad indicator if anything seems damp or discolored from earlier wetness. Mold and mildew thrive in damp environments. A little detergent and simple scrubbing is all that is needed to remove any stains. A professional contractor should be called in if the stain does not go away on its own. While it’s possible to simply paint over a stain, more frequently than not, the stain will need the replacement of the underlying material.

How much does it really cost to paint the outside of a house?

According to HomeGuide, painting the outside of a property may cost anywhere from $1,811 to $3,201. For a 2,400-square-foot, two-story home, the average cost of painting the outside is roughly $2,500. That works out to around $0.60 to $1.60 for each square foot..

The cost of painting the outside of a home depends on a variety of things.

The size of the house is the most important aspect in determining the cost of painting the outside of your home. This affects both the quantity of paint and materials needed, as well as the amount of labor required. The painting contractor will begin their estimate by determining the total square footage of the surfaces to be painted and then provide a price based on that total square footage. How many crew members will be needed and how much cladding is being painted over may all have an impact on how much it will cost to paint anything.

The cost of painting the outside of a home will also be affected by the following factors:

Preparation


Preparation is the key to a successful paint job, whether it’s on the inside or the outside. The paint work will not endure if the surface is not adequately prepped. To ensure proper adhesion, the surface must be well cleaned. That might entail power washing, stripping old paint, sandpaper, patching cracks, holes, and priming the walls for the outside of the house

Additional gear

If your property is bigger than the norm, a painting contractor may need to bring in specialist equipment. Boom lifts or additional scaffolding may be necessary. It’ll be added to your final bill.

The total amount of time spent working.

According to HomeGuide, you should expect to spend between $30 and $40 per hour for each painter who works on your property. It will take roughly 36 hours for two painters to prep and paint the outside of a 1,800-square-foot house. That takes your total labor costs down to $1,8080-1,260.

Paints and other materials

For every 100 square feet of surface area, one gallon of paint is expected to be utilized. A gallon of low-quality paint costs around $21, whereas a gallon of high-quality paint costs roughly $70. If your home is 1,800 square feet, then you’ll need 18 gallons of paint to complete the job there. This increases your total paint expense to somewhere from $380 and $1,260.

Doors and trim

Painting the trim costs roughly one cent per linear foot. There are a variety of variables that influence the final cost of painting an external door, but generally, it ranges between $90 and $200 per door. Make sure you include these charges in your final estimate.

You don’t want to skimp out on paint. It will only last a few years if you use low-quality paint. When properly prepared, high-quality paint may endure up to 15 years.

The price of painting various surfaces varies.

It is possible to paint over most kinds of siding, with different outcomes and prices. Different varieties of siding need different amounts of prepping and priming, which affects the final cost. What you’ll need to paint each variety is summarized in the following table

Vinyl siding may be improved by painting it.

The color of your vinyl siding was designed to last for many years, but as time passes, it may begin to fade. Vinyl can be painted, which isn’t ideal but also not impossible. In general, if you paint your siding a lighter color than its original color, you may do so. That’s because deeper colors may distort vinyl since it can only absorb so much heat. It will be necessary to utilize vinyl paint that is specially formulated for this purpose. If your siding moves, the original color may show through the joints if it isn’t coated correctly, so take extra care while painting it. Brush and roller painting costs $43 per 100 square feet, whereas spray painting costs $34 per 100 square feet.

Metal siding may be painted.

Aluminum is the most often used metal for siding. Metal siding must be thoroughly cleaned with a TSP/water solution before painting. Afterwards, the surface was cleaned and dried before being sanded and primed with an oil-based primer. Paint may be applied once the priming has dry. Due to the lack of adhesion of spray painting to the surface, brush and roller procedures are required. This is the cost for painting using brushes and rollers: $29/100 ft2.

The process of repainting stucco

After a month or two of curing, new stucco may be painted. The paint won’t stick to the surface if it doesn’t. Painting contractors may use moisture meters to assess whether or not the surface is dry enough to paint. A dry day is required for painting once it has been sanded and any holes or cracks have been repaired. The absorbency of stucco makes it necessary to use more paint while painting it. Brush painting costs $112 per square foot, roller painting costs $55 per 100 square feet, and spray painting costs $25 per square foot.

Wood siding may be painted.

It might take a long time to prepare wood siding. A thorough cleaning and sanding process is required to remove any stray paint chips from the surface. A broken or decaying piece of siding should be replaced first. A wood filler may be used to patch up minor flaws in the wood. Brush and roller painting costs $43 per 100 square feet, whereas spray painting costs $34 per 100 square feet.

Repainting a brick

The surface must first be scraped with a dry brush and then cleaned with a TSP/water solution before painting. Painting may begin after the primer has dried. Brush painting will cost you $30 per 100 square feet, roller painting will cost you $52 per 100 square feet, and spray painting will cost you $18 per 100 square feet.

The price of painting larger surfaces might rise above average.

We briefly touched on the paint job’s intricacy above. Painting houses that are taller than usual is a major source of worry for painting professionals since it raises the danger to them and complicates their work.

Preparation and painting might take longer at heights of 8 feet or more. Due to the fact that the contractor must work from a ladder or scaffolding, they must utilize roller poles or wands on spray guns. To remain on the safe side and avoid accidents, the painters will take particular care due to the elevated working environment. You’ll need to adjust your budget if your house has any very high-priced features. If this is the case, the additional fee will be determined by your painting contractor.

Choosing a color for the outside of your house

Decide on the correct kind of paint for the job.

When choosing paint for your house, there are two things you need to consider: the kind of paint and the color options. To keep your house protected from the weather, the paint you select must be long-lasting. To avoid having to pay for a second coat of paint too soon, it’s critical that you get high-quality paint. Make sure it’s stain-resistant, has a fair amount of coverage, and has excellent external protection. If you have siding on your home, you’ll need to choose a paint that works well with it. It’s possible to use the services of a seasoned painting contractor for this.

Making paint color selections

Painting the outside of your house may be a difficult process. All that matters is that the color of your choice will be on display in your home for the next decade or more, which means you need to be happy with the decision.

Research exterior paint colors online if you don’t know where to begin. A better color profile may be found by looking through a few home improvement websites. To get an idea of how various colors would appear on your home, you may use certain online programs that let you upload a picture of it.

Online color matching tools may be provided by a paint retailer or a particular paint brand. You may choose a starting color and the computer will suggest colors that go well with it for you. You’ll be able to experiment with several paint colors for your home’s exterior, including the main walls, trim, and other elements.


Painting little sections of your home’s exterior might also help you get a sense of how the color will appear. To get the best results, paint a small section of the house’s south and north-facing walls. It’s a good idea to check over the paint samples in various light conditions throughout the day to ensure that you’re satisfied with how they seem.

What are the hottest paint colors right now?

For exteriors, neutrals and naturals continue to be popular. The colors you may choose to paint the outside of your house may be restricted in certain neighborhoods. If you’re not sure, ask your local community association.

Neutral beiges, greys, natural blues, and greens are the most popular colors. Keeping trim light and bright is a popular choice since it contrasts well with the primary color. Generally speaking, whites and creams are the finest colors for this, however some homeowners are opting for black trim. There’s a lot of room for experimentation when it comes to the front entrance. Colorful door options include red, teal, yellow, and black.

How to choose a painter

It takes a long time to paint the outside of your house. Equipment such as scaffolding, boom lifts, and ladders will also be needed. High-altitude prep and painting should be left to the experts since it may be dangerous. They’ll not only be able to do it securely, but they’ll also be able to do it more quickly, and you’ll get results that are professional and flawless.

If you’re going to hire a contractor to paint your house, you need to do your homework beforehand. Check for items like a company license, enough insurance, WCB coverage, and any pending concerns with the Better Business Bureau. Inquire about the contractor’s previous three projects and request to speak with some of their past clients. There are several ways to learn about the prior customers’ experiences, including looking at images and driving by. We at Lucky Painting Limited have made provision that eases your burden when seeking estimation. Call us now to book a free session.

Priming and Painting Lintel

Steel lintels are an extremely common component of most brick masonry buildings. Since they support the facade above a window, priming and painting Lintel becomes of extreme importance in keeping your house in shape.

The simplest method to maintain steel lintels that are not severely deteriorated is to scrape, prime and paint them on a regular basis. Installing exterior primer and paint on the lintel will help protect it from corroding elements. Before the steel lintels are scraped and painted, the existing paint on the lintel must be tested for asbestos and lead containing material. Paint often contains lead, and while less common, asbestos is occasionally found in paint. If lead or asbestos exists, the paint must be abated by a licensed contractor.


Painting will only prevent additional damage to a lintel, and does not correct any existing damage to the steel. If the lintel is showing signs of more significant deterioration, it should be replaced. For example, if the lintel is bowing or bending, a gap can form between the lintel and the brick masonry above. Another sign of a deteriorated lintel is rust jacking or oxide jacking, which occurs when the rust on the lintel expands and causes the mortar in front of the lintel to crack or break loose. These conditions can threaten the structural stability of a masonry wall.


Steel lintel repair is critical to extending its usable life and preventing structural damage. A primer and paint should be applied to steel lintels prior to installation, and any broken brick masonry components should be repaired or replaced. From the edge of the lintel to the brick masonry that backs it up, waterproofing should be applied. Adding a layer of corrosion prevention is made possible by this waterproofing. To keep the brickwork above the steel lintel in place, use brick ties. Brick ties, on the other hand, pierce the waterproofing of the lintel. Water should not be able to enter the inside if there are any gaps or flaws in the waterproofing.


The degradation of steel lintels may also be caused by improper drainage, which should be addressed while replacing lintels. Some new lintels are poorly sealed to avoid water penetration at the connection between the facade and the new lintels that have been placed. Sadly, this information may really be harmful rather than helpful. Despite the fact that sealant will keep water out of the wall, it will also retain any moisture at the lintel level of the wall. The corrosion of the steel lintel will be accelerated by the presence of water on it. At the bottom of the mortar joints, weep vents or weep holes should be built to guarantee that any water that may be trapped in the brick is expelled.


WHAT ARE THEY RESPONSIBLE FOR?

Lintels are a fundamental feature of any brick building’s structural framework, making them an essential aspect of any architectural design. Windows and doors in brick buildings have L-shaped steel components installed in the upper portion of the apertures. Rather of placing the weight directly on the door or window, these devices are designed to disperse it. Their long-term viability is greatly influenced by the changing climate. A skilled painter, on the other hand, is much less costly than replacing the lintels or the doors and windows that no longer open.


Maintenance of lintel systems is essential for the structural safety of your building.


Failure to keep your lintels in good condition might have severe results. It’s possible that a weak spot in one of them might cause a window to break or possibly the whole wall to fall if the building’s façade is supported by them. Our building painters can assist if you don’t know when the previous lintel maintenance project was done. A ten-year maintenance cycle with a yearly check is what we propose.


Deterioration of Lintels


Lintels are composed of steel, thus even though they aren’t in the open, they may corrode with time. Steel lintels may rust even in a brick construction because of oxidation. Moisture may seep into your stonework and corrode the lintels if there are cracks. All of these things may weaken your building to the point that it warps or collapses completely. Keep an eye on your brick buildings for signs of bulging or cracking. Doorways and window frames are particularly vulnerable to degradation of the lintel.


In what ways may a LINTEL be problematic?

Rust is a natural occurrence when metal is exposed to moisture. The purpose of windows is to keep out the elements, however this is not a foolproof method of security. In the Midwestern summer, humidity is a regular friend, and even a little amount of condensation on your window might be enough to create problems.

Steel expands greatly as it corrodes. When metal inserted within masonry rusts, it may grow seven times its original thickness, according to research. Even with so much extension, the window frame’s other components will be compelled to move. Your foundation’s exterior is damaged as a result of these moving components. When the window frame is attached to the lintel, you’ll notice a rusty red discolouration and metal flakes or scales in the same place.

WHAT IS THE BEST WAY TO FIX?

Cutting out, removing, and replacing the lintel is required. The best way to seal and preserve it from the weather is to paint it. Replacement of the rusty metal with galvanized metal is another alternative, which will survive longer than the standard steel lintel does. This is a great do-it-yourself project if you like working with your hands. Another option is to hire a mason, general contractor, or handyman.


An experienced local bricklayer or mason should be consulted if the mortar around the afflicted window or door has broken. To begin with, you’ll need to be sure that the lintel is responsible for the fractures. Cracks on the outside of your foundation may indicate that your foundation is sinking and need expert repair.

Restoring the Lintel’s Decline


Maintaining your brick constructions on a regular basis is the finest strategy for ensuring their stability. Be on the lookout for any signs of structural weakness. If you want to avoid crumbling, water retention, and structural damage, have a professional inspect and repair your masonry regularly. If your lintels have started to decay, you should contact in a professional for repairs. In addition to buckling, bulging and cracking brickwork, degradation of your home’s structural integrity may result in costly and complicated repairs. Make sure to keep up with lintel degradation maintenance and repairs to keep your brick looking its best for a long time.

The Way We Work

Lintels may be restored by scrubbing away rust and debris and sanding the surface to a clean finish by our team of experts. Only the finest rust removal products are used by qualified professionals, protecting your lintel metal from further rust.

To ensure that the rust-preventative paint adheres properly to a metal surface, we first apply a primer. Rust-Oleum and other high-quality rust-prevention exterior paints extend the life of your lintels

If you’re looking for lintel repair or replacement, we’ve worked on hundreds of houses and businesses.

Totally Free Quotes

To get a free estimate on whether or not your lintels need to be re-painted , repaired or replaced in Calgary and its environ, call us now for a free  quote or inspection of your facility.

Painting Brick Exterior

The practice of painting brick exteriors has grown in popularity in Calgary in the last several years. There are a plethora of advantages and hazards to consider, so the most important thing to determine is whether or not it is really necessary and what effect it will have.

When you’re walking around Calgary, you’ll see a lot of brick buildings. Brick, stucco, and siding are all typical options for exteriors of homes. It’s not merely for the sake of making your house seem nice on the outside. The most frequent construction material in the past century was brick and many homeowners opted to retain the original appearance of a brick house. In recent years, painting outside brick has become a popular trend due of advances in paint technology.

The exteriors of the houses are ancient and unclean due to the harsh weather and pollution in the air. Additionally, the brick external surfaces show signs of deterioration and weathering. Whenever you think it’s time for a fast cover-up and concealment of the flaws Painting over old external brick is the finest method. By sealing the wall’s surface, painting the external bricks will help improve the wall’s insulation.

In the Greater Calgary Area, the most popular exterior brick hues are dark charcoal, gray tones, chocolate brown, and off-white tints. Red exterior paint is a popular choice for homeowners who wish to maintain the brick’s natural hue.

In Calgary, property prices are rising at an alarming rate. The housing market is booming. Bidding wars are used to sell resale properties. To receive the greatest potential price for their houses, homeowners pay close attention to all aspects of the transaction. A painted brick house will attract more attention from potential buyers if it is properly painted in a color that complements the architecture and character of the property. It’s an excellent technique to cover defects and make their property more appealing, which leads to greater offers and a faster sale.

The easiest approach to determine whether or not to get your home’s outside brick painted is to listen to the advice of an experienced real estate agent. Simply because it is not possible to get back to a house’s original appearance after painting over an outside brick. There’s no going back once it’s completed.

A professional opinion is especially important if you want to paint over the original outside brick of your property. A long-lasting coat of best paint for external brick should be used to ensure that the paint doesn’t wear out too soon after application. There are just too many dangers associated with using amateur painters and using subpar exterior paint. It will cost you a fortune to repair the paint if it begins bubbling and peeling.

A two-year guarantee is offered on all exterior projects by C&S Painting, and we can provide references from all across the city. For more than two decades, these external renovations have been in the works. Our costs are incomparable and we always use the finest paint for a brick home.

Painting Exterior Brick Has Advantages

If your home’s brick façade is red, orange, or yellowed, a paint refresh may have a number of positive effects.

Enhances the appearance of your home’s exterior. The value of your property will go up if you paint your bricks. When painted appropriately, a dark hue like slate grey or even a classic white may have a significant aesthetic effect.

Protects the wearer from the weather. The fresh paint on your brick house will work as a sealer to protect it from precipitation and other seasonal weather changes when it is properly updated. Your home’s exterior may be protected against fading and decay by painting it.

It’s easy to clean. Leaving brick untreated allows dirt and debris to get lodged and difficult to remove. The smooth surface of painted brick makes it much simpler to clean with a power washer on a more frequent basis.

Things to Consider When Painting Exterior Brick

With that said, painting external brick is a work that should be approached with caution

It’s a permanent finish. You can’t go back to your brick house’s original brick façade once you paint it. It is common knowledge among professional painters that once brick has been painted, it must be left that way. It may be quite expensive to even attempt to remove paint off brick. Fortunately, you don’t have to stick with a single paint color for the rest of your life since you can change it whenever you choose.

In the event of a leak, paint might chip. In general, this is true, however excess moisture near the ground might be a genuine worry with painted brick. This may be avoided, though, with simple repaints every 7-10 years or so. It’s also a good idea to get your external brick repainted on a regular basis to maintain it looking its best.

The outside of your home may need more frequent cleaning. However, grime and mildew are considerably more noticeable on painted exteriors than on natural brick. An occasional professional power washing may help maintain your brick exterior looking its best. This is a low-cost option, often running in the hundreds of dollars.

Advice on Painting Brick on the Exterior

The inherent color and durability of brick make it an ideal construction material. Typically, brick homes are built such that a homeowner does not have to paint the brickwork. There is no need to avoid painting brick, but this does not imply that you should. Make sure you follow these guidelines to guarantee that the painting of your house goes according to plan.

Always avoid painting deteriorated, chipped, or deformed brick. Molding and crumbling brick may be hidden with a fresh coat of paint, but this is not always the case. This is a complete and utter fabrication! Paint should never be applied to water-damaged brickwork. Painting wet bricks will just exacerbate the issues you’re currently facing.


Take care to use the right paint for your project. A good masonry paint (and probably a primer) is a must for painting brick exteriors due to the porousness of the material. Choosing the correct primers and paints requires an in-home color consultation by a skilled painter.

Paint your home’s exterior with a professional. Failure to adequately prepare the brick for painting or the application of the improper paint may result in a major smear. Painters with experience know precisely what tools, paints, and supplies to use to repair, clean, dry, prep, and paint your brick to the finest standards possible.

The façade of your home may be improved with modest, less permanent alterations. To avoid making a hasty decision, consider the pros and cons of painting your outside brick before deciding. Once again, painting brick is a long-term commitment, so be sure this is something you really want to accomplish before you get started. The façade of your property may always be refreshed in different ways. Consider painting your outside wood trim, your garage door, or your shutters and windows before making a final decision. All of these items might have a positive impact on the overall appearance of your property.

Paint Your Brick House with the Help of a Professional!

Painting brick is a reasonably easy approach to have a big effect on your home’s appearance and boost its value. Professional exterior painters can guarantee that your brick house is painted correctly and looks wonderful for years to come, despite some small downsides. The finest paints and finishes are used by professional house painters to provide a stress-free home remodeling project. Get a free estimate on your outside painting now!

7 Reasons Why You Should Choose Wooden Frames Over PVCu


Wooden frames are highly attractive and look great on any home.  Here are 7 reasons why you should choolse wooden frames over pvcu.

You may customize your wooden window frames by choosing from a wide range of woods such as maple, mahogany, or oak, each of which has a distinct appearance. Wooden window frames may be carved, stained, or painted to fit your preferences and to match the style of your home.

3d illustration, white background

When compared to PVCu, windows with timber frames are substantially more environmentally friendly.

They actually have a negative GWP (global warming potential), which means that during the course of their employment, they may reduce the quantity of CO2 in the atmosphere. PVCu manufacture, on the other hand, requires the discharge of very toxic compounds, six of which have been prioritized for eradication by European governments.

This window frame choice is the most ecologically friendly of all since it uses wood from sustainable sources.

Timber window frames have the potential to survive for many years, but PVCu windows are likely to last fewer than 30 years. Your hardwood windows can withstand wear and tear and last a lifetime if properly maintained.

Timber, as one of nature’s masterstrokes, functions as a natural insulator, keeping your home at a reasonable temperature. Because wood is inherently insulating, it aids in the retention of heat inside your home. As a result, carbon emissions are reduced, and your power cost is reduced while your home remains warm and pleasant.

Although wooden window frames need regular care and weatherproofing to stay in good shape, painting and varnishing them not only makes them appear nice but also makes them more resistant to the elements.

PVCu window frames, contrary to common assumption, are not maintenance-free, and a PVCu window cannot be fixed as simply.

A PVC window frame uses around eight times the amount of energy as a wood window frame. PVC trash is expected to increase to 6.4 million tonnes by 2020, according to environmental organizations. PVC windows create 43 percent more garbage than wood windows. Around 82 percent of material is disposed of in landfills, while the remaining 15 percent is burnt. Only 3% of the garbage produced is recycled.

Timber windows with high performance are not always more costly than their PVCu equivalents. You have a lot of options since they come in so many distinct varieties. While maple is the most affordable window wood, mahogany is the most expensive. Furthermore, you can be confident that if you pick a traditional window frame for your house, it will endure considerably longer than PVCu.


What are the Benefits of Timber Windows?

Although many people in the United Kingdom like wood windows and doors, many have shifted to PVC. Why? PVC, according to several salespeople, does not decay like wood, is less expensive, and does not need painting. That sounds terrific, but before you rush off to make your purchase, let us question your assumptions.

Wooden Interior with Funiture and Fireplace

Norway has a lot of forests and has exceptionally harsh winters. As a result, they’ve become fairly good at harnessing their abundant natural resources to keep us warm, as well as an effective construction material.

PVC windows are seen in extremely few residences in Norway. This is due to the fact that wood is a natural barrier to the cold.

It outperforms PVC windows and doors when carefully designed and constructed into a window or door and paired with double or triple glazing.

Why is PVC so popular in the United Kingdom? The tale is complicated, but for many people, decaying wood windows conjure up images of those placed in homes following WWII. Retain you ever noticed how many homes constructed more than a century ago still have their original windows?


This is due to the fact that they were fashioned from well-seasoned, high-quality wood. Many structures erected after WWII, on the other hand, were constructed with inferior materials. As a result, wood has developed a poor image.


So, what is the current truth?

In the United Kingdom, over 12 million windows of all varieties are sold each year, with wood windows accounting for 30% of that market. The public sector uses 57 percent of wood windows supplied in the UK, while the private sector uses 42 percent; 86 percent of these are used in renovation projects, while 14 percent are used in new construction. (Figures courtesy of the Forest Stewardship Council.)

While Norwegian windows and doors have always been made of high-quality materials, the progress of wood windows in terms of quality,

Interior of Home during complete renovation. This old house was complete gutted inside and now new wooden framing is installed for next phase of modern walls, floor and ceiling.

durability, and design has been significant in the past ten years. Modern high-performance wood windows may have finish guarantees of up to 10 years and rot free guarantees of up to 30 years, with frames that are completely protected from water and UV rays at the factory. The use of dual sealing and factory glazing extends the life of a unit, while smart design features extend the life of the wood even further.

When compared to PVC units, the National Building Federation’s Standards in Quality and Development estimates that PVC windows will last 20 to 25 years, whereas vacuum-treated softwood windows would last 25 to 35 years. ‘Properly built and well kept wood windows can and do endure the lifespan of the structure in which they are put,’ according to the Green Builders Digest.


Many individuals find upkeep difficult, yet no material is maintenance-free, despite promises made by PVC sellers. Innovations in timber window design and finish have resulted in products that reduce water retention, damp penetration, and enable wood to breathe, all of which contribute to a low-maintenance product. Paint that peels and blisters is no longer an issue.

Factory-finished windows may last up to 8 years without needing to be repainted. Painting cycles of 5 to 8 years were the standard after then. Modern finishes also help to cut down on prep time. Unlike PVC, factory-finished wood windows and doors may be customized to a specific color to match your project and home. While it is true that wood windows need some upkeep, new high-performance windows make this upkeep quite simple.

While the initial cost of wood windows may be greater than that of other materials, the ‘whole-life’ cost of maintenance, durability, and environmental effect that timber provides gives it an outstanding value for money.

To back up the assertion of good value for money Softwood is cheaper, according to the National Housing Federation, both in terms of original capital expenditures and life cycle expenses over a 30-year period.

Another financial benefit of wood windows is their capacity to be repaired and restored. Wood may be easily mended, refreshed, and maintained without the need of specific components, expertise, or equipment, according to TRADA, the Timber Research and Development Association.

Finally, lumber is a natural insulator that, when paired with the glazing system (air, argon, or krypton filled), insulating glass, and draught sealing, has no trouble meeting current criteria of a U-value of as low as 0.6W/m2K.

To sum it up

Timber is an ecologically beneficial, thermally efficient, good-looking, and low-maintenance material that comes from managed forests, largely in my birthplace of Scandinavia. All of this is, thankfully, a far cry from the bad image earned in recent years by low-cost, low-quality softwood windows and doors.

All of the above makes sense to me, and when it comes to windows and doors, nothing compares to the beauty and feel of wood.

Which is Better: Wooden Windows or PVC-u Windows?

Replacement windows are a long-term investment that pays off handsomely. They may increase the value of your house, save you money on energy costs, minimize condensation, enhance peace and quiet, and cut down on maintenance time.

Empty room with glass window frame house interior on concrete wall

Before you take the leap, consider if you would be better off with wooden or plastic windows. Here’s a side-by-side comparison to aid you in your selection.

Cost

PVC-u windows are nearly usually the most cost-effective choice. They seldom, however, provide the greatest value. Wooden windows will last at least twice as long as vinyl windows and will increase the value of your house – especially if it’s a historic residence.

Warranties

PVC-u windows usually come with a 10-year guarantee, but wood windows usually come with a 30-year warranty.

Appearance

Many historic houses around the nation have been ruined by PVC-u replacement windows. Although some PVC-u manufacturers are now producing better-looking period windows, nothing compares to the appearance and feel of wood. You may have original classic elements like joints, thin glazing bars, and incorporated horns without losing performance with today’s wood windows.

Window, Installing, Service, Repairing, Home Improvement

Even when covered in aluminum, modern wood windows have a firmness and quality that is as vital within the space as it is outside.

Energy-efficiency

Replacement windows made of wood or PVC-u may both provide excellent levels of energy efficiency.

Due to the robustness of hardwood frames, massive triple-glazed units may be installed without the need of ultra-thick parts.


Household Upkeep

Whether made of PVC-u or factory-finished wood, today’s windows are low-maintenance. They merely need yearly maintenance to have the frames cleaned and the hardware oiled. Factory finished wood windows will need a new coat of paint after around 10 years, and thereafter at seven-year intervals, depending on exposure circumstances. This restores them to their previous state and enables you to adjust the color if desired. PVC-u windows, on the other hand, do not need re-coating but will lose their finish with time. PVC-u windows are also significantly more difficult to repair than wood windows.

The natural world

Wood is the most environmentally friendly window material. Studies have shown its superiority in a variety of environmental aspects. Most importantly, replacing a PVC-U window with a Wood Window Alliance window saves roughly 160kg of carbon dioxide.

As the best painting company in Calgary and environ, we interpret the art of painting to mean customer satisfaction, and that is why our work is centered around client fulfilment. Our focus circles every detail of your painting needs to deliver the results of your dreams. We can satisfy your window needs be it wooden frames or PVCs. Call us now and speak to one of our experts at no cost.