Maximizing ROI on Your Building Painting Investment: Expert Tips and Strategies

As a landlord, the appearance of your rental property is critical in attracting and retaining tenants. One of the most effective ways to maintain your property’s visual appeal is through regular building painting. However, painting can be a significant investment, and it’s essential to ensure that you’re getting the best value for your money. That’s why in this blog post, we’ll provide you with tips and strategies to maximize the return on investment (ROI) for your building painting project. From understanding your goals and selecting the right contractor to preparing the building, choosing the right paint, and maintaining the painted surfaces, we’ll guide you through the process of achieving long-lasting results within budget. With these strategies, you’ll not only enhance your property’s curb appeal, but also increase its value, minimize vacancy periods, and keep your tenants satisfied. So, let’s dive in and discover how to get the most out of your building painting investment.

Determining the purpose of the painting project for rental properties

When embarking on a building painting project for rental properties, it’s essential to determine the purpose of the painting project. Knowing the goal of the project can help guide decisions related to color, finish, and paint type, and ultimately, maximize the return on investment (ROI) for the landlord.

One important consideration is the target audience. Who are the intended renters, and what type of property are they looking for? The goal of the painting project should align with the desired demographic. For example, a rental property near a university may benefit from bright, bold colors to attract younger tenants, while a property in a more upscale neighborhood may require a more neutral color palette to appeal to a more mature audience.

Another consideration is the property’s surroundings. If the rental property is situated in a rural area, the goal may be to create a harmonious relationship with nature, while a rental property located in an urban environment may require a more modern and contemporary aesthetic.

It’s also essential to consider the condition of the property’s exterior. If the building’s exterior is in poor condition, the goal may be to create a more polished and updated look. In contrast, if the building’s exterior is in good shape, a simple refresh may be all that’s needed to maintain the property’s visual appeal.

Lastly, landlords should consider the long-term goals of the rental property. Are they looking to increase property value, reduce vacancy periods, or retain tenants? The goal of the painting project should align with these long-term objectives to maximize the ROI.

In summary, determining the purpose of the painting project is a crucial first step for landlords looking to invest in building painting. By considering the intended audience, surroundings, property condition, and long-term goals, landlords can make informed decisions about color, finish, and paint type, ultimately maximizing the ROI for the rental property.

Identifying the target audience for rental properties

Identifying the target audience for rental properties is a critical step in determining the purpose of a building painting project. Understanding who the intended renters are can help guide decisions related to color, finish, and paint type, ultimately maximizing the return on investment (ROI) for the landlord.

One way to identify the target audience is by looking at the location of the rental property. Is it near a university or college? Is it located in a family-friendly neighborhood? Is it in a bustling city center or a more rural area? The location can give clues about who the intended audience is.

Another way to identify the target audience is by looking at the amenities and features of the rental property. For example, if the property has a pool, gym, or other luxury features, the target audience may be young professionals or couples without children. Alternatively, if the property has multiple bedrooms and is located in a family-friendly neighborhood, the target audience may be families with children.

Landlords should also consider the demographic and lifestyle of the intended audience. Are they young professionals or retirees? Are they students or families? Are they interested in a modern, urban lifestyle or a more relaxed, rural setting? By understanding the demographic and lifestyle of the target audience, landlords can choose colors and finishes that will appeal to them.

Once the target audience has been identified, landlords should research color and design trends that appeal to that demographic. For example, younger renters may be drawn to bold, bright colors, while older renters may prefer more muted and neutral tones. Landlords can also consider the psychology of color and how it can impact emotions and mood. For example, blues and greens are often associated with relaxation and tranquility, while yellows and oranges can evoke feelings of energy and excitement.

In conclusion, identifying the target audience for rental properties is a crucial step in determining the purpose of a building painting project. By understanding the location, amenities, demographic, and lifestyle of the intended audience, landlords can choose colors and finishes that will appeal to them, ultimately maximizing the ROI for the rental property.

Choosing the Right Contractor

Choosing the right contractor for a building painting project is crucial for ensuring the project’s success and maximizing the return on investment (ROI). Here are some tips for choosing the right contractor:

Research and compare multiple contractors

Don’t settle for the first contractor you come across. Research and compare multiple contractors to find the one that best fits your needs and budget. Look for contractors with experience in painting rental properties and positive reviews from previous clients.

Check for proper licensing and insurance

Ensure that the contractor you choose is properly licensed and insured. This will protect you from liability in case of accidents or property damage during the project.

Ask for references

Ask the contractor for references from previous clients. This will give you an idea of their work quality and professionalism.

Get a detailed written estimate

Before hiring a contractor, get a detailed written estimate that outlines the scope of the project, the materials to be used, and the timeline for completion. This will help you avoid any surprises or additional costs later on.

Communication and responsiveness

Choose a contractor who communicates clearly and is responsive to your questions and concerns. A contractor who is easy to work with and keeps you informed throughout the project will make the process smoother and less stressful.

Warranty and guarantees

Look for contractors who offer warranties and guarantees on their work. This shows that they stand behind their work and are committed to ensuring customer satisfaction.

Price

While price is an important factor, it shouldn’t be the only consideration when choosing a contractor. Avoid choosing the cheapest contractor as they may cut corners or use inferior materials, resulting in a lower quality finish and a shorter lifespan for the paint job.

In conclusion, choosing the right contractor for a building painting project requires careful consideration and research. By following these tips, landlords can find a contractor who is experienced, licensed and insured, provides references, communicates effectively, offers warranties and guarantees, and provides a fair price, ultimately maximizing the ROI for the rental property.

Inspecting and repairing the rental property’s exterior

Inspecting and repairing the rental property’s exterior is an important step in maximizing the ROI for a building painting investment. Here are some tips for inspecting and repairing the rental property’s exterior:

Inspect the building’s exterior

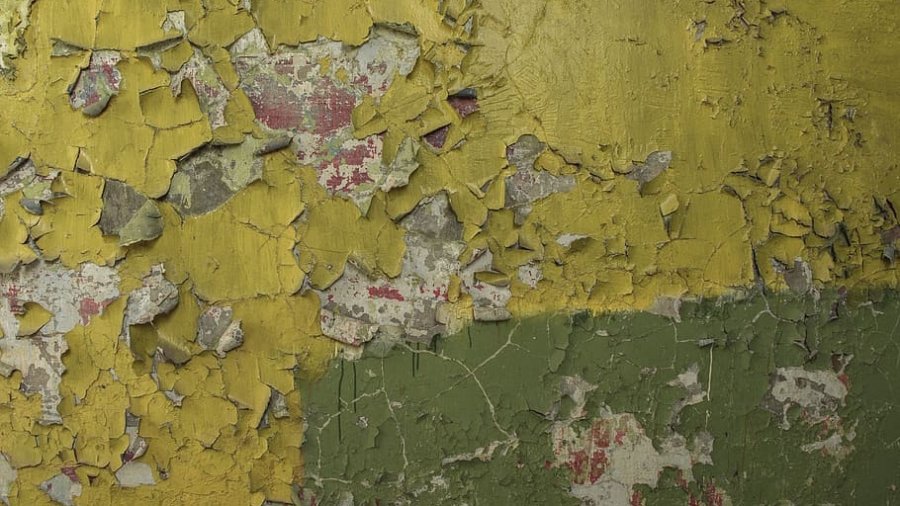
Start by thoroughly inspecting the building’s exterior for any signs of damage, such as cracks, holes, or peeling paint. This will help you identify areas that need to be repaired before painting.

Repair any damages

Repair any damages that you find during the inspection. This includes filling any cracks or holes in the walls, repairing any damaged siding or trim, and fixing any leaks or water damage. Painting over damaged surfaces will not only look unprofessional but also reduce the lifespan of the paint job.

Check for mold and mildew

Check for any mold or mildew on the building’s exterior. If you find any, it’s important to remove it before painting. A power washer or a solution of bleach and water can be effective in removing mold and mildew.

Address any pest problems

If you have any pest problems, such as ants, termites, or carpenter bees, address them before painting. Pests can cause damage to the building’s exterior, which can affect the lifespan of the paint job.

Consider adding a protective coating

Consider adding a protective coating to the building’s exterior to help prevent future damage. A clear coat or a sealer can help protect the building from the elements and extend the lifespan of the paint job.

Hire a professional

It’s always a good idea to hire a professional to inspect and repair the building’s exterior before painting. A professional can identify potential issues that may not be obvious to the untrained eye and provide expert advice on how to address them.

In conclusion, inspecting and repairing the rental property’s exterior is an important step in maximizing the ROI for a building painting investment. By thoroughly inspecting the building’s exterior, repairing any damages, checking for mold and mildew, addressing any pest problems, considering adding a protective coating, and hiring a professional, landlords can ensure a high-quality and long-lasting paint job that will add value to their rental property.

Understanding the different types of paint and finishes for rental properties

Understanding the different types of paint and finishes is an important step in maximizing the ROI for a building painting investment for rental properties. Here are some common types of paint and finishes used for rental properties:

Latex paint

Latex paint is a water-based paint that dries quickly and is easy to clean up with soap and water. It’s a popular choice for rental properties because it’s affordable, durable, and easy to apply. Latex paint is also available in a wide range of colors and finishes, including matte, eggshell, satin, and semi-gloss.

Oil-based paint

Oil-based paint is a solvent-based paint that dries slowly and produces a glossy finish. It’s a good choice for high-traffic areas because it’s more durable and easier to clean than latex paint. However, oil-based paint is also more expensive and has a stronger odor than latex paint.

Matte finish

Matte finish is a flat finish that doesn’t reflect light. It’s a good choice for walls with imperfections because it doesn’t highlight them. Matte finish is also easy to touch up if it gets damaged.

Eggshell finish

Eggshell finish has a slight sheen and is a popular choice for rental properties. It’s easy to clean and can be used on walls and trim. Eggshell finish is also more durable than matte finish and can hide some imperfections.

Satin finish

Satin finish has a soft sheen and is a popular choice for rental properties because it’s easy to clean and resists stains. Satin finish is also durable and can be used on walls and trim.

Semi-gloss finish

Semi-gloss finish has a shiny finish and is a popular choice for trim and doors. It’s durable and easy to clean, making it a good choice for high-traffic areas.

When choosing the type of paint and finish for a rental property, it’s important to consider the durability, ease of cleaning, and overall appearance. Latex paint is often a good choice for rental properties because it’s affordable, easy to apply, and comes in a variety of finishes. However, oil-based paint may be a better choice for high-traffic areas that require more durability. Matte, eggshell, satin, and semi-gloss finishes each have their own benefits and should be chosen based on the room’s use and overall aesthetic.

Choosing the most appropriate paint for the rental property’s exterior

Choosing the most appropriate paint for the rental property’s exterior is crucial in maximizing the ROI for a building painting investment. Here are some tips for choosing the most appropriate paint for the rental property’s exterior:

Consider the climate

The type of paint you choose for the rental property’s exterior will depend on the climate in which the property is located. If the property is located in an area with harsh weather conditions, such as high humidity or extreme temperatures, it’s important to choose a paint that can withstand these conditions.

Choose the right type of paint

There are two main types of paint for exteriors: oil-based and latex-based. Oil-based paint is more durable and better for wood surfaces, but it takes longer to dry and has a strong odor. Latex-based paint dries faster, is easy to clean, and has low VOC levels, making it more environmentally friendly.

Select the appropriate sheen

The sheen of the paint affects the appearance and durability of the paint job. A flat or matte sheen is good for hiding imperfections, while a high-gloss sheen is more durable and easy to clean.

Look for fade-resistant paint

The rental property’s exterior will be exposed to sunlight, which can cause the paint to fade over time. Look for paint that is fade-resistant to ensure that the property looks good for a long time.

Check the warranty

Many paint manufacturers offer warranties on their products. Check the warranty to see if it covers fading, peeling, or cracking.

Hire a professional

Hiring a professional painter can help ensure that the appropriate paint is chosen for the rental property’s exterior. A professional painter will have experience with different types of paint and will be able to recommend the best paint for the property.

In conclusion, choosing the most appropriate paint for the rental property’s exterior is an important step in maximizing the ROI for a building painting investment. Consider the climate, type of paint, sheen, fade-resistance, warranty, and hire a professional painter to ensure that the property looks good and is protected for a long time.

Monitoring ROI

After completing a painting project for a rental property, it’s important to monitor the return on investment (ROI) to ensure that the project was successful. Here are some tips for monitoring ROI:

Keep track of costs

Keep track of all costs associated with the painting project, including the cost of materials, labor, and any other expenses. This will help you calculate the total cost of the project and determine if the ROI is worth the investment.

Compare before and after

Take before and after photos of the rental property to compare the appearance and determine if the painting project improved the property’s value. If possible, obtain an appraisal or a real estate agent’s opinion to determine if the property’s value has increased.

Monitor tenant satisfaction

Talk to the tenants to see if they are satisfied with the painting project. Happy tenants are more likely to renew their leases and recommend the property to others, which can increase the property’s value.

Monitor maintenance costs

Keeping track of maintenance costs after the painting project can help determine if the project has reduced the need for repairs and maintenance. A well-maintained property can increase the property’s value and attract more tenants.

Consider the rental income

If the painting project results in the property being rented for a higher rate, it can increase the ROI. Monitor the rental income after the project to determine if there is an increase in revenue.

Analyze the ROI

Analyze the costs and benefits of the painting project to determine the ROI. If the ROI is positive, it may be worth investing in future painting projects. If the ROI is negative, it may be necessary to consider other improvements that can increase the property’s value.

In conclusion, monitoring ROI is an important step in determining the success of a painting project for a rental property. Keeping track of costs, comparing before and after, monitoring tenant satisfaction and maintenance costs, considering the rental income, and analyzing the ROI can help determine if the project was successful and if future painting projects are worth the investment.

Conclusion

In conclusion, maximizing ROI on a building painting investment for rental properties requires careful planning and execution. It starts with determining the purpose of the project and identifying the target audience. Choosing the right contractor, preparing the building, and inspecting and repairing the rental property’s exterior are also critical steps. Understanding the different types of paint and finishes and selecting the appropriate paint for the rental property’s exterior are also key factors to consider.

After completing the painting project, it’s important to monitor ROI to ensure that the project was successful. Keeping track of costs, comparing before and after, monitoring tenant satisfaction and maintenance costs, considering the rental income, and analyzing the ROI can help determine the success of the project and guide future investments.

By following these tips and strategies, landlords can increase the value of their rental properties, attract more tenants, and ultimately maximize their ROI on building painting investments.

How Often Should You Repaint Your Commercial Building? A Guide to Maintenance and Upkeep

Maintaining the appearance of a commercial building is crucial for creating a positive impression among clients, employees, and the community. One of the most effective ways to keep a building looking its best is through regular repainting. But how often should you repaint your commercial building? The answer depends on a variety of factors, including the building’s location, materials, and previous paint job. In this guide, we’ll explore the different factors that can impact how often a building needs to be repainted, as well as the signs that indicate it’s time for a fresh coat of paint. We’ll also discuss the benefits of regular repainting and provide tips for choosing the right paint and contractor for your building. By the end of this guide, you’ll have a better understanding of how to maintain the appearance of your commercial building and protect your investment for years to come.

Factors That Affect the Frequency of Repainting

There are several factors that can impact how often a commercial building needs to be repainted. The first and most obvious factor is the climate and weather conditions in the building’s location. Extreme heat, cold, humidity, rain, and wind can all cause paint to degrade more quickly, leading to fading, cracking, and peeling. In general, buildings located in areas with harsh weather conditions will need to be repainted more frequently than those in milder climates.

Another factor to consider is the type of materials used in the construction of the building. For example, buildings made from wood or stucco may require more frequent repainting than those made from brick or concrete, as these materials are more susceptible to damage from weather and other environmental factors. Additionally, older buildings may require more frequent repainting, as the existing paint may have degraded over time and become less effective at protecting the building’s surfaces.

The quality of the previous paint job can also impact how often a building needs to be repainted. A poorly done paint job may not adhere properly to the building’s surfaces, leading to early peeling and cracking. If the previous paint job was done using low-quality paint, it may also degrade more quickly than a higher quality paint, necessitating more frequent repainting.

Finally, the amount of foot traffic and activity around the building can impact how often it needs to be repainted. Buildings that are subject to frequent wear and tear from foot traffic, such as storefronts or restaurants, may need to be repainted more often than those that experience less activity.

In general, it’s best to consult with a professional painting contractor to determine how often your commercial building needs to be repainted. They can take into account all of these factors, as well as other considerations such as the age of the building and the type of paint used, to develop a maintenance plan that keeps your building looking its best.

Signs That Your Building Needs to be Repainted

Over time, commercial buildings can start to show signs of wear and tear, including fading, cracking, and peeling paint. If left unaddressed, these issues can worsen and eventually lead to more significant damage to the building’s surfaces. Here are some signs that your building may need to be repainted:

Fading or Discoloration

If you notice that the color of your building’s paint has faded or become discolored, it’s a sign that the paint has degraded and is no longer protecting the building’s surfaces from the elements. This is particularly common in buildings located in areas with harsh weather conditions.

Peeling or Cracking Paint

Peeling or cracking paint is a clear sign that it’s time for a fresh coat of paint. This can be caused by a variety of factors, including poor adhesion to the building’s surfaces, exposure to moisture, and age.

Stains or Water Damage

If you notice stains or signs of water damage on your building’s surfaces, it’s a sign that the paint may no longer be effectively protecting the building from moisture. This can lead to more serious issues such as mold growth and structural damage.

Chalky Residue

If you notice a chalky residue on the surface of your building’s paint, it’s a sign that the paint is breaking down and losing its protective properties. This can be caused by exposure to UV rays, moisture, and other environmental factors.

Rust or Corrosion

If your building has metal surfaces such as doors or railings, rust or corrosion is a sign that it’s time for a fresh coat of paint. This not only improves the appearance of the building, but also protects the metal from further damage.

If you notice any of these signs on your commercial building, it’s important to address them as soon as possible to prevent further damage. A professional painting contractor can evaluate the condition of your building’s surfaces and recommend the appropriate course of action, whether that’s a simple touch-up or a complete repaint.

Benefits of Regular Repainting

Maintaining the appearance of your commercial building is crucial for creating a positive impression among clients, employees, and the community. One of the most effective ways to keep your building looking its best is through regular repainting. Here are some of the key benefits of repainting your commercial building on a regular basis:

Improved Appearance

The most obvious benefit of regular repainting is that it keeps your building looking fresh, clean, and well-maintained. This can help to create a positive impression among potential clients and customers, and can also boost employee morale by providing a more pleasant work environment.

Increased Property Value

A well-maintained building is worth more than one that has been neglected. Regular repainting can help to maintain the value of your property by keeping it in good condition and preventing damage from occurring.

Protection Against the Elements

The paint on your building’s surfaces serves as a protective barrier against the elements, including UV rays, moisture, and wind. Regular repainting helps to ensure that this barrier remains effective, preventing damage to the building’s surfaces and prolonging its lifespan.

Prevention of Structural Damage

Over time, moisture can seep into the surfaces of your building, causing structural damage and leading to costly repairs. Regular repainting helps to prevent this from happening by sealing the surfaces and preventing moisture from penetrating.

Cost Savings

Regular repainting can actually save you money in the long run by preventing the need for costly repairs and replacements. By maintaining your building’s surfaces, you can avoid the need for more extensive repairs down the line, which can be much more expensive.

Compliance with Building Codes

Many cities and municipalities have regulations in place requiring commercial buildings to be properly maintained and kept in good condition. Regular repainting can help to ensure that your building is in compliance with these codes, avoiding potential fines and legal issues.

Improved Energy Efficiency

By choosing the right type of paint and color, you can actually improve the energy efficiency of your building. Lighter colors reflect more heat, reducing the amount of energy needed to cool the building in warmer months.

In order to reap these benefits, it’s important to work with a professional painting contractor who can help you develop a maintenance plan that meets the unique needs of your building. By regularly repainting your commercial building, you can ensure that it stays in top condition and continues to make a positive impression on clients, employees, and the community for years to come.

How to Choose the Right Paint and Painting Contractor

Choosing the right paint and painting contractor is crucial for ensuring that your commercial building looks its best and remains in top condition. Here are some tips to help you make the right choices:

Determine your needs

Before choosing a paint or painting contractor, it’s important to determine your specific needs. Consider factors such as the type of surfaces to be painted, the environmental conditions in your area, and the desired aesthetic.

Choose high-quality paint

The quality of the paint you choose will have a significant impact on the longevity and appearance of your building. Look for high-quality, durable paints that are designed for the specific surfaces you will be painting, such as masonry, metal, or wood.

Consider eco-friendly options

If sustainability is a priority for your business, consider using eco-friendly paint options. Look for paints that are low-VOC (volatile organic compounds) or zero-VOC, which are safer for the environment and for those who work in the building.

Research potential painting contractors

When choosing a painting contractor, research potential options carefully. Look for contractors with a good reputation, positive reviews, and experience working on commercial buildings similar to yours. Check for proper licensing and insurance to ensure that you are working with a reputable contractor.

Get multiple quotes

It’s important to get multiple quotes from different painting contractors to compare pricing and services. Make sure that each quote includes a detailed breakdown of the services to be provided and the products that will be used.

Ask for references

Before hiring a painting contractor, ask for references from previous clients. This can give you insight into the quality of their work and their level of professionalism.

Get a written contract

Once you have chosen a painting contractor, make sure to get a written contract that outlines the scope of work, pricing, payment terms, and other important details. This can help to ensure that everyone is on the same page and that there are no surprises down the line.

By following these tips, you can choose the right paint and painting contractor for your commercial building, ensuring that it looks its best and remains in top condition for years to come.

Conclusion

In conclusion, regular repainting of your commercial building is a crucial component of building maintenance that has numerous benefits. By investing in regular repainting, you can improve the appearance of your building, increase its value, protect it against the elements, prevent structural damage, save on costs, comply with building codes, and improve energy efficiency.

To achieve these benefits, it is important to choose the right paint and painting contractor. When choosing a paint, consider factors such as the type of surface to be painted, environmental conditions, and desired aesthetic. Look for high-quality paints that are durable and designed for the specific surfaces you will be painting. Consider eco-friendly options if sustainability is a priority for your business.

When choosing a painting contractor, research potential options carefully. Look for contractors with a good reputation, positive reviews, and experience working on commercial buildings similar to yours. Check for proper licensing and insurance to ensure that you are working with a reputable contractor. Get multiple quotes and ask for references before making a decision, and make sure to get a written contract that outlines the scope of work, pricing, payment terms, and other important details.

It is also important to be aware of the signs that your building needs to be repainted. These include fading, chalking, cracking, peeling, and rust or corrosion. By addressing these signs early, you can prevent further damage and maintain the overall condition of your building.

In addition to regular repainting, it is also important to maintain the overall cleanliness and upkeep of your commercial building. This includes regular cleaning of windows, gutters, and other surfaces, as well as repairing any damage or wear and tear as soon as possible.

Overall, regular repainting of your commercial building is a wise investment that can pay off in numerous ways. By choosing the right paint and painting contractor and staying on top of maintenance and upkeep, you can ensure that your building looks its best and continues to make a positive impression on clients, employees, and the community for years to come.

Bathrooms on a budget: 10 elegant yet cheap bathroom ideas to transform your space

Are you tired of your outdated, drab bathroom but feel overwhelmed by the thought of a costly renovation? Good news – updating your bathroom doesn’t have to come with a hefty price tag. With some creative thinking and smart planning, you can transform your bathroom into an elegant and functional space without breaking the bank. In this post, we’ll share 10 cheap bathroom ideas that can help you achieve a stylish, updated look without spending a fortune. From painting and lighting to accessories and storage, we’ll provide tips and inspiration to help you transform your bathroom into a space you’ll love. So, if you’re ready to spruce up your bathroom on a budget, keep reading!

1. Paint the walls

Painting the walls is one of the most effective ways to transform the look and feel of your bathroom on a budget. A fresh coat of paint can update an outdated color scheme or give your bathroom a whole new look and feel.

When choosing a color for your bathroom walls, consider the existing elements in the space such as the flooring, fixtures, and accessories. You can choose a color that complements these existing elements or adds a new pop of color for a bold statement.

Neutral colors such as white, gray, or beige are popular choices for bathrooms as they provide a clean and classic look. You can also consider using bold colors such as navy, dark green, or black for a dramatic statement or a spa-like atmosphere.

Before painting your walls, ensure they are clean and free of any dirt or debris. Remove any hardware or fixtures from the walls to ensure a clean and even paint job. Use painter’s tape to protect any areas that you don’t want to paint.

When choosing paint, opt for a high-quality paint that is specifically formulated for bathrooms. These paints are resistant to moisture and mildew, which is important in the humid environment of a bathroom.

Overall, painting your bathroom walls is an affordable and effective way to transform the look and feel of your space. Choose a color that complements your existing elements or makes a bold statement, and be sure to use a high-quality paint that is formulated for bathrooms.

2. Add wallpaper or peel-and-stick wall coverings

Adding wallpaper or peel-and-stick wall coverings can be a great way to add visual interest and personality to your bathroom. Whether you choose a bold pattern or a subtle texture, these coverings can help create a focal point in the room and give it a unique look.

One of the advantages of peel-and-stick wall coverings is that they are easy to install and remove, making them a great option for renters or those who like to change up their decor frequently. Wallpaper, on the other hand, can be a bit more challenging to install and remove, but it can also add a touch of elegance and sophistication to your bathroom.

When choosing a wallpaper or wall covering, consider the existing elements in your bathroom such as the flooring, fixtures, and accessories. You want to choose a pattern or texture that complements these elements rather than clashes with them.

Overall, adding wallpaper or peel-and-stick wall coverings can be a fun and easy way to update your bathroom decor and add some personality to your space.

3. Upgrade your lighting

Upgrading your bathroom lighting is an easy and effective way to enhance the functionality and style of your space. Proper lighting can make a significant impact on the overall look and feel of your bathroom.

When upgrading your bathroom lighting, consider the different types of lighting you’ll need. Ambient lighting provides overall illumination and can be achieved through ceiling fixtures or recessed lighting. Task lighting is important for specific areas such as the vanity or shower, and can be achieved through wall sconces or pendant lights. Accent lighting can be used to highlight decorative elements in the space, such as artwork or plants.

In addition to choosing the right types of lighting, consider the style and finish of the fixtures. Choose a finish that complements the existing elements in your bathroom such as the faucet, towel bars, and hardware. You can also choose fixtures with unique designs or shapes to add visual interest to your space.

Overall, upgrading your bathroom lighting is an easy and affordable way to enhance the functionality and style of your space. Consider the different types of lighting you’ll need and choose fixtures that complement your existing elements or add a unique design element.

4. Swap out accessories

If you’re looking for a simple and affordable way to refresh your bathroom, swapping out accessories is a great option. Small changes can make a big impact on the overall look and feel of your bathroom, and it doesn’t have to break the bank.

One way to switch up your bathroom accessories is to add new towels. Consider a color or pattern that complements your existing decor or add a pop of color for added interest. You can also switch up your shower curtain and bath mat to create a cohesive look.

Another way to update your bathroom accessories is to add new hardware. Replacing cabinet knobs, drawer pulls, and towel bars can instantly modernize your bathroom. Choose a finish that complements your existing hardware or switch it up for a bold new look.

If you have a countertop in your bathroom, consider adding new accessories like a soap dispenser or toothbrush holder. These small items can make a big impact on the overall look and feel of your bathroom, and they’re easy to switch out when you’re ready for a new look.

Finally, consider adding a plant or two to your bathroom. Plants can add a natural element to your bathroom and help purify the air. Choose a plant that thrives in humid environments, like aloe vera or spider plants, and be sure to choose a container that complements your existing decor.

Overall, swapping out accessories is an affordable and easy way to update your bathroom. Whether you add new towels, hardware, or a plant, you’re sure to create a space that feels fresh and new.

5. Replace your vanity

Replacing your vanity is a bigger project, but it can completely transform the look of your bathroom. A new vanity can provide more storage, enhance the functionality of your space, and even increase the value of your home.

When choosing a new vanity, consider the size and layout of your bathroom. You’ll want to ensure that the vanity fits the space and doesn’t feel cramped or overwhelming. You’ll also want to choose a vanity that complements the existing style of your bathroom.

There are many different types of vanities to choose from, including freestanding, wall-mounted, and corner vanities. Freestanding vanities are the most common and offer the most storage options. Wall-mounted vanities are a great option for small bathrooms, as they save floor space and can create the illusion of more space. Corner vanities are perfect for bathrooms with an awkward layout or limited space.

In addition to the style and size, you’ll also want to consider the material of your new vanity. Popular options include wood, marble, and quartz. Each material has its own benefits and drawbacks, so do your research before making a decision.

Finally, don’t forget to consider the sink and faucet when choosing a new vanity. You can choose from undermount, vessel, or drop-in sinks, and a variety of faucet styles and finishes to create a cohesive look.

Overall, replacing your vanity is a larger project, but it can completely transform the look and functionality of your bathroom. With so many options to choose from, you’re sure to find a vanity that meets your needs and enhances your space.

6. Install a new faucet

Installing a new faucet is a simple way to update the look and functionality of your bathroom. A new faucet can provide better water flow, enhance the style of your bathroom, and even increase the value of your home.

When choosing a new faucet, consider the style and finish that complements your existing bathroom decor. You’ll want to choose a style that works with your sink and overall design scheme. Popular styles include traditional, contemporary, and transitional.

Once you’ve chosen a style, consider the finish of your new faucet. Popular finishes include chrome, brushed nickel, and oil-rubbed bronze. Choose a finish that complements your existing hardware or adds a new element to your bathroom.

Before installing your new faucet, be sure to turn off the water supply and disconnect the old faucet. Follow the manufacturer’s instructions to install the new faucet, ensuring a tight seal and proper water flow.

In addition to enhancing the style of your bathroom, a new faucet can also improve functionality. Look for features like a high-arc spout or a single-handle design for added convenience and ease of use.

Overall, installing a new faucet is a simple and affordable way to update your bathroom. With so many styles and finishes to choose from, you’re sure to find a faucet that meets your needs and enhances the look and feel of your space.

7. Add greenery

Adding greenery to your bathroom is a great way to enhance the overall look and feel of the space. Plants not only add a pop of color and texture, but they also provide health benefits such as improving air quality and reducing stress.

When choosing plants for your bathroom, consider the lighting and humidity levels in the space. Bathrooms typically have high levels of humidity, so choose plants that thrive in these conditions. Popular options include ferns, spider plants, and peace lilies.

If your bathroom doesn’t receive much natural light, choose plants that can thrive in low light conditions, such as snake plants or pothos.

In addition to choosing the right plants, consider the pots and containers you’ll use to display them. Opt for pots with drainage holes to prevent water from accumulating and causing damage to your surfaces. You can also choose decorative containers or hanging baskets to add even more visual interest to your space.

When caring for your bathroom plants, be sure to water them regularly and ensure they receive adequate sunlight or artificial light. Consider adding a humidifier to your bathroom to help keep the plants healthy and thriving.

Overall, adding greenery to your bathroom is an easy and affordable way to enhance the overall look and feel of the space while also providing health benefits. Choose plants that thrive in your bathroom’s conditions and display them in decorative pots or containers for added visual interest.

8. Replace your shower head

Replacing your shower head is a simple and affordable way to upgrade your bathroom experience. With a new showerhead, you can improve water pressure, save water, and even add luxury features to your shower.

One of the most popular types of showerheads is the handheld showerhead. This type of showerhead is great for families with children or pets, as it allows for more flexibility when washing. Handheld showerheads can also make cleaning your shower easier, as you can direct the water flow exactly where it’s needed.

Another popular option is the rain showerhead. This type of showerhead creates a gentle, rain-like stream of water that can be incredibly relaxing. Some rain showerheads even have LED lights that change color with the temperature of the water, adding a fun and unique feature to your shower.

If you’re looking to save water, consider a low-flow showerhead. These showerheads use less water than traditional showerheads, which can help you save money on your water bill. Low-flow showerheads can still provide a strong water flow, so you don’t have to sacrifice water pressure for savings.

When choosing a new showerhead, consider the finish and style. Chrome and brushed nickel are popular finishes for modern bathrooms, while oil-rubbed bronze and brass are great choices for a more traditional look. You should also consider the size of your showerhead and the height of your shower arm to ensure a proper fit.

Overall, replacing your showerhead is a simple and affordable way to upgrade your bathroom experience. With a variety of styles and features available, you’re sure to find a showerhead that meets your needs and enhances your daily routine.

9. Update your flooring

Updating your bathroom flooring can make a huge impact on the overall look and feel of the space. While it can be a costly endeavor, there are affordable options that can still give your bathroom a new lease on life.

One option for updating your bathroom flooring is to replace the tiles. This is a more expensive option, but it can completely transform the space. Choose a tile that complements your existing decor or consider adding a pop of color or pattern for added interest. Porcelain, ceramic, and stone tiles are all great options for bathroom flooring.

If replacing the tiles is not in the budget, there are other ways to update the look of your bathroom flooring. One option is to install vinyl plank flooring. This type of flooring is affordable and easy to install, making it a great option for a DIY project. Vinyl plank flooring comes in a variety of styles and colors, so you’re sure to find a design that complements your existing decor.

Another affordable option is to update the grout and caulk. Over time, grout and caulk can become discolored or cracked, making your bathroom look dated. Removing and replacing the grout and caulk can instantly give your bathroom a fresh, updated look.

If you’re looking for a quick fix, consider adding a new bath mat. This is a simple and affordable way to update the look of your bathroom flooring without committing to a major renovation. Choose a bath mat that complements your existing decor or adds a pop of color or pattern to the space.

Overall, updating your bathroom flooring is a great way to give your bathroom a fresh, new look. Whether you choose to replace the tiles, install vinyl plank flooring, or simply update the grout and caulk, you’re sure to create a space that feels like a retreat.

10. Incorporate artwork

Incorporating artwork into your bathroom is a great way to add personality and interest to the space. Not only does it make the bathroom feel less sterile, but it also allows you to express your personal style.

When choosing artwork for your bathroom, consider the moisture levels of the space. Bathrooms tend to be more humid than other areas of the house, so it’s important to choose pieces that can withstand moisture. Opt for prints or paintings behind glass or acrylic frames, or choose pieces that are made specifically for high-humidity areas.

Another consideration when choosing artwork is the size of the piece. In a small bathroom, a large piece of art can overwhelm the space, so it’s best to stick to smaller pieces or a small gallery wall. In a larger bathroom, a statement piece can add drama and interest.

When selecting the artwork itself, consider the colors and patterns in your bathroom. Choose pieces that complement the existing color scheme or add a pop of color to a neutral space. Abstract art, black and white photography, or botanical prints are popular choices for bathroom decor.

If you’re hesitant to hang artwork in your bathroom, consider leaning framed pieces against a shelf or vanity. This creates a more relaxed, casual feel and allows you to easily switch out pieces as your tastes change.

Overall, incorporating artwork into your bathroom is a great way to add personality and style to the space. With the right piece, you can create a bathroom that feels like a retreat and reflects your unique taste.

Conclusion

Incorporating these 10 elegant yet cheap bathroom ideas can help transform your space without breaking the bank. By adding artwork, updating flooring, replacing your showerhead, swapping out accessories, replacing your vanity, installing a new faucet, adding greenery, painting the walls, and upgrading your lighting, you can give your bathroom a fresh new look and feel.

Don’t be afraid to get creative and make your own unique upgrades to suit your personal style and preferences. Whether you’re looking to create a spa-like atmosphere or add a pop of color, there are many budget-friendly options available.

Remember, you don’t have to spend a fortune to create a beautiful and functional bathroom. With a little bit of creativity and some smart choices, you can transform your space into a stylish and inviting retreat that you’ll love spending time in.

How to Choose the Right Paint Color for Your Commercial Building: Expert Tips

When it comes to designing and maintaining a commercial building, choosing the right paint color is a critical decision. The color of a building’s exterior is one of the first things that potential customers and clients will notice, and it can have a significant impact on their perception of the business. A well-chosen color scheme can attract attention, create a professional appearance, and even enhance the value of the property.

However, the process of selecting the right paint color is not always straightforward. There are numerous factors to consider, from branding and identity to practical concerns like maintenance and lighting. Moreover, with so many different colors and shades to choose from, it can be challenging to know where to start.

That’s where the advice of professional painters can be invaluable. Experienced painters have worked with a wide range of businesses and building types, and they have a keen eye for design and color selection. By following their tips and advice, you can feel confident in your decision and make a choice that will benefit your business for years to come.

In this blog post, we’ll share some expert tips and advice on how to choose the right paint color for your commercial building. Whether you’re a business owner, property manager, or designer, these insights will help you navigate the decision-making process and make a choice that meets your needs and goals. So let’s get started!

1. Consider Your Brand and Business Identity

One of the most critical considerations when choosing a paint color for your commercial building is your brand and business identity. Your building’s exterior should reflect your company’s values, personality, and mission, creating a cohesive and memorable experience for customers and clients.

To begin, start by assessing your brand identity and values. Think about your company’s mission statement, target audience, and overall personality. Are you a creative, edgy brand, or a more traditional, professional one? Do you cater to a specific demographic, such as families or young professionals?

Once you have a clear understanding of your brand identity, consider how you can reflect that in your building’s color scheme. This might mean incorporating your brand’s logo colors, using complementary colors that evoke your brand’s mood or personality, or simply choosing a color scheme that matches your brand’s overall aesthetic.

When choosing a color scheme based on your brand and identity, it’s also essential to consider consistency in design. This means making sure that your building’s exterior matches your brand’s other marketing and design materials, such as your website, business cards, and advertising campaigns. This consistency creates a strong and recognizable brand identity that customers and clients will remember and trust.

To get some inspiration, look at successful examples of brands that have effectively used color in their building designs. For example, McDonald’s iconic red and yellow color scheme is instantly recognizable and reflects the company’s fun, energetic personality. Similarly, Apple’s sleek and modern retail stores use clean lines and neutral colors to convey their brand’s simplicity and innovation.

2. Consider Your Surroundings

Another critical consideration when choosing a paint color for your commercial building is your surroundings. Your building’s exterior should fit in with the surrounding environment, whether that means matching the color scheme of nearby buildings or complementing the natural landscape.

To begin, take a close look at your building’s surroundings. Consider the color schemes of neighboring buildings, the natural landscape, and any other factors that might impact the overall look and feel of the area. For example, if your building is located in a historic district, there may be restrictions on the colors you can use.

Once you have a good understanding of your surroundings, you can start to choose a color scheme that fits in with the area. This might mean using colors that match nearby buildings or choosing complementary colors that accentuate the natural surroundings.

It’s also essential to consider how your building will look at different times of day and in different weather conditions. For example, a light-colored building may appear washed out on a sunny day, while a dark-colored building may look gloomy on a cloudy day. Think about the lighting and weather conditions in your area, and choose a color scheme that will look good in a variety of situations.

When considering your surroundings, it’s also essential to think about the message you want to convey with your building’s exterior. For example, if you’re located in a bustling urban area, you may want to choose a bold, attention-grabbing color scheme that reflects the energy of the city. On the other hand, if you’re located in a quiet, residential area, you may want to choose a more subdued color scheme that blends in with the neighborhood.

To get some inspiration, look at successful examples of buildings that have effectively used color to complement their surroundings. For example, a restaurant located near the beach might use a color scheme that evokes the ocean and sand, while a building located in a mountainous area might use a color scheme that reflects the natural beauty of the landscape.

3. Consider Practical Considerations

While considering your brand identity and surroundings are essential factors when choosing a paint color for your commercial building, it’s also crucial to consider practical considerations. Practical considerations include factors such as maintenance, durability, and weather resistance, which are important for ensuring that your building’s exterior looks good and lasts for years to come.

When it comes to maintenance, choosing the right paint color can make a big difference. Dark colors, for example, may require more frequent touch-ups and cleaning than lighter colors. Similarly, glossy finishes may show more wear and tear than matte finishes. Think about the amount of maintenance your building’s exterior will require, and choose a paint color and finish that will minimize the need for touch-ups and cleaning.

Durability is another critical practical consideration when choosing a paint color. Factors such as the type of paint and the quality of the application can impact how long the paint will last. Consider the climate in your area, as well as any unique challenges your building’s exterior may face, such as exposure to saltwater or extreme temperatures. Choose a high-quality paint and make sure it’s applied correctly to ensure that your building’s exterior lasts as long as possible.

Weather resistance is also an important practical consideration. Different types of paint are designed for different types of weather, so it’s essential to choose a paint that can withstand the climate in your area. For example, if you live in an area with heavy rain, you’ll want to choose a paint that is water-resistant. Similarly, if you live in an area with high humidity, you’ll want to choose a paint that can withstand the moisture.

It’s also essential to consider any regulations or restrictions in your area when choosing a paint color. For example, some areas may have restrictions on the use of certain colors or finishes, or may require you to choose a paint color that is in line with the architectural style of the area.

To get some inspiration, look at successful examples of buildings that have effectively used practical considerations when choosing their paint color. For example, a hospital might choose a paint color that is easy to clean and maintain, while a building located in a hurricane-prone area might choose a paint that is weather-resistant and can withstand high winds.

4. Consider Design Trends and Inspiration

Keeping up with current design trends can be a great way to give your commercial building’s exterior a modern and stylish look. While you don’t want to choose a paint color solely based on what’s trendy at the moment, taking inspiration from design trends can help you create a building exterior that looks fresh and contemporary.

To begin, research current design trends in the commercial building industry. Look for inspiration in magazines, blogs, and social media platforms such as Pinterest and Instagram. You can also consult with a professional designer or paint expert to get some ideas.

When considering design trends, it’s important to think about the message you want to convey with your building’s exterior. Different design trends can evoke different emotions and feelings, so choose a trend that aligns with your brand identity and values. For example, if you run a tech company, you may want to choose a design trend that is sleek and modern. If you run a daycare center, you may want to choose a design trend that is playful and colorful.

It’s also important to consider the architecture of your building when choosing a design trend. Some design trends work better with certain architectural styles than others, so make sure you choose a trend that complements your building’s style. For example, a minimalist design trend might work well with a modern, glass-fronted building, while a classic, ornate design trend might work better with a historic building.

When looking for inspiration, don’t be afraid to think outside the box. Consider using bold and unexpected colors or trying unique color combinations to create a building exterior that stands out. You can also look for inspiration in art, nature, and other sources outside of the commercial building industry.

To get some inspiration, look at successful examples of buildings that have effectively used design trends when choosing their paint color. For example, a restaurant might use a design trend that is inspired by the local culture or cuisine, while a tech company might use a design trend that incorporates futuristic elements.

5. Consult with Professionals

Choosing the right paint color for your commercial building can be a daunting task, especially if you’re not familiar with the color selection process. One of the best ways to ensure that you’re making the right choice is to consult with professionals.

There are several professionals who can provide guidance when it comes to choosing the right paint color for your commercial building. These include professional painters, interior designers, and color consultants. Each of these professionals has a different area of expertise and can provide valuable insights into the color selection process.

Professional painters can help you choose a color that will not only look great but will also be durable and long-lasting. They can provide advice on the type of paint to use based on the surface material of your building, as well as the weather conditions in your area. They can also provide guidance on the best techniques for applying the paint to ensure a professional finish.

Interior designers can help you choose a color that complements the overall design aesthetic of your commercial space. They can take into account factors such as lighting, furniture, and decor to help you choose a color that will create a cohesive and visually appealing space. They can also help you choose a color that will create the desired mood or atmosphere in your space, whether that be calming, energizing, or professional.

Color consultants are professionals who specialize in color theory and psychology. They can provide guidance on choosing colors based on their meanings and associations, as well as how they interact with other colors in your building’s environment. They can also provide guidance on creating a color palette that is both visually appealing and aligned with your brand identity and values.

When consulting with professionals, it’s important to communicate your vision and goals for your building’s exterior. Provide them with as much information as possible about your business, brand identity, and target audience. This will help them provide recommendations that are tailored to your specific needs.

In summary, consulting with professionals can be a great way to ensure that you’re making the right choice when it comes to choosing the right paint color for your commercial building. Whether you consult with professional painters, interior designers, or color consultants, they can provide valuable insights and guidance to help you make an informed decision that will enhance the overall appearance and functionality of your building.

Conclusion

In conclusion, choosing the right paint color for your commercial building can be a daunting task, but by following these tips from the pros, you can make an informed decision that will enhance the overall appearance and functionality of your building.

First, consider your brand and business identity to ensure that your paint color aligns with your values and messaging. Next, consider your surroundings and practical considerations, such as the type of surface material and weather conditions. Then, take inspiration from current design trends and outside sources, and don’t be afraid to consult with professionals, such as professional painters, interior designers, and color consultants, to get valuable insights and guidance.

Remember that choosing the right paint color for your commercial building is an investment in your business, and it can have a significant impact on how your business is perceived by customers and clients. By taking the time to carefully consider all of these factors, you can choose a paint color that not only looks great but also helps to achieve your business goals.

So, whether you’re looking to create a modern and sleek exterior for a tech company or a playful and colorful exterior for a daycare center, these tips from the pros can help you choose the perfect paint color for your commercial building.

wall-paint-yellow-old

Fixing a Bad Paint Job of Interior & Exterior [The Ultimate Guide]

A fresh coat of paint can do wonders for your home’s interior or exterior, but a bad paint job can be a frustrating and time-consuming problem. Whether it’s peeling, cracking, or uneven coverage, a bad paint job can detract from the beauty and value of your home. Fortunately, with the right approach and tools, it’s possible to fix a bad paint job and achieve a professional-looking finish. In this comprehensive guide, we’ll walk you through the steps to fix a bad paint job for both interior and exterior surfaces, from assessing the problem to applying primer and paint. We’ll also share tips and tricks to help you achieve a successful paint job and prevent future problems. So if you’re dealing with a bad paint job, read on to learn how to fix it and restore your home’s beauty and value.

Assessing the Problem: The First Step to Fixing a Bad Paint Job

When you’re dealing with a bad paint job, the first step to fixing it is to assess the problem. This involves identifying the type and severity of the issue so that you can determine the best course of action. Here are some common problems you may encounter when fixing a bad paint job:

Peeling or Cracking Paint

Peeling or cracking paint is a common problem that can be caused by a variety of factors, including moisture, temperature changes, and poor surface preparation. To assess this problem, examine the affected area and look for signs of moisture, such as water stains or mold. If moisture is the cause, you’ll need to address the source of the problem before repainting. If the paint is simply old or poorly applied, you’ll need to remove the old paint and apply a new coat.

Uneven Coverage

Uneven coverage is another common problem that can be caused by a variety of factors, including poor surface preparation, inadequate application, and low-quality paint. To assess this problem, look for areas where the paint is thin or missing and compare them to areas with proper coverage. If the problem is caused by poor surface preparation or inadequate application, you’ll need to remove the old paint, prepare the surface properly, and apply a new coat. If the problem is caused by low-quality paint, you may need to choose a higher quality paint for the next application.

Color Fading or Change

Color fading or change can be caused by exposure to sunlight, moisture, or chemicals. To assess this problem, compare the current color to the original color and look for signs of fading or change. If the problem is caused by exposure to sunlight or moisture, you’ll need to take measures to protect the surface from further damage. If the problem is caused by chemical exposure, you’ll need to avoid exposing the surface to the same chemicals in the future and choose a paint that is resistant to chemical damage.

Identifying the Cause: The Key to Fixing a Bad Paint Job

When you’re dealing with a bad paint job, it’s not enough to just assess the problem – you also need to identify the cause. By doing so, you can address the root of the issue and prevent the problem from recurring in the future. Here are some common causes of bad paint jobs and how to identify them:

Poor Surface Preparation

One of the most common causes of bad paint jobs is poor surface preparation. This can include failing to clean the surface properly, not sanding it enough, or not using the right primer. To identify this cause, examine the surface and look for signs of dirt, dust, or debris. You may also notice that the paint is not adhering properly to the surface, or that it is peeling or cracking in certain areas.

Inadequate Application

Another common cause of bad paint jobs is inadequate application. This can include using too little paint, using the wrong type of brush or roller, or not following the manufacturer’s instructions. To identify this cause, examine the surface and look for areas where the paint is thin or missing. You may also notice that the paint is streaky or uneven in certain areas.

Low-Quality Paint

Low-quality paint can also cause bad paint jobs, as it may not adhere properly to the surface or provide the desired coverage or color. To identify this cause, examine the paint can and look for information on its quality and ingredients. You may also notice that the paint is thin or watery, or that it is not providing the desired color or coverage.

Removing Old Paint: Tips and Techniques for a Smooth Surface

Before starting a new painting project, it’s important to remove old paint from the surface to ensure a smooth and even finish. However, removing old paint can be a challenging task, especially if the paint is thick or has multiple layers. Here are some tips and techniques to make the process of removing old paint easier and more effective:

Mechanical Methods

Mechanical methods involve using tools to physically remove the paint from the surface. These methods include scraping, sanding, and using a heat gun. Scraping involves using a putty knife or scraper to remove the paint, while sanding involves using sandpaper or a sanding machine to smooth the surface. Heat guns are useful for removing paint from wood or metal surfaces, as they soften the paint and make it easier to scrape off. Mechanical methods are effective for removing thick layers of paint, but they can also damage the surface if not used carefully.

Chemical Strippers

Chemical strippers are products that dissolve the paint, making it easier to remove. They come in different types, including solvent-based and water-based. Solvent-based strippers are effective for removing multiple layers of paint, while water-based strippers are safer to use and more environmentally friendly. When using chemical strippers, it’s important to follow the manufacturer’s instructions carefully, as they can be hazardous if not used properly. It’s also important to wear protective gear, such as gloves and goggles, to avoid skin and eye irritation.

Power Washing

Power washing involves using a high-pressure water stream to remove paint from the surface. This method is effective for removing loose or flaking paint, as well as dirt and grime. However, it’s important to use the right pressure setting and distance to avoid damaging the surface. Power washing is not recommended for removing thick layers of paint, as it can push the paint deeper into the surface and make it harder to remove.

Preparing the Surface for Repainting: Tips and Techniques for a Successful Paint Job

Before repainting a surface, it’s important to prepare it properly to ensure a smooth and long-lasting finish. Preparing the surface involves cleaning, repairing, and priming the surface, as well as ensuring that it is dry and free of debris. Here are some tips and techniques for preparing the surface for repainting:

Cleaning the Surface

Cleaning the surface is the first step in preparing it for repainting. This involves removing any dirt, dust, grease, or other debris that may be on the surface. A solution of warm water and mild soap can be used to clean the surface, followed by a rinse with clean water. For tougher stains or marks, a stronger cleaning solution may be necessary. It’s important to let the surface dry completely before proceeding to the next step.

Repairing the Surface

The next step is to repair any damage to the surface, such as cracks, holes, or dents. This can be done using a patching compound, such as spackle or joint compound, which can be applied with a putty knife or scraper. Once the compound has dried, the surface should be sanded smooth using sandpaper or a sanding machine. Any loose or peeling paint should also be removed at this stage.

Priming the Surface

Priming the surface is an important step in ensuring a smooth and long-lasting paint job. Primers are designed to create a smooth and even surface for the paint to adhere to, as well as to prevent stains, mildew, and other problems. It’s important to choose the right primer for the surface, such as a water-based or oil-based primer, depending on the type of surface and paint being used. The primer should be applied in a thin and even coat, using a brush, roller, or sprayer. Once the primer has dried, the surface should be sanded lightly using fine sandpaper.

Ensuring the Surface is Dry and Free of Debris

Before applying the paint, it’s important to ensure that the surface is completely dry and free of debris. This includes checking for any moisture or humidity in the air, which can affect the paint’s adhesion and drying time. It’s also important to remove any dust or debris from the surface using a clean and dry cloth. Masking tape or painter’s tape can be used to protect any areas that are not being painted, such as trim or windows.

Applying Primer and Paint: Tips for a Professional Finish

After preparing the surface for repainting, the next step is to apply primer and paint to the surface. Primer is important because it provides a smooth, even surface for the paint to adhere to, and it can also help the paint last longer. Applying primer and paint can be a tricky process, but with the right tools and techniques, you can achieve a professional finish. Here are some tips for applying primer and paint:

Choosing the Right Primer and Paint

Choosing the right primer and paint is important for achieving a professional finish. It’s important to select a primer and paint that are compatible with each other, as well as with the surface being painted. For example, water-based paints are typically used for interior surfaces, while oil-based paints are often used for exterior surfaces. The type of surface being painted, such as wood or metal, will also affect the choice of primer and paint.

Preparing the Primer and Paint

Before applying the primer and paint, it’s important to prepare them properly. This involves stirring the primer and paint thoroughly to ensure that the pigment is evenly distributed. It’s also important to follow the manufacturer’s instructions for mixing and application, including the recommended number of coats and drying time.

Applying the Primer

When applying the primer, it’s important to use a brush, roller, or sprayer that is appropriate for the type of primer being used. A high-quality brush or roller can help to ensure a smooth and even finish, while a sprayer can be more efficient for larger surfaces. The primer should be applied in thin, even coats, with each coat allowed to dry completely before applying the next coat. It’s important to avoid applying the primer too thickly, as this can cause drips and unevenness.

Applying the Paint

When applying the paint, the same principles apply as for the primer. It’s important to choose the right tool for the job, such as a brush, roller, or sprayer, and to apply the paint in thin, even coats. It’s also important to work quickly and efficiently, to avoid letting the paint dry too quickly or too slowly. It’s important to follow the manufacturer’s instructions for drying time and number of coats.

Finishing Touches

After applying the primer and paint, it’s important to inspect the surface for any imperfections or unevenness. Touch-ups can be made using a brush or roller, as needed. It’s also important to clean up any drips or spills immediately, using a damp cloth or paper towel.

Hiring a Painter

When it comes to fixing a bad paint job, hiring a professional painter may be the best option. While it may be tempting to tackle the job yourself, a professional can ensure a high-quality finish and save you time and money in the long run. Here are some benefits of hiring a professional painter:

Expertise and Experience

Professional painters have the expertise and experience to assess the problem, identify the cause, and determine the best course of action. They have the knowledge and skills to select the right tools, materials, and techniques to achieve a flawless finish. They can also offer advice on color selection, surface preparation, and maintenance.

Time and Efficiency

Painting can be a time-consuming and labor-intensive process, especially if you’re not experienced in it. A professional painter can complete the job quickly and efficiently, without sacrificing quality. They have the tools and equipment to make the process faster and more streamlined, and they can work around your schedule to minimize disruption to your daily routine.

Quality of Work

A professional painter can ensure a high-quality finish that lasts for years. They know how to prepare surfaces properly, apply primer and paint evenly, and address any imperfections or issues that arise. They also use high-quality materials and products that are designed to withstand the elements and resist fading and peeling.

Safety

Painting can be a dangerous job, especially if you’re working at heights or using hazardous chemicals. Professional painters have the training and equipment to work safely and minimize the risk of accidents or injuries. They also have liability insurance and workers’ compensation, which protects you from any damage or liability that may occur during the project.

Cost-Effective

While hiring a professional painter may seem more expensive upfront, it can actually save you money in the long run. A professional painter can complete the job quickly and efficiently, without the need for expensive tools or materials. They can also prevent costly mistakes that can occur when trying to fix a bad paint job yourself.

In conclusion, hiring a professional painter can be a smart investment for fixing a bad paint job. With their expertise, experience, and efficiency, they can ensure a high-quality finish that lasts for years. They can also provide valuable advice and guidance on color selection, surface preparation, and maintenance. While it may be tempting to tackle the job yourself, hiring a professional can save you time, money, and hassle in the long run.

painter

Hiring a Professional Painter Vs. DIY: Pros and Cons

Painting a room or a house can be a great way to freshen up your space and give it a new look. However, deciding whether to hire a professional painter or tackle the project yourself can be a difficult decision. While DIY painting may seem like a cost-effective solution, it can often result in a subpar finish and take up a significant amount of time. On the other hand, hiring a professional painter can guarantee a high-quality finish but may come with a higher price tag. In this blog post, we will explore the pros and cons of hiring a professional painter versus doing it yourself, so you can make an informed decision on which option is best for you.

Pros of Hiring a Professional Painter

Here are some of the advantages of hiring a professional painter to handle your house painting project.

Quality of Work

Professional painters have years of experience in painting and know the best techniques for achieving high-quality finishes. They also have access to the latest tools and technologies to ensure a professional-looking job. When you hire a professional painter, you can be confident that the work will be done to a high standard, with even and consistent coverage, clean lines, and attention to detail.

Time-Saving

Painting can be a time-consuming process, especially if you’re not experienced in it. A professional painter can get the job done quickly and efficiently, allowing you to get back to your daily routine. They will know how to properly prepare the surface, apply the paint evenly and quickly, and finish the job within a reasonable time frame.

Convenience

Hiring a professional painter means you won’t have to worry about purchasing all the necessary equipment and materials or dealing with the cleanup afterward. A professional painter will come prepared with everything they need, including the paint, brushes, rollers, drop cloths, and any other necessary tools. They will also clean up after themselves once the job is done, leaving your home looking clean and tidy.

Expert Advice

Professional painters can offer expert advice on color selection, paint types, and finishes to suit your needs and preferences. They can also advise on any repairs that may need to be done before painting to ensure a long-lasting finish. A professional painter can help you choose the right type of paint for your specific needs, such as high-traffic areas, moisture-prone areas, or areas with special requirements such as mold-resistant paint.

Peace of Mind

When you hire a professional painter, you can have peace of mind knowing that the work will be done to a high standard, with minimal disruption to your daily routine. You won’t have to worry about any mistakes or imperfections in the finished product, as a professional painter will ensure that the job is done to your satisfaction.

Cons of Hiring a Professional Painter

Here are some of the disadvantages of hiring a professional painter to handle your house painting project.

Cost

One of the biggest cons of hiring a professional painter is the cost. Professional painters typically charge by the hour or by the project, and their rates can vary depending on their level of experience, the size of the project, and the materials needed. The cost of hiring a professional painter can be significantly higher than doing the job yourself, which can be a deterrent for many homeowners.

Lack of Control

When you hire a professional painter, you are relinquishing some control over the project. While you can provide input on the color, type of paint, and finishes you want, the painter will ultimately make the decisions on how to execute the job. This lack of control can be frustrating for some homeowners who have a specific vision for their home and want to be involved in the process.

Scheduling Issues

Professional painters are often in high demand, which means they may not be available to start your project right away. You may have to wait several weeks or even months for a professional painter to be available, which can be a problem if you have a tight timeline. Additionally, if the project takes longer than expected, it can cause scheduling conflicts and disrupt your daily routine.

Risk of Damage

While professional painters are skilled and experienced, there is always a risk of damage when working in your home. Paint spills, drips, and accidents can damage your floors, furniture, and other belongings. While most professional painters take precautions to protect your property, accidents can happen, and it can be stressful to deal with the aftermath.

Limited Customization Options

Professional painters typically work within a certain set of parameters, which can limit your customization options. While they can offer advice on color selection and finishes, they may not be able to execute more complex designs or customizations. If you have a specific vision for your home that requires a high degree of customization, you may need to look for a specialized painter or consider doing the job yourself.

Communication Issues

Communication is key when working with a professional painter, and if there are communication issues, it can lead to frustration and misunderstandings. For example, if the painter doesn’t understand your vision for the project, it can lead to a finished product that doesn’t meet your expectations. Additionally, if there are any issues during the project, it’s important to be able to communicate with the painter to resolve them quickly and effectively.

Pros of DIY Painting

Here are some of the advantages of painting your project yourself.

Cost Savings

One of the most significant benefits of DIY painting is the cost savings. By doing the job yourself, you can save money on labor costs and avoid paying for professional equipment and supplies. You can also choose a paint brand that fits your budget and preferences without the added cost of labor.

Control Over the Project

When you do the job yourself, you have complete control over the project. You can choose the colors and finishes you want, and have the freedom to make adjustments or changes along the way. This level of control can be especially appealing for homeowners who have a specific vision for their home and want to be involved in the process.

Flexibility in Scheduling

Another advantage of DIY painting is the flexibility in scheduling. You can work on the project at your own pace and on your own schedule, which can be convenient for busy homeowners. Additionally, you don’t have to worry about scheduling conflicts or delays caused by a professional painter’s availability.

Personal Satisfaction

There’s a certain satisfaction that comes with completing a home improvement project yourself. Seeing the finished product and knowing that you did it all on your own can be a source of pride and accomplishment. This can be especially true for homeowners who enjoy DIY projects and want to take an active role in improving their home.

Improved Skills and Knowledge

Painting your home yourself can also improve your skills and knowledge of home improvement projects. You can learn about different paint types, techniques, and tools, which can be useful for future projects. Additionally, you may discover a new hobby or passion for DIY projects that can be a source of enjoyment and fulfillment.

More Customization Options

When you do the job yourself, you have the freedom to customize the project to your specific preferences. You can experiment with different colors, finishes, and techniques to create a unique look that reflects your style and personality. This level of customization can be difficult to achieve with a professional painter, who typically works within a set of parameters.

Cons of DIY Painting

Here are some of the disadvantages of painting your project yourself.

Time and Effort

Painting a room or a home can be a time-consuming and labor-intensive project, especially for those who are inexperienced. It can take days or even weeks to complete, and require a significant amount of effort and physical labor. This can be a challenge for busy homeowners who have other responsibilities and commitments.

Skill Level

Painting may seem like a simple task, but it requires a certain level of skill and experience to achieve a professional-looking finish. Without proper technique and knowledge, it’s easy to make mistakes that can be difficult or expensive to fix. This can be especially true for more complicated projects, such as painting ceilings or intricate trim work.

Cost of Supplies and Equipment

While DIY painting can be cost-effective in terms of labor costs, it can still be expensive when it comes to supplies and equipment. High-quality paint, brushes, rollers, and other materials can add up quickly, especially if you need to purchase specialized tools or equipment for the job.

Safety Risks

Painting can also pose some safety risks, particularly when it comes to using ladders or other equipment. Falls and injuries can occur if proper safety precautions are not taken, which can be particularly dangerous for those who are not experienced with using this type of equipment.

Mess and Clean-Up

Painting can be messy, with drips and spills that can damage floors, furniture, and other surfaces. Proper preparation and clean-up can be time-consuming and require additional effort, particularly for those who are not experienced with painting.

Limited Warranty or Guarantee

Finally, when you DIY paint, you are responsible for the outcome and any potential issues that may arise. You won’t have the same warranty or guarantee that comes with hiring a professional painter, which can be a concern for homeowners who want to ensure a high-quality, long-lasting finish.

In conclusion, the decision to hire a professional painter or to tackle the painting project yourself ultimately depends on your individual needs, preferences, and skill level. Hiring a professional painter has many advantages, such as their expertise, efficiency, and use of high-quality equipment and materials. On the other hand, DIY painting can be cost-effective and rewarding, and it allows for a personal touch and creative freedom.

However, it’s important to consider the potential drawbacks of each option. DIY painting can be time-consuming, messy, and potentially dangerous, while hiring a professional painter can be costly and may not always guarantee a satisfactory outcome.

Before making a decision, it’s important to weigh the pros and cons, as well as to evaluate your skill level, budget, and time constraints. You may also want to consider seeking advice or recommendations from friends, family, or professionals in the field.

Ultimately, whether you choose to hire a professional painter or to tackle the project yourself, the end result should be a beautiful and high-quality finish that you can enjoy for years to come.

ceiling paint

The Do’s and Don’ts of Painting Ceilings

Painting a ceiling can be a daunting task, but with the right techniques and tools, it can also be a satisfying DIY project. However, there are several do’s and don’ts to keep in mind to ensure a successful and safe painting experience. In this blog post, we will explore some essential tips and tricks for painting ceilings, as well as some common mistakes to avoid.

From choosing the right paint and equipment to prepping the surface and avoiding common mistakes, we will cover everything you need to know to paint your ceiling like a pro. Whether you’re looking to update the look of a room or simply need to touch up some scuffs and marks, following these guidelines will help you achieve a beautiful and long-lasting finish.

We’ll also provide insights into how to tackle specific challenges, such as working around light fixtures and ceiling fans, and how to avoid drips and streaks. With our guidance, you’ll be able to approach your ceiling painting project with confidence and achieve the results you desire.

So, whether you’re a seasoned DIY enthusiast or a beginner, this guide will provide you with all the information you need to tackle your ceiling painting project successfully. By following our do’s and don’ts and applying our tips and tricks, you’ll be able to create a stunning and professional-looking finish that will enhance the overall look and feel of your space.

The Do’s of Painting Ceilings

Do choose the right paint

Choosing the right paint is crucial for achieving a smooth and even finish on your ceiling. For most ceilings, a flat or matte finish is recommended, as it doesn’t reflect light and can help hide imperfections. It’s also important to choose a paint that is specifically formulated for ceilings, as it will have a thicker consistency and better coverage.

Do prepare the surface

Before painting, it’s important to prepare the surface by cleaning it thoroughly and repairing any cracks or imperfections. Use a damp cloth or sponge to wipe down the ceiling and remove any dust or debris. For cracks or holes, use a spackling compound or joint compound to fill them in, and sand the surface smooth once it’s dry.

Do use the right tools

The right tools can make all the difference when it comes to painting a ceiling. Use a high-quality roller with a long handle to reach the ceiling, and a paintbrush to cut in around the edges. A paint tray or bucket with a screen can also help ensure even coverage and prevent drips.

Do work in small sections

When painting a ceiling, it’s important to work in small sections to ensure even coverage and prevent drips or splatters. Divide the ceiling into smaller sections using painter’s tape, and work on one section at a time. This will also help you to avoid overreaching and straining your arms and shoulders.

Do use a ladder or scaffold

To reach the ceiling, you will likely need to use a ladder or scaffold. Make sure the ladder or scaffold is sturdy and secure, and follow all safety precautions. It’s also important to have someone hold the ladder or scaffold while you work, or to use a stabilizing bar to prevent it from tipping.

The Don’ts of Painting Ceilings

Don’t skip the primer

Primer is an important step in the painting process, as it helps the paint adhere to the surface and provides a smooth and even finish. Skipping the primer can result in a patchy or uneven finish, especially if the ceiling has stains or discoloration.

Don’t use too much paint

Using too much paint can result in drips and splatters, as well as an uneven finish. To avoid this, use a small amount of paint and apply it in thin, even layers. You can always add more paint if needed, but it’s difficult to remove excess paint once it’s applied.

Don’t paint too quickly

Painting too quickly can also result in drips and splatters, as well as an uneven finish. Take your time and work in small sections, allowing each section to dry before moving on to the next. This will help ensure a smooth and even finish.

Don’t forget to protect your furniture and floors

Painting a ceiling can be messy, so it’s important to protect your furniture and floors. Cover furniture with plastic or drop cloths, and use painter’s tape to protect baseboards and trim. You can also use a canvas drop cloth on the floor to catch any drips or splatters.

Don’t forget to ventilate the room

Paint can release fumes that can be harmful if inhaled, so it’s important to ventilate the room while painting. Open windows and doors, and use a fan to circulate air. You can also wear a mask or respirator to protect yourself from fumes.

Choosing The Right Tools

Painting your ceiling can be a tricky task, but having the right tools can make all the difference in achieving a professional-looking finish. Here are the essential tools you’ll need for a successful ceiling painting project:

Roller and Extension Pole: A high-quality roller and extension pole will help you reach every corner of your ceiling without straining your arms and back. Make sure to choose a roller with a nap that is suitable for the texture of your ceiling.

Paintbrushes: You’ll need a variety of paintbrushes, including a large one for cutting in around the edges and a smaller one for touch-ups and tight spots.

Paint Tray: A sturdy paint tray with disposable liners will make it easier to pour and mix your paint, and keep your work area clean.

Painter’s Tape: Painter’s tape is essential for protecting your walls and creating clean lines around fixtures and trim.

Drop Cloths: Covering your floors and furniture with drop cloths will protect them from accidental spills and splatters.

Ladder or Scaffolding: Depending on the height of your ceiling, you may need a ladder or scaffolding to reach high areas safely.

Investing in the right tools upfront will not only make your ceiling painting project easier but will also save you time and money in the long run. Don’t skimp on quality when it comes to your tools – using high-quality equipment will help you achieve a more professional-looking finish and make your project a success.

Choosing the Right Paint

When it comes to interior design, the ceiling is often overlooked as a potential focal point. However, choosing the right color for your ceiling can have a significant impact on the overall look and feel of a room. In this article, we will explore some tips and considerations for choosing the right color for your ceiling.

Consider the room’s purpose and size.

The first thing to consider when choosing a color for your ceiling is the room’s purpose and size. For example, a lighter color can help make a small room feel more spacious and airy, while a darker color can add warmth and intimacy to a larger room. Additionally, the color you choose should complement the function of the room. For instance, a calming blue or green color might be appropriate for a bedroom, while a bright yellow or orange could work well in a playroom or living room.

Match the ceiling color to the walls.

Another popular approach to choosing a ceiling color is to match it to the walls. This creates a cohesive look and can help make the room feel more balanced. However, it’s important to remember that the ceiling doesn’t have to be an exact match to the walls. Instead, you can opt for a shade that is a few shades lighter or darker than the walls to create depth and interest.

Consider the ceiling height.

Ceiling height is another important consideration when choosing a ceiling color. If you have a low ceiling, a lighter color can help make the room feel more spacious and open. On the other hand, if you have a high ceiling, a darker color can add warmth and intimacy to the room. Additionally, painting a high ceiling with a darker color can help make the room feel cozier and more intimate.

Take into account the lighting

The lighting in a room can significantly affect the appearance of the ceiling color. If the room has a lot of natural light, a lighter color may work well to enhance the brightness of the space. Alternatively, if the room has limited natural light, a darker color may add warmth and depth to the room. It’s important to test out the paint color in different lighting conditions before committing to a color to ensure that it works well in all lighting scenarios.

Experiment with bold colors

While many people opt for a traditional white ceiling, don’t be afraid to experiment with bold colors. A vibrant ceiling color can add interest and personality to a room, and can be a fun way to express your creativity. Just make sure to balance the bold color with the rest of the room’s design elements to avoid overwhelming the space.

Consider the overall design scheme

When choosing a ceiling color, it’s important to consider the overall design scheme of the room. The ceiling color should complement the colors and patterns used in the walls, flooring, and furniture. For example, if the room features a lot of neutral tones, a bold ceiling color can add a pop of color and interest to the space.

Test the color before committing

Lastly, it’s important to test the color on a small section of the ceiling before committing to the entire room. Paint colors can look very different in the context of a room and under different lighting conditions. By testing the color on a small section, you can ensure that it works well in your specific space before committing to the entire ceiling.

Choosing the right color for your ceiling can significantly impact the overall look and feel of a room. By considering the room’s purpose and size, matching the ceiling color to the walls, taking into account the ceiling height and lighting, experimenting with bold colors, considering the overall design scheme, and testing the color before committing, you can choose a ceiling color that complements the space and enhances its overall design.

Conclusion

Painting a ceiling can seem like a daunting task, but by following these do’s and don’ts, you can achieve a professional-looking finish. Remember to choose the right paint, prepare the surface, use the right tools, work in small sections, and use a ladder or scaffold safely. Additionally, make sure to use primer, apply paint in thin, even layers, and take your time to ensure a smooth and even finish. Don’t forget to protect your furniture and floors, and ventilate the room to avoid harmful fumes. By following these tips, you can successfully paint your ceiling and transform the look and feel of your room.

One final tip is to consider hiring a professional painter if you feel unsure or overwhelmed by the task. A professional painter will have the experience, expertise, and tools to get the job done quickly and efficiently, leaving you with a beautiful and long-lasting finish. Additionally, they can provide advice on paint selection, color choices, and other details to ensure the best possible result. Ultimately, whether you decide to tackle the project yourself or hire a professional, painting your ceiling can be a fun and rewarding experience that can transform your space and add value to your home.

wall-plant-quaint-gray

Whitewash Vs. Limewash For Brick Exterior: Which Is Better? [Full Comparison]

Brick exteriors have a timeless appeal that can enhance the beauty of any home. However, over time, the color and texture of the brick can become dull and faded due to weathering, pollution, or other factors. Fortunately, there are several ways to give your brick exterior a fresh and modern look. Painting your brick exterior is one of the most effective ways to update your home’s exterior and boost its curb appeal.

Whitewashing and limewashing are two popular methods of painting brick exteriors. Whitewashing involves applying a watered-down mixture of paint and water to create a semi-transparent coating that still allows the texture of the brick to show through. Limewashing, on the other hand, involves using a mixture of lime, water, and pigment to create a natural-looking, opaque finish that provides long-lasting protection to the brick.

While both whitewashing and limewashing can transform the look of your home’s exterior, each method has its own unique advantages and disadvantages. Choosing the right method for your brick exterior depends on a variety of factors, such as your personal style, budget, and environmental considerations.

In this blog post, we will explore the pros and cons of whitewashing and limewashing brick exteriors to help you make an informed decision on which option is best for your home. We will also discuss important factors to consider when choosing between the two methods, such as climate, design preferences, and resale value.

Whether you are looking to update the exterior of your home or simply want to give your brick fireplace a fresh look, this article will provide you with the information you need to make an informed decision. By the end of this article, you will have a better understanding of the benefits and drawbacks of whitewashing and limewashing, as well as the factors that should be taken into account when choosing between the two methods.

So, without further ado, let’s dive into the world of whitewashing and limewashing brick exteriors, and discover which option is best for your home!

Advantages of whitewashing brick exteriors

Enhances Curb Appeal

Whitewashing is an excellent way to give your home a fresh and modern look. It can enhance your home’s curb appeal and increase its value on the real estate market. The light color of whitewash creates a bright and clean look that complements any architectural style, making it an ideal choice for homeowners who want to update their home’s exterior.

Budget-Friendly

Whitewashing is an affordable way to update your home’s exterior. Compared to other exterior painting methods, whitewashing requires fewer coats and less paint, which can save you money on both materials and labor costs. Additionally, if you’re on a tight budget, you can even create your own whitewash mixture using watered-down paint, which can save you even more money.

Easy to Apply

Whitewashing is a relatively easy painting method that can be done by homeowners with little to no experience. Unlike other exterior painting methods that require multiple coats and precise application techniques, whitewashing can be applied quickly and easily with a paintbrush, roller, or sprayer. Plus, the semi-transparent nature of whitewash means that you don’t have to worry about creating a perfect finish, making it an ideal choice for DIY projects.

Breathable Surface

One of the biggest advantages of whitewashing brick exteriors is that it creates a breathable surface. Unlike other exterior painting methods that can trap moisture inside the brick, whitewash allows the brick to breathe, preventing moisture buildup and the growth of mold and mildew. This can help keep your home’s exterior looking clean and well-maintained for years to come.

Easily Removable

If you decide to change the look of your home’s exterior in the future, whitewash is easy to remove or paint over. Unlike other exterior painting methods that require extensive preparation and labor to remove, whitewash can be removed using a power washer or sandblasting, or painted over with a different color.

Disadvantages of whitewashing brick exteriors

Limited Color Options

Whitewashing creates a semi-transparent, white finish that doesn’t offer a lot of flexibility when it comes to color options. While you can adjust the level of opacity by varying the concentration of paint and water in the mixture, the end result is still a white finish. This may not be the ideal choice for homeowners who want to add more color and personality to their home’s exterior.

Shorter Lifespan

Compared to other exterior painting methods, whitewashing may have a shorter lifespan. Over time, the whitewash may fade or peel, especially in areas that are exposed to harsh weather conditions or high traffic. While you can apply a protective sealant to prolong the lifespan of the whitewash, this will add to the overall cost and maintenance requirements of the project.

Limited Coverage

Whitewashing is a semi-transparent method that doesn’t offer full coverage of the brick. While this may be an advantage in terms of creating a natural-looking finish, it can also be a disadvantage if you’re looking to cover up imperfections or stains on the brick. If your brick exterior has significant damage or staining, you may need to consider a different painting method to achieve full coverage.

Maintenance Requirements

Whitewashing requires regular maintenance to keep the finish looking fresh and clean. Over time, the whitewash may accumulate dirt, grime, and other pollutants that can detract from the overall appearance of your home’s exterior. Regular cleaning and touch-ups may be required to maintain the integrity of the finish, which can add to the overall cost and time commitment of the project.\

Not Reversible

Unlike some other painting methods, whitewashing is not easily reversible. Once the whitewash is applied, it may be difficult or impossible to remove without damaging the underlying brick. This means that if you decide to change the look of your home’s exterior in the future, you may need to consider more extensive renovation work to achieve the desired outcome.

Advantages of limewashing brick exteriors

Breathability

One of the main advantages of limewashing is that it allows the brick to “breathe.” Unlike some other painting methods that create a barrier between the brick and the environment, limewashing allows moisture and air to pass through the surface of the brick. This can help to prevent moisture buildup, mold growth, and other issues that can damage the integrity of the brick over time.

Durability

Limewashing creates a durable finish that can withstand the elements and resist fading over time. Because the lime mixture is absorbed into the surface of the brick rather than simply sitting on top of it, the finish is less likely to peel, chip, or crack. This means that you can enjoy a beautiful, long-lasting finish on your home’s exterior without having to worry about frequent touch-ups or maintenance.

Natural Look

Limewashing creates a natural, matte finish that enhances the natural beauty of the brick. Unlike some other painting methods that can make the brick look artificial or “painted,” limewashing allows the character and texture of the brick to shine through. This makes it an ideal choice for homeowners who want to enhance the rustic, natural look of their home’s exterior.

Cost-effective

Compared to other exterior painting methods, limewashing can be a cost-effective option. Because it is a simple, straightforward process that doesn’t require a lot of specialized equipment or materials, it can be a more affordable option than some other painting methods. This makes it an ideal choice for homeowners who want to refresh the look of their home’s exterior without breaking the bank.

Environmentally-friendly

Limewashing is an environmentally-friendly painting method that doesn’t produce harmful fumes or chemicals. The lime-based mixture is made from natural materials, and it can be easily washed away with water if needed. This makes it an ideal choice for homeowners who want to minimize their environmental impact and create a healthier living space for themselves and their families.

Disadvantages of limewashing brick exteriors

Limited Color Choices

One of the main drawbacks of limewashing is that it offers limited color choices compared to other painting methods. While the natural, matte finish of limewashing can be appealing to many homeowners, those who are looking for a specific color or shade may be disappointed. Limewashing typically produces a range of earthy, neutral tones, and it can be difficult to achieve brighter, more vibrant colors.

Irreversibility

Another potential disadvantage of limewashing is that it is irreversible. Once the lime-based mixture has been applied to the surface of the brick, it is absorbed into the brick and becomes a permanent part of its surface. This means that if you decide later that you don’t like the look of limewashing, it can be difficult or even impossible to remove without damaging the underlying brick.

Long Drying Time

Limewashing requires a longer drying time than some other painting methods. Because the lime-based mixture is absorbed into the surface of the brick, it can take several days or even weeks to fully dry and cure. During this time, the finish may be vulnerable to damage from rain, wind, or other environmental factors, which can make it more difficult to achieve a perfect finish.

Difficulty of Application

Limewashing can be a challenging painting method to apply, particularly for those who are not experienced with the technique. Because the mixture is absorbed into the surface of the brick, it can be difficult to achieve a consistent finish that looks even and professional. This can be particularly challenging for those who are working on a large or complex project.

Maintenance

While limewashing is a durable and long-lasting painting method, it does require some maintenance over time. The finish may need to be touched up periodically to maintain its appearance, and it can be vulnerable to damage from environmental factors like moisture, sunlight, and extreme temperatures. This means that homeowners will need to be prepared to invest some time and effort into maintaining the finish over the long term.

Factors to Consider When Choosing Between Whitewash and Limewash

When it comes to painting a brick exterior, both whitewashing and limewashing are popular choices. While both techniques involve using a lime-based mixture to create a natural, matte finish on brick, there are some key differences to consider when choosing between them. In this article, we’ll explore some of the key factors to consider when deciding whether to whitewash or limewash a brick exterior.

Desired Look

The first factor to consider is the desired look of the finished project. Whitewashing produces a brighter, more opaque finish that can be perfect for creating a clean, modern look. Limewashing, on the other hand, produces a softer, more natural finish that is ideal for creating a rustic, weathered look. If you are looking for a bright, fresh finish, whitewashing may be the better choice. If you prefer a more muted, earthy look, limewashing may be the way to go.

Color Options

Another key factor to consider is the color options available with each technique. Whitewashing typically produces a range of bright, clean colors, while limewashing produces a range of earthy, natural tones. If you are looking for a specific color or shade, whitewashing may be the better choice. If you are more interested in achieving a natural, muted look, limewashing may be the way to go.

Surface Preparation

Surface preparation is an important factor to consider when choosing between whitewashing and limewashing. Whitewashing can typically be applied to any clean, dry surface, making it a relatively straightforward process. Limewashing, on the other hand, typically requires more surface preparation, including cleaning, pre-treatment with a lime wash primer, and sometimes even a skim coat of mortar to repair any damaged brickwork.

Application Process

The application process is another important factor to consider. Whitewashing is typically applied using a paintbrush or roller, making it a relatively simple and straightforward process. Limewashing, on the other hand, can be more challenging to apply, particularly for those who are not experienced with the technique. It is typically applied using a brush or sprayer, and requires a certain level of skill and expertise to achieve a consistent, even finish.

Maintenance Requirements

Finally, it is important to consider the maintenance requirements of each technique. Whitewashing typically requires very little maintenance over time, and can last for many years with minimal touch-ups. Limewashing, on the other hand, may require more frequent maintenance, particularly in areas where the finish is exposed to high levels of moisture, sunlight, or extreme temperatures.

In conclusion, when choosing between whitewashing and limewashing a brick exterior, there are several factors to consider. The desired look of the finished project, color options, surface preparation, application process, and maintenance requirements are all important factors to weigh when making your decision. By taking the time to consider these factors and choose the technique that best suits your needs, you can achieve a beautiful, long-lasting finish on your brick exterior.

voc paint No voc paint

VOC paint Vs. No-VOC paint: What’s The Difference? Which Should You Choose

Paint is a crucial aspect of home décor and renovation, but have you ever thought about the potential harm it can cause? Many traditional paints contain volatile organic compounds (VOCs) that can be harmful to your health and the environment. But what is VOC paint, and how does it differ from no-VOC paint? Let’s take a closer look.

VOC Paint

Volatile Organic Compounds (VOCs) are organic chemicals that evaporate at room temperature. These chemicals are released into the air during the drying process of traditional paint, causing what is known as off-gassing. Off-gassing can have negative effects on the environment and human health, as VOCs can cause respiratory problems, headaches, dizziness, and even more severe long-term health issues.

VOCs are found in many household items such as cleaning products, furnishings, and even some cosmetics. However, paints are one of the main culprits when it comes to VOC emissions. Traditional paints can contain up to 10,000 VOCs per liter, which is a cause for concern. That’s where VOC-free paint comes in.

No-VOC Paint

No-VOC, or low-VOC, paint is a type of paint that has low or no volatile organic compounds. These paints are made with natural ingredients such as water, plant-based oils, and minerals, which makes them much safer to use in your home. No-VOC paints still contain some VOCs, but at much lower levels than traditional paint, and they meet the standards set by regulatory bodies such as the Environmental Protection Agency (EPA).

No-VOC paint is not only safer for your health but also has several other benefits. It is less likely to cause headaches and nausea, is virtually odorless, and is more environmentally friendly than traditional paint. No-VOC paints also tend to have a lower level of toxins in the paint, which means they are much safer to use around children and pets.

Pros and Cons of VOC and No-VOC Paints

When it comes to choosing between VOC and No-VOC paint, it’s essential to weigh the pros and cons of each. Here are some of the main advantages and disadvantages of both types of paint:

VOC Paint Pros

Faster Drying Time

VOC paint typically dries faster than no-VOC paint, which can be an advantage if you need to paint a room quickly. This can be especially important for commercial painting projects where time is of the essence.

Better Coverage

VOC paint often provides better coverage than no-VOC paint, meaning that you may need fewer coats to achieve the desired look. This can be a significant cost-savings if you’re painting a large area.

Longer Shelf Life

VOC paint typically has a longer shelf life than no-VOC paint, which means that it can be stored for longer periods without going bad. This can be an advantage if you need to keep paint on hand for future touch-ups.

More Affordable

VOC paint is often less expensive than no-VOC paint, which can be an important consideration if you’re working with a tight budget.

Variety of Colors

VOC paint comes in a wide variety of colors, finishes, and textures, making it easy to find the perfect paint for your project.

It’s important to note that while VOC paint does have some advantages, the potential health risks associated with VOCs make it a less desirable option for many people. If you do choose to use VOC paint, it’s important to take steps to minimize your exposure to harmful chemicals, such as wearing a mask and increasing ventilation in the room during and after painting.

VOC Paint Cons

Health Risks

VOCs can have a range of negative health effects, including eye, nose, and throat irritation, headaches, nausea, and even long-term damage to the liver, kidneys, and central nervous system. In addition, VOCs can contribute to poor indoor air quality, which can exacerbate respiratory problems like asthma and allergies.

Environmental Impact

VOCs are also harmful to the environment, contributing to the formation of smog and air pollution. When VOCs are released into the air, they can react with other pollutants and sunlight to create ground-level ozone, which can cause respiratory problems, especially for those with pre-existing conditions.

Odor

VOC paint can have a strong odor that can be unpleasant and potentially harmful if inhaled in large quantities. The smell can linger for days or even weeks after painting, making it difficult to inhabit the painted area.

Cost

While VOC paint may be less expensive than no-VOC paint, it can still be more costly than other traditional paint options. This can make it difficult for those on a tight budget to afford.

Regulations

Some areas have regulations limiting the amount of VOCs allowed in paint, which can restrict the availability of certain colors or finishes.

Overall, the health and environmental risks associated with VOCs make it a less desirable option for many people. While VOC paint may have some advantages, the potential negative impacts on health and the environment outweigh any benefits. If you’re looking for a safer, more eco-friendly option, no-VOC paint is the way to go.

No-VOC Paint Pros

Safer for Your Health

No-VOC paint is free from harmful chemicals, such as formaldehyde and benzene, which can be harmful to your health. This makes it an excellent option for those who are sensitive to chemicals, have allergies, or have respiratory problems like asthma.

Better Indoor Air Quality

No-VOC paint significantly improves indoor air quality by reducing the amount of toxic fumes and volatile organic compounds (VOCs) released during and after painting. This makes it a great choice for families with young children or anyone who wants to create a healthier living environment.

Environmentally Friendly

No-VOC paint is more environmentally friendly than traditional VOC paint, as it contains fewer harmful chemicals that can contribute to air pollution and other environmental problems.

Long-Lasting Color

No-VOC paint is formulated to be highly durable and long-lasting, which means that it won’t fade or discolor over time. This is especially important for areas that receive a lot of sunlight or are exposed to moisture, as it helps the paint to maintain its color and appearance.

Easy to Clean

No-VOC paint is easy to clean and maintain, which makes it an excellent choice for high-traffic areas, such as kitchens and bathrooms. It can be wiped down with a damp cloth or sponge, and doesn’t require harsh chemicals or solvents for cleaning.

Overall, no-VOC paint offers numerous advantages, including improved indoor air quality, better health outcomes, and long-lasting color and durability. While it may be slightly more expensive than traditional VOC paint, the long-term benefits to your health and the environment make it a worthwhile investment.

No-VOC Paint Cons

Longer Drying Time

No-VOC paint often takes longer to dry than traditional VOC paint, which can be a disadvantage if you need to paint a room quickly. This can be especially frustrating if you need to move furniture or other items back into the room.

Limited Availability

While no-VOC paint is becoming more widely available, it can still be more challenging to find than traditional VOC paint. This can be a disadvantage if you live in a remote area or don’t have access to specialty paint stores.

Higher Cost

No-VOC paint is often more expensive than traditional VOC paint, which can be a significant drawback if you’re working with a tight budget. However, it’s worth noting that the long-term benefits of no-VOC paint may outweigh the initial cost.

Texture and Finish

No-VOC paint may not be available in as many textures or finishes as traditional VOC paint. This can be a disadvantage if you’re looking for a specific look or finish for your project.

Performance

No-VOC paint may not perform as well as traditional VOC paint in some cases, especially when it comes to coverage or durability. This can be a disadvantage if you need a paint that will hold up well over time or in high-traffic areas.

While these disadvantages should be considered when choosing a no-VOC paint, it’s important to remember that the benefits of using a safer, more eco-friendly paint option may outweigh any drawbacks. No-VOC paint can significantly reduce your exposure to harmful chemicals and contribute to a healthier indoor environment.

Conclusion

VOC and no-VOC paints differ primarily in the level of volatile organic compounds they contain. While VOC paint may dry more quickly and have a longer shelf life, it poses a significant health risk to humans and the environment. On the other hand, no-VOC paint is much safer to use, has little to no odor, and is environmentally friendly. While it may be more expensive and require more coats to achieve the desired finish, the benefits of using no-VOC paint far outweigh the disadvantages. Ultimately, the choice between VOC and no-VOC paint comes down to personal preference, budget, and the importance of safety and environmental concerns to the individual.

If you’re looking to switch to a no-VOC paint, there are many options available in the market today. Many major paint manufacturers have started to produce low or no-VOC paint options to meet the growing demand for safer, more eco-friendly paint choices. Some of the most popular no-VOC paint brands include Sherwin-Williams, Benjamin Moore, and Behr.

When shopping for no-VOC paint, it’s essential to read the label carefully to ensure that the paint you choose meets the necessary standards. Look for labels that indicate that the paint meets the requirements set by regulatory bodies like the EPA or Green Seal. You should also look for certifications like the Greenguard Gold Certification, which guarantees that the paint has been tested and certified to meet strict chemical emissions standards.

In addition to choosing a no-VOC paint, there are also other steps you can take to reduce your exposure to harmful VOCs. One option is to increase ventilation in your home by opening windows or using exhaust fans. This can help to reduce the concentration of VOCs in the air and minimize the health risks associated with off-gassing. You can also opt for low-VOC or no-VOC cleaning products and furnishings to further reduce your exposure to harmful chemicals.

In conclusion, The difference between VOC and no-VOC paint is significant, with no-VOC paint being a much safer and more eco-friendly option. While VOC paint may be more widely available and have some advantages in terms of drying time and shelf life, the health risks associated with VOCs make no-VOC paint the clear choice for those who prioritize safety and environmental concerns. If you’re looking to switch to a no-VOC paint, be sure to do your research, read labels carefully, and consider other steps you can take to reduce your exposure to harmful chemicals in your home.

27552329865_10e4756e7b_b

Painting Kitchen Cabinets: Is it a Good Idea (Pros and Cons)

Painting your kitchen cabinets can be a great way to give your kitchen a fresh, updated look without spending a lot of money on a full remodel. However, painting cabinets is not without its drawbacks. In this post, we’ll explore the pros and cons of painting your kitchen cabinets to help you decide whether it’s the right choice for your home.

Pros of Painting Kitchen Cabinets

Cost-effective

Painting your kitchen cabinets is a cost-effective way to update your kitchen. It is much less expensive than replacing your cabinets entirely. You can achieve a whole new look for a fraction of the cost of new cabinets.

Quick and easy

Painting your cabinets is a relatively quick and easy process. It can usually be done within a few days, depending on the size of your kitchen. You can have a fresh, updated look in no time.

Customizable

When you paint your cabinets, you have complete control over the color and finish. You can choose any color you want and create a customized look that matches your style and preferences.

Sustainable

Painting your kitchen cabinets is a sustainable option. By repurposing your existing cabinets, you can avoid adding to the waste stream and reduce the demand for new materials.

Increase the value of your home

Upgrading your kitchen is one of the most effective ways to increase the value of your home. By painting your kitchen cabinets, you can give your kitchen a fresh, updated look, which can increase the perceived value of your home.

DIY Project

Painting your kitchen cabinets is a DIY project that many homeowners can tackle themselves. With the right preparation and techniques, you can achieve a professional-looking finish and save money on labor costs.

Easy to maintain

Painted kitchen cabinets are easy to maintain. You can simply wipe them down with a damp cloth to keep them clean. If you choose a high-quality paint and apply it correctly, your cabinets should be durable and long-lasting.

Overall, painting your kitchen cabinets is a great option for homeowners who want to update their kitchen without breaking the bank. It is a cost-effective, customizable, and sustainable way to achieve a fresh, updated look.

Cons of Painting Kitchen Cabinets

Time-consuming

Painting kitchen cabinets is a time-consuming process. It involves a lot of preparation work, such as cleaning, sanding, and priming, before you can even begin to apply the paint. Depending on the size of your kitchen, the process can take several days or even weeks to complete.

Labor-intensive

Painting kitchen cabinets is a labor-intensive process. It requires a lot of manual labor, such as sanding, painting, and applying multiple coats of paint. If you are not comfortable doing this type of work, you may need to hire a professional, which can add to the cost.

Not as durable as new cabinets

Painted cabinets are not as durable as new cabinets. The paint can chip or peel over time, especially in high-traffic areas like the kitchen. If you have young children or pets, your cabinets may be more prone to wear and tear.

Limited color options

While painting your cabinets does offer a range of color options, the choices are still somewhat limited compared to new cabinets. If you want a specific color or finish, you may not be able to achieve it with paint.

May not match other kitchen elements

If you paint your cabinets, they may not match other elements of your kitchen, such as your countertops or backsplash. This can create a disjointed look that may not be aesthetically pleasing.

Can be difficult to achieve a professional-looking finish

Achieving a professional-looking finish when painting your kitchen cabinets can be challenging. It requires careful preparation and application techniques, which can be difficult to master for the average homeowner.

Can be difficult to undo

Once you paint your cabinets, it can be difficult to undo the process. If you change your mind or want to sell your home in the future, you may need to invest in new cabinets, which can be expensive.

Overall, while painting your kitchen cabinets can be a great way to update your kitchen, there are some potential drawbacks to consider. It is important to weigh the pros and cons before deciding whether to paint your cabinets or invest in new ones.

Tips for Painting Kitchen Cabinets

If you’re considering painting your kitchen cabinets, it’s important to choose the right paint and materials for the job. With so many options available, it can be overwhelming to know where to start. In this article, we’ll explore the best paint and materials to use for painting kitchen cabinets.

Primer

Before you begin painting your kitchen cabinets, it’s important to apply a coat of primer. Primer helps the paint adhere to the surface and prevents the wood from absorbing the paint. The best primer to use for kitchen cabinets is a high-quality oil-based primer. Oil-based primers are more durable and better at blocking stains than water-based primers. Additionally, oil-based primers are less likely to raise the grain of the wood, which can create a rough surface that’s difficult to paint.

Paint

When it comes to choosing paint for your kitchen cabinets, there are several options to consider. Here are some of the best types of paint for painting kitchen cabinets:

Acrylic paint

Acrylic paint is a popular choice for painting kitchen cabinets because it dries quickly and is easy to clean up with water. Additionally, acrylic paint is durable and resists fading and cracking over time. Look for a high-quality acrylic paint that is specifically designed for cabinets.

Oil-based paint

Oil-based paint is another good option for painting kitchen cabinets. It’s more durable than acrylic paint and has a smoother finish. However, oil-based paint takes longer to dry and requires solvents for cleanup, which can be messy and time-consuming.

Chalk paint

Chalk paint has become increasingly popular in recent years for its matte finish and vintage look. It requires little preparation work and can be applied directly to most surfaces without sanding or priming. However, chalk paint is not as durable as other types of paint and may require additional coats or a protective sealant.

Milk paint

Milk paint is a natural, eco-friendly option that is made from milk protein, lime, and pigment. It has a unique matte finish and is often used to create a distressed or shabby-chic look. Milk paint requires a bonding agent to adhere to surfaces like kitchen cabinets, and may require additional coats for full coverage.

Regardless of the type of paint you choose, it’s important to select a high-quality paint that is specifically designed for kitchen cabinets. Look for a paint that is durable, washable, and resists chipping, fading, and yellowing over time.

Brushes and Rollers

The type of brush or roller you use for painting your kitchen cabinets can make a big difference in the quality of the finished product. Here are some tips for choosing the right brushes and rollers:

Brushes

Look for high-quality, synthetic bristle brushes that are designed for use with the type of paint you’ve chosen. Avoid using natural bristle brushes, which can leave streaks and shed bristles. A 2-inch angled brush is ideal for painting cabinet frames and doors.

Rollers

For large, flat surfaces like cabinet doors, use a high-density foam roller. Foam rollers provide a smooth, even finish and are less likely to leave brush marks than traditional rollers. Be sure to choose a roller that is the appropriate size for your cabinets.

Sandpaper

Sanding your cabinets before painting them helps to smooth out any imperfections and create a surface that the paint will adhere to. Use a fine-grit sandpaper, such as 220-grit, to lightly sand the cabinets. Be sure to sand in the direction of the wood grain to avoid creating scratches or gouges.

Protective Coating

To help protect your newly painted cabinets from wear and tear, it’s a good idea to apply a protective coating. A clear, water-based polyurethane is a good choice for this purpose. It provides a durable, clear finish that resists chipping and scratching. Look for a polyurethane that is specifically designed for use on painted cabinets, as some types may yellow over time.

Preparation

Proper preparation is key to achieving a professional-looking finish on your kitchen cabinets. Here are some tips for preparing your cabinets for painting:

  • Clean the cabinets thoroughly with a degreaser or soap and water. Remove any dirt, grime, or grease from the surface.
  • Remove all hardware, including cabinet knobs and drawer pulls.
  • Use painter’s tape to protect any areas you don’t want to paint, such as countertops, walls, and floors.
  • Sand the cabinets lightly to create a surface that the paint will adhere to.
  • Apply a coat of primer to the cabinets before painting.

Tips for Painting Kitchen Cabinets

Here are some additional tips for painting your kitchen cabinets:

  • Work in a well-ventilated area to avoid inhaling fumes from the paint.
  • Use a high-quality brush or roller to achieve a smooth, even finish.
  • Apply thin, even coats of paint, and allow each coat to dry completely before applying the next.
  • Consider using a paint sprayer for larger areas, such as cabinet doors, for a smooth, professional-looking finish.
  • Be patient! Painting kitchen cabinets is a time-consuming project that requires attention to detail and patience. Allow plenty of time for each coat of paint to dry before moving on to the next step.

Conclusion

Painting your kitchen cabinets can be a cost-effective way to give your kitchen a new look, but it’s not without its drawbacks. While it’s a relatively quick and easy process, it can be time-consuming and labor-intensive. Painted cabinets are not as durable as new cabinets, and the paint can chip or peel over time. However, painting your cabinets can be a sustainable way to update your kitchen and increase the value of your home.

If you decide to paint your kitchen cabinets, make sure to choose the right paint and follow the proper preparation and application techniques. If you’re not confident in your ability to do a professional-looking job, consider hiring a professional painter.

In summary, painting kitchen cabinets can be a great option for those looking to update their kitchen on a budget. However, it’s important to carefully consider the pros and cons before making a decision. By doing so, you can ensure that you make the best choice for your home and your needs.