
Painting a ceiling can be a daunting task, but with the right techniques and tools, it can also be a satisfying DIY project. However, there are several do’s and don’ts to keep in mind to ensure a successful and safe painting experience. In this blog post, we will explore some essential tips and tricks for painting ceilings, as well as some common mistakes to avoid.
From choosing the right paint and equipment to prepping the surface and avoiding common mistakes, we will cover everything you need to know to paint your ceiling like a pro. Whether you’re looking to update the look of a room or simply need to touch up some scuffs and marks, following these guidelines will help you achieve a beautiful and long-lasting finish.
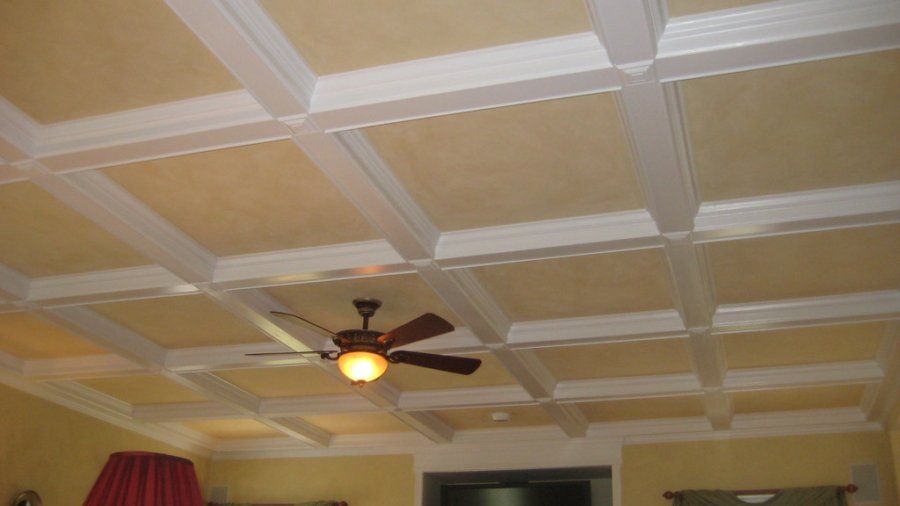
We’ll also provide insights into how to tackle specific challenges, such as working around light fixtures and ceiling fans, and how to avoid drips and streaks. With our guidance, you’ll be able to approach your ceiling painting project with confidence and achieve the results you desire.
So, whether you’re a seasoned DIY enthusiast or a beginner, this guide will provide you with all the information you need to tackle your ceiling painting project successfully. By following our do’s and don’ts and applying our tips and tricks, you’ll be able to create a stunning and professional-looking finish that will enhance the overall look and feel of your space.
The Do’s of Painting Ceilings
Do choose the right paint
Choosing the right paint is crucial for achieving a smooth and even finish on your ceiling. For most ceilings, a flat or matte finish is recommended, as it doesn’t reflect light and can help hide imperfections. It’s also important to choose a paint that is specifically formulated for ceilings, as it will have a thicker consistency and better coverage.
Do prepare the surface
Before painting, it’s important to prepare the surface by cleaning it thoroughly and repairing any cracks or imperfections. Use a damp cloth or sponge to wipe down the ceiling and remove any dust or debris. For cracks or holes, use a spackling compound or joint compound to fill them in, and sand the surface smooth once it’s dry.
Do use the right tools
The right tools can make all the difference when it comes to painting a ceiling. Use a high-quality roller with a long handle to reach the ceiling, and a paintbrush to cut in around the edges. A paint tray or bucket with a screen can also help ensure even coverage and prevent drips.
Do work in small sections
When painting a ceiling, it’s important to work in small sections to ensure even coverage and prevent drips or splatters. Divide the ceiling into smaller sections using painter’s tape, and work on one section at a time. This will also help you to avoid overreaching and straining your arms and shoulders.
Do use a ladder or scaffold
To reach the ceiling, you will likely need to use a ladder or scaffold. Make sure the ladder or scaffold is sturdy and secure, and follow all safety precautions. It’s also important to have someone hold the ladder or scaffold while you work, or to use a stabilizing bar to prevent it from tipping.
The Don’ts of Painting Ceilings
Don’t skip the primer
Primer is an important step in the painting process, as it helps the paint adhere to the surface and provides a smooth and even finish. Skipping the primer can result in a patchy or uneven finish, especially if the ceiling has stains or discoloration.
Don’t use too much paint
Using too much paint can result in drips and splatters, as well as an uneven finish. To avoid this, use a small amount of paint and apply it in thin, even layers. You can always add more paint if needed, but it’s difficult to remove excess paint once it’s applied.
Don’t paint too quickly
Painting too quickly can also result in drips and splatters, as well as an uneven finish. Take your time and work in small sections, allowing each section to dry before moving on to the next. This will help ensure a smooth and even finish.
Don’t forget to protect your furniture and floors
Painting a ceiling can be messy, so it’s important to protect your furniture and floors. Cover furniture with plastic or drop cloths, and use painter’s tape to protect baseboards and trim. You can also use a canvas drop cloth on the floor to catch any drips or splatters.
Don’t forget to ventilate the room
Paint can release fumes that can be harmful if inhaled, so it’s important to ventilate the room while painting. Open windows and doors, and use a fan to circulate air. You can also wear a mask or respirator to protect yourself from fumes.
Choosing The Right Tools
Painting your ceiling can be a tricky task, but having the right tools can make all the difference in achieving a professional-looking finish. Here are the essential tools you’ll need for a successful ceiling painting project:
Roller and Extension Pole: A high-quality roller and extension pole will help you reach every corner of your ceiling without straining your arms and back. Make sure to choose a roller with a nap that is suitable for the texture of your ceiling.
Paintbrushes: You’ll need a variety of paintbrushes, including a large one for cutting in around the edges and a smaller one for touch-ups and tight spots.
Paint Tray: A sturdy paint tray with disposable liners will make it easier to pour and mix your paint, and keep your work area clean.
Painter’s Tape: Painter’s tape is essential for protecting your walls and creating clean lines around fixtures and trim.
Drop Cloths: Covering your floors and furniture with drop cloths will protect them from accidental spills and splatters.
Ladder or Scaffolding: Depending on the height of your ceiling, you may need a ladder or scaffolding to reach high areas safely.
Investing in the right tools upfront will not only make your ceiling painting project easier but will also save you time and money in the long run. Don’t skimp on quality when it comes to your tools – using high-quality equipment will help you achieve a more professional-looking finish and make your project a success.
Choosing the Right Paint
When it comes to interior design, the ceiling is often overlooked as a potential focal point. However, choosing the right color for your ceiling can have a significant impact on the overall look and feel of a room. In this article, we will explore some tips and considerations for choosing the right color for your ceiling.
Consider the room’s purpose and size.
The first thing to consider when choosing a color for your ceiling is the room’s purpose and size. For example, a lighter color can help make a small room feel more spacious and airy, while a darker color can add warmth and intimacy to a larger room. Additionally, the color you choose should complement the function of the room. For instance, a calming blue or green color might be appropriate for a bedroom, while a bright yellow or orange could work well in a playroom or living room.
Match the ceiling color to the walls.
Another popular approach to choosing a ceiling color is to match it to the walls. This creates a cohesive look and can help make the room feel more balanced. However, it’s important to remember that the ceiling doesn’t have to be an exact match to the walls. Instead, you can opt for a shade that is a few shades lighter or darker than the walls to create depth and interest.
Consider the ceiling height.
Ceiling height is another important consideration when choosing a ceiling color. If you have a low ceiling, a lighter color can help make the room feel more spacious and open. On the other hand, if you have a high ceiling, a darker color can add warmth and intimacy to the room. Additionally, painting a high ceiling with a darker color can help make the room feel cozier and more intimate.
Take into account the lighting
The lighting in a room can significantly affect the appearance of the ceiling color. If the room has a lot of natural light, a lighter color may work well to enhance the brightness of the space. Alternatively, if the room has limited natural light, a darker color may add warmth and depth to the room. It’s important to test out the paint color in different lighting conditions before committing to a color to ensure that it works well in all lighting scenarios.
Experiment with bold colors
While many people opt for a traditional white ceiling, don’t be afraid to experiment with bold colors. A vibrant ceiling color can add interest and personality to a room, and can be a fun way to express your creativity. Just make sure to balance the bold color with the rest of the room’s design elements to avoid overwhelming the space.
Consider the overall design scheme
When choosing a ceiling color, it’s important to consider the overall design scheme of the room. The ceiling color should complement the colors and patterns used in the walls, flooring, and furniture. For example, if the room features a lot of neutral tones, a bold ceiling color can add a pop of color and interest to the space.
Test the color before committing
Lastly, it’s important to test the color on a small section of the ceiling before committing to the entire room. Paint colors can look very different in the context of a room and under different lighting conditions. By testing the color on a small section, you can ensure that it works well in your specific space before committing to the entire ceiling.
Choosing the right color for your ceiling can significantly impact the overall look and feel of a room. By considering the room’s purpose and size, matching the ceiling color to the walls, taking into account the ceiling height and lighting, experimenting with bold colors, considering the overall design scheme, and testing the color before committing, you can choose a ceiling color that complements the space and enhances its overall design.
Conclusion
Painting a ceiling can seem like a daunting task, but by following these do’s and don’ts, you can achieve a professional-looking finish. Remember to choose the right paint, prepare the surface, use the right tools, work in small sections, and use a ladder or scaffold safely. Additionally, make sure to use primer, apply paint in thin, even layers, and take your time to ensure a smooth and even finish. Don’t forget to protect your furniture and floors, and ventilate the room to avoid harmful fumes. By following these tips, you can successfully paint your ceiling and transform the look and feel of your room.
One final tip is to consider hiring a professional painter if you feel unsure or overwhelmed by the task. A professional painter will have the experience, expertise, and tools to get the job done quickly and efficiently, leaving you with a beautiful and long-lasting finish. Additionally, they can provide advice on paint selection, color choices, and other details to ensure the best possible result. Ultimately, whether you decide to tackle the project yourself or hire a professional, painting your ceiling can be a fun and rewarding experience that can transform your space and add value to your home.